
So till now, we have learned regarding the object creation and field customization. In these fields, we usually fill the data as per the rules defined at the time of customization. But there are some cases, where the fields must show the error if input violates some condition. Moreover, let me explain to you with a clear example. If your bank account has Rs.10000, it is sensible to draw the amount from Re.1 to Rs.10000. But it's impossible to draw an amount greater than Rs.10000. So in those cases, it must show an error to the end user. And we must all these things orally. But how does an application says? It says w.r.t to certain conditions. So now we will define those condition w.r.t salesforce validations rules.
So now online training explain those the validation rules in the following manner.
Step - 1 :
Select your application and click on the object that you have previously created ( BanK processes) and click on the field that you have created so far.
Step - 2 :
On the left-hand side from the drop-down click on objects and select your object. Then you will be entering into the following screen.
step - 3 :
From the above section in the validation rules. Click on NEW.
Step - 4 :
When you have clicked you will be entering into the following screen.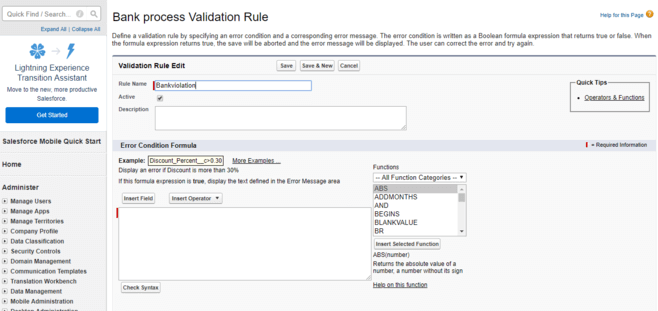
step- 5 :
So if you observe the above screenshot, you will find Insert text and Insert symbol options there. From those options, we need to define the formula.to raise an error. Usually, the Insert Field contains the fields that you have created previously and the insert symbol contains various fields like (+,-, *,/ etc ). And once if you have define the formula we need to check the syntax. And if no errors found, We must give some error message. Besides, you can customize the error location and finally click on save. 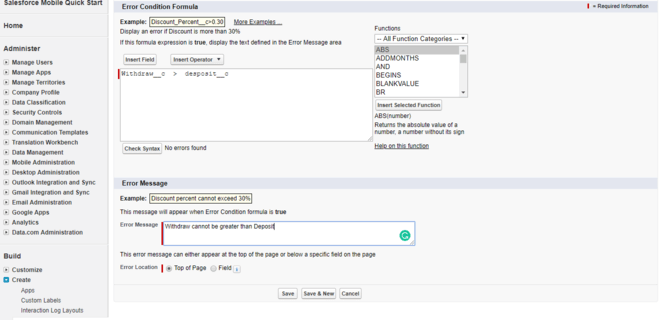
That's it we can created a validation rule.
And you can easily check this in your objects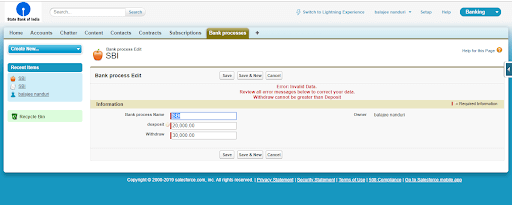
Yahoo! Validation works!
So till now, we have completed the basic formula. So now let's move on to a bit further.
But before going to apply, create a filed named Address ( Text data type) in the bank process object. So soon after filed creation, you will be finding the field as shown below
Since a field has been created, now we will create an advanced formula on it.
We can create an advanced formula by creating a new field with the data type as Formula. So from the formula section, click on the Advance formula Insert the function as shown below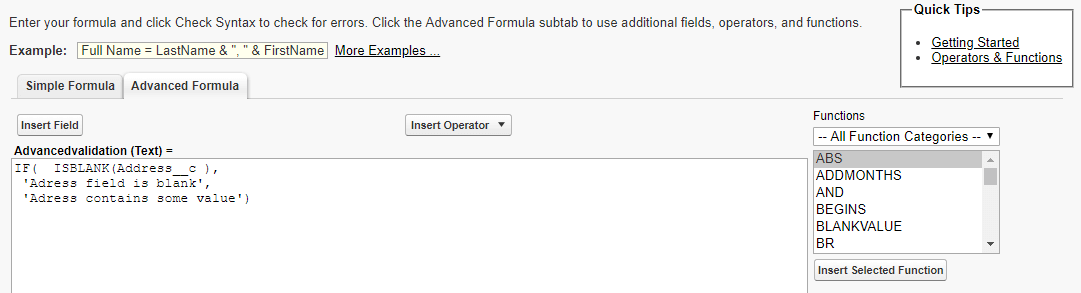
If you observe the above screenshot, we have used two functions named IF and ISBLANK. As the name indicates IF is used to check the condition. Since our aim is to check the user has entered some text in the address field (or) not. So we have used ISBLANK.
And soon after the formula creation, we need to check the syntax. If it shows any error, we need to make it as error-free and click on Next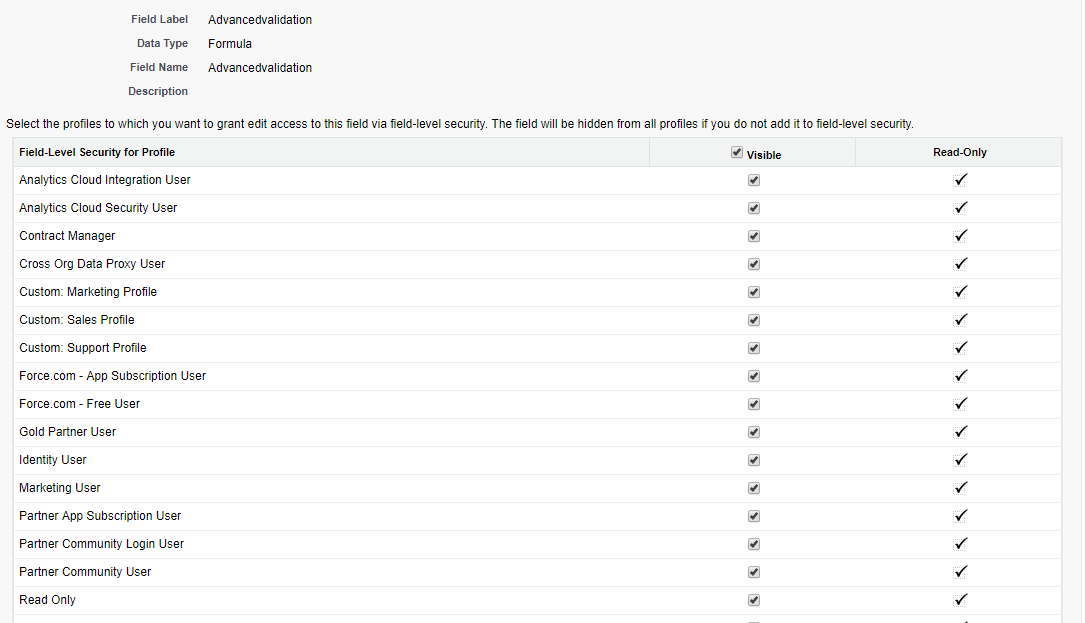
Assign visibility permissions. In my case, I assigning permission to all the people and click on NEXT.
Finally, Click on SAVE.
So once you click on Bank process and fill the details. And if you enter the fields the messages will be displayed according to the definition that you have described.
So I hope you people have a basic regarding the simple and advanced formula. And get the more real-time example from software training institutes
So now we will have a look regarding the
Pick lists :
Salesforce provides the ability to create a custom pick-list in its environment. These pick-lists are limited to particular objects, not the other objects. Besides Salesforce allows the developers/user flexibility to use the Global pick list. Besides it allows the value sets to share values across objects and custom fields. Besides, it allows the pick-list to specify the values that you want to create. Moreover, it allows the user to use the standard objects (or) to select the custom objects.
So we will see object customization. So follow the step below to achieve to
Step - 1 :
Select the object ( Banking) and from the quick view visit fields. And from visit Fields Click on NEW.
step - 2 :
Select the data type as Pick List and select NEXT
Step - 3:
Here provide the Filed name and Field label as GloblalPick List.
step - 4 :
Go back to your object page, Click on set up. From the search bar, click on Pick-list. And you will be finding the Pick-list options under create.
step - 5 :
Click On NEW.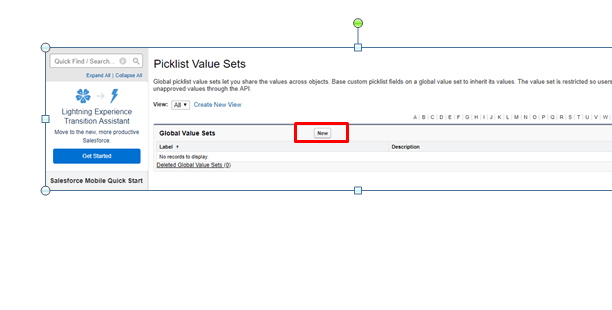
step- 6:
Give the label and name as TEST SET. And if wish to display the values that you have given as per the given order, check the 2nd option and click on SAVE.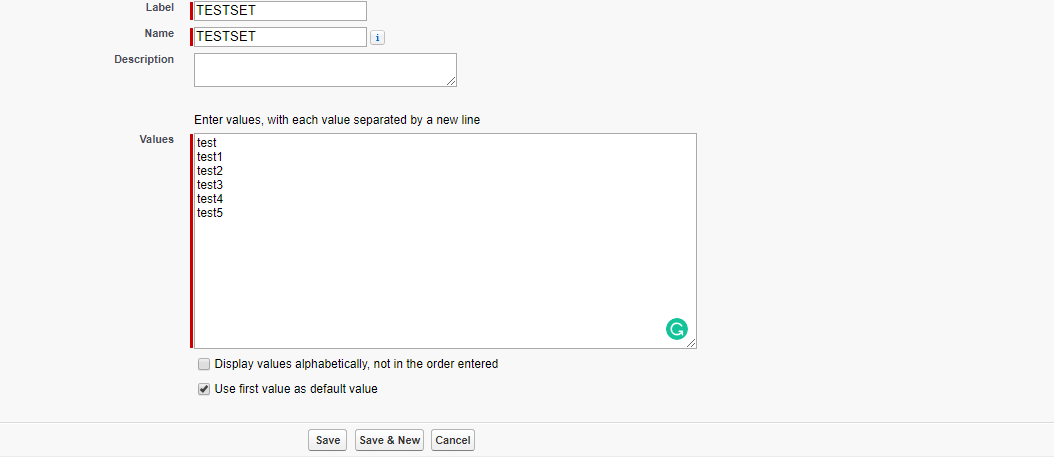
step - 7 :
So go back to Field creation page, and refresh the page that you have worked before. Here, give the values as USE global playlist and from the drop-down Click on TEST SET( that you have created before) and click on NEXT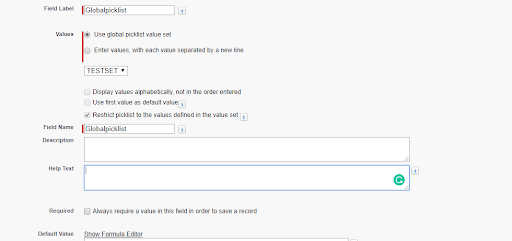
:
step - 8:
Provide the visibility permission of the Field. I would like to provide Visible to all and Click on Next.
step - 9 :
Click SAVE.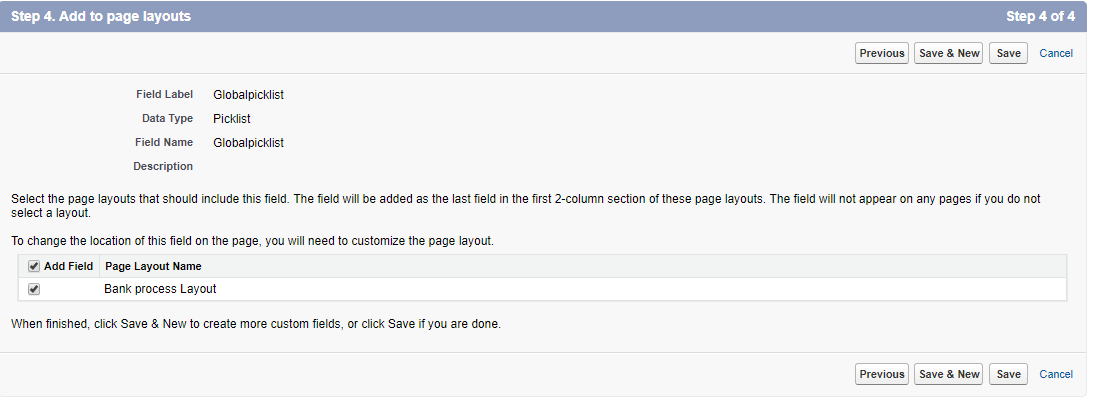
Step - 10 :
You will be entering the following screen!
step - 11:
so if you click on the field list, you will be finding at the Filed names as shown below.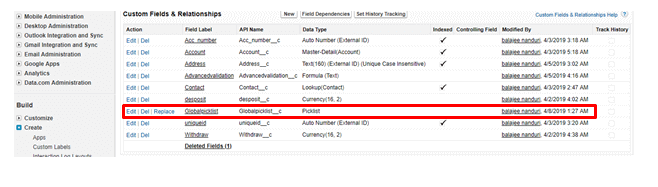
And you can observe the same in other objects like Employment Websites.
Moreover, you can do this as shown below:
Visit Employment Websites Objects, From the Quick view, Click on Fields and Click on NEW.
Select the Data type as Pick-list and click on Next.
check the values from the drop-down. And if you found TEST SET you succeed.