
In the previous block, we people have learned about S3 Storage. So as stated earlier, this S3 may contain a large amount of data in different formats. And this large amount of data may also contain sensitive information. So in order to keep this data away from the hackers, it's is suggestable to use the separate space. And Amazon does this through AWS VPC (Virtual Private Cloud).
What is VPC?
VPC is an abbreviation for Virtual Private Cloud. In AWS Environment, this is a private cloud. This platform helps to use all the AWS services in a defined private space. Here you can easily customize the network configuration for the amazon private cloud. Using the security groups, you can have control over the virtual network and also restrict the incoming traffic. Besides, VPC helps you to secure your environment and give the complete authority of incoming traffic. There are two types of VPC namely the default VPC and Non- default VPC.
As the name suggests Amazon itself create a VPC in your account. And this platform allows you to create your own VPC. With VPC you have the complete control over your Virtual Networking Environment. This includes the selection of own IP address range, creation of subnets as well as the configuration of route tables and network gateways. Here you can use both the IPV4 and IPV6 for secure and easy application of resources.
We can create the VPC in two different ways. So let us how do we create this practically.
1. Using the Launch Wizard :
step -1:
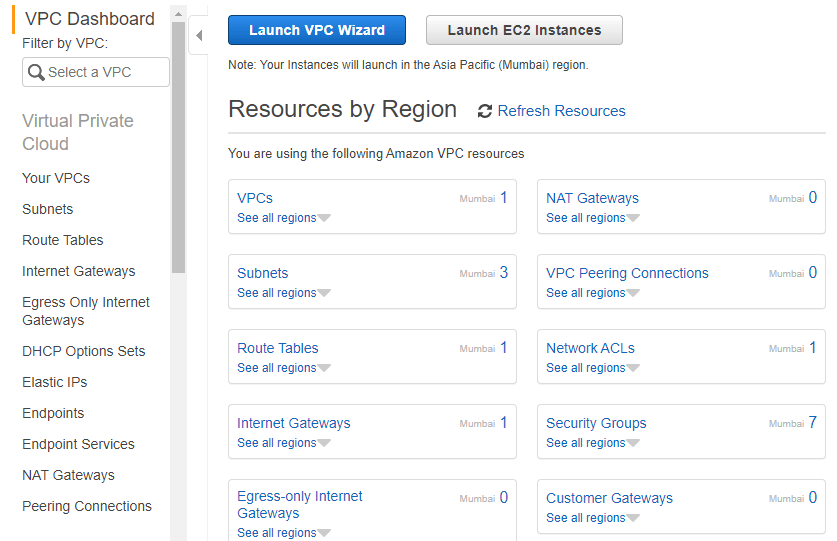
Log in to the Amazon account and search for the VPC. Then you will be entering into the following screen
step - 2:
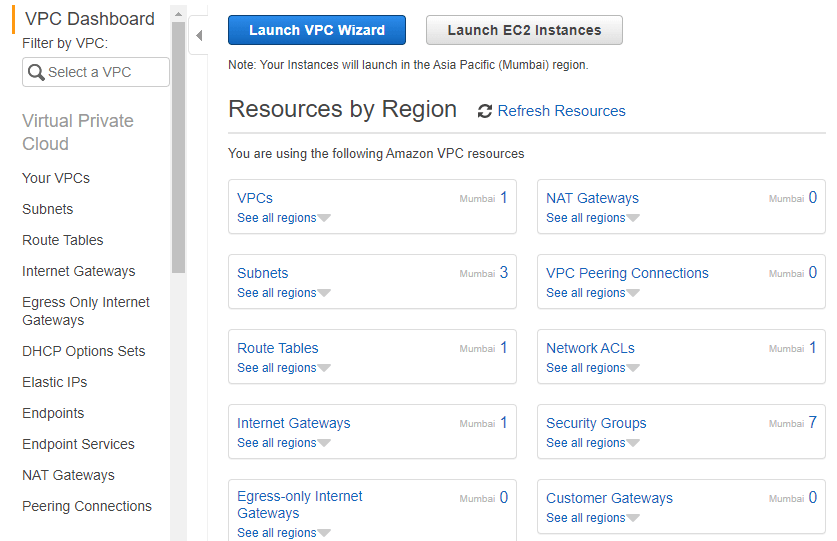
Click on Launch VPC Wizard
step - 3:
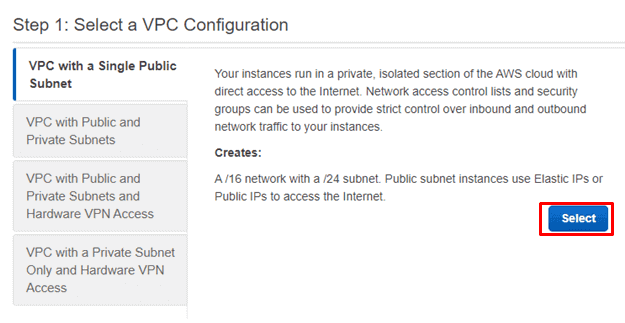
Select VPC Configuration and click on Select
step - 4:
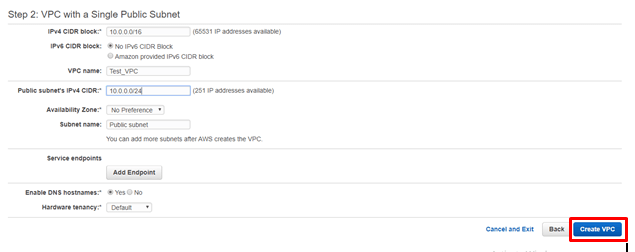
Provide any VPC name and click on Create VPC.
step - 5 :
Click Ok

step - 6:
Then you see the screen as shown below

Step - 7:
Navigate to your subnets, then you can see the subnet with the subnet named public Subnet as follows:

And if you observe the route table column here, you can see the route table address as shown below
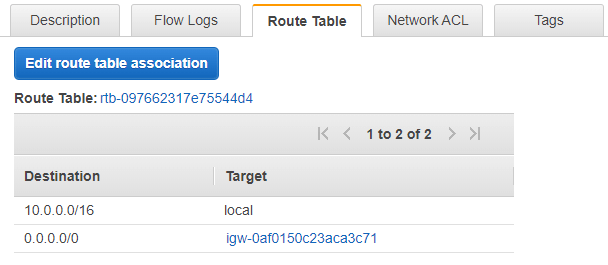
So like this, we can create the VPC normally
step - 1:
log in to the AWS Account and search for the VPC. Then you will be entering into the following screen

step - 2:
Provide any name and click on Create
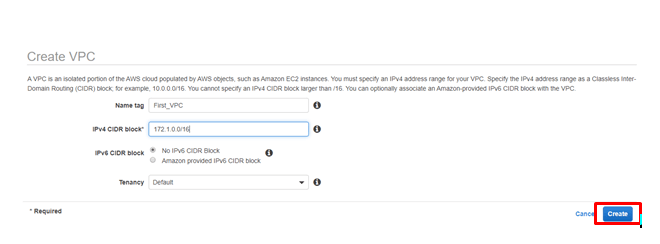
step - 3:
Click Close.

Subnets Creation:
Here we need to create two subnets named public subnet and the private subnets. So let us see how to do we create them
Private_Subnet creation.
step - 1:
In your VPC Account, navigate to your Subnets and click on Create Subnet.

step - 2:
Fill the details as shown below and click on Create
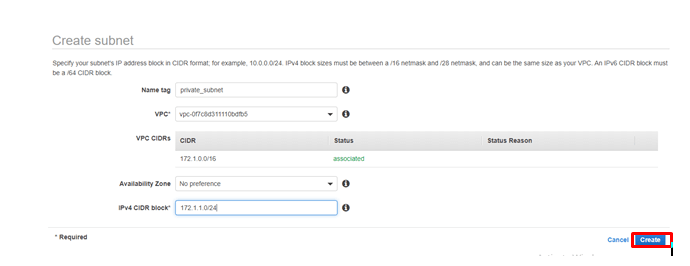
step - 3 :
Click Close

Public_subnet Creation:
step - 1:
In your VPC Account, navigate to your Subnets and click on Create Subnet.

step - 2:
Fill the details as shown below and click on Create
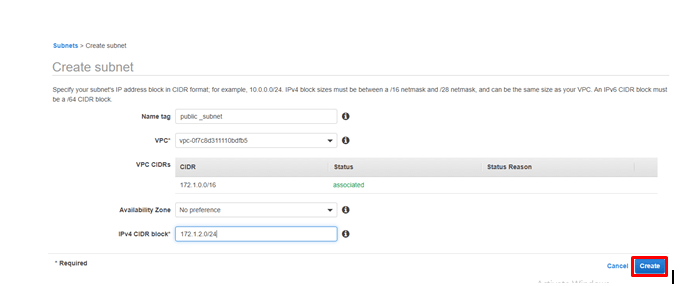
step - 3 :
Click Close
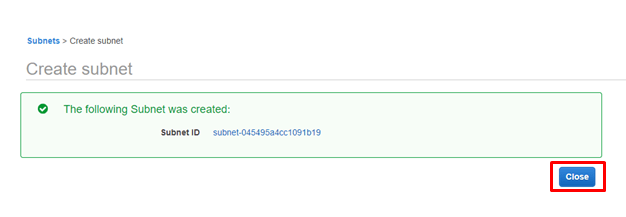
So once you navigate to your subnets sections, then you will be entering into the following screen

Also, visit our blog on Kubernetes on AWS
Internet GateWay Creation:
step -1:
Navigate to the Internet Gateways and click on Internet GateWays.

step - 2:
Provide any name and click on Create

step - 3:
Click Close
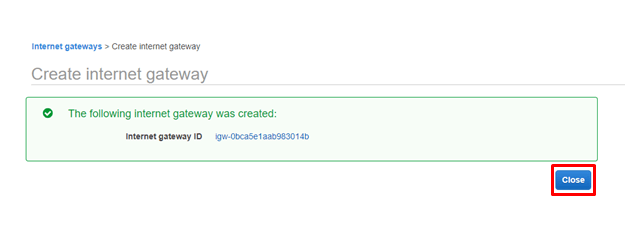
Attaching the Gateway to the VPC:
step -1:
Select the VPC that you have created now and click on actions
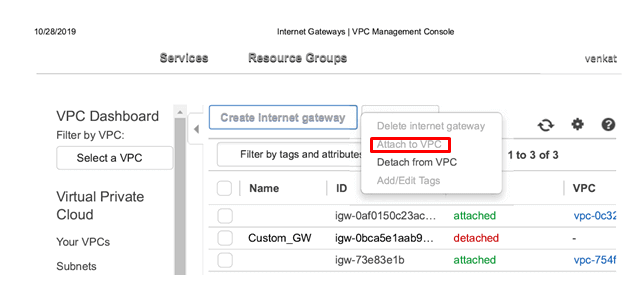
step - 2:
Select the VPC and click on Attach.

Then you can see the Internet Gateway Subnet as shown below

Routable Creation:
Step -1:
Navigate to the route tables and click on Create Routable Table

step - 2:
Provide any name and select the VPC and click on Create

step - 3:
Click Close
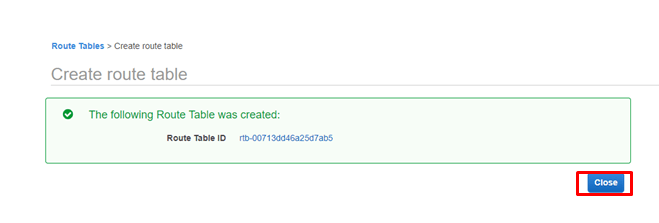
step - 4:
Select the route that you have created. And navigate to the routes column and Click on Edit Routes.

Creating public Routes:
step - 1:
Click on Add Route

step - 2:
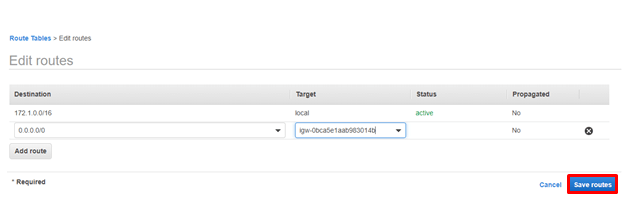
Provide the destination address (0.0.0.0/0) and select the Internet Gateway and Click on Save Routes.
step - 3:
Click on Close

Adding the public Route to the Public subnet:
step - 1:
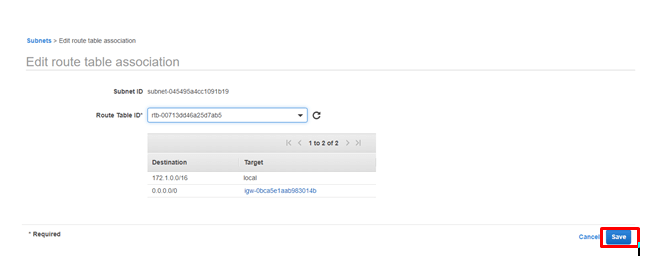
Navigate to the subnets and click on Public _ Subnets. And then navigate to the Route table and click on Edit Route table Association.

step - 2:
Select the Route table and Click on Save.
step - 3:
Click Close

So like this, we will add Create the VPC in our Cloud Environment. And let us start creating an instance using this VPC
Instance creation:
Step - 1:
Navigate to you EC2 and click on Launch Instance.

step - 2:
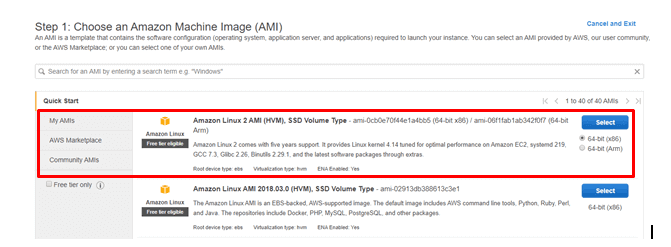
Choose and Select the instance.
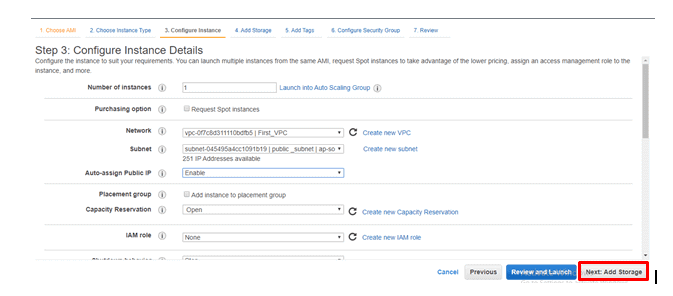
step - 3:
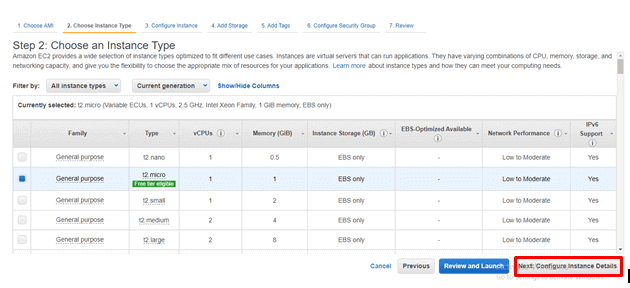
Click on Configure Instance details.
step - 4:
Fill the details as shown below
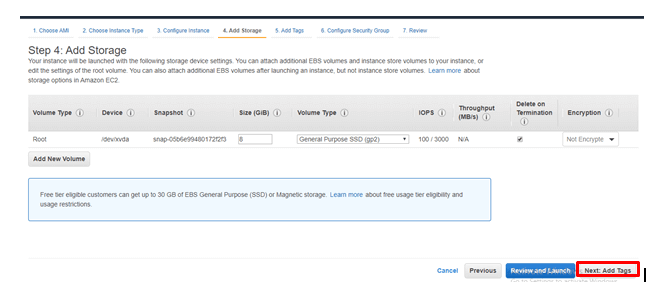
step - 5:
Click on Add tags
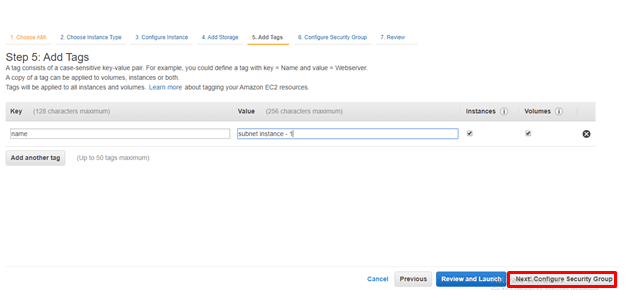
step - 6 :
Click on Add tag and Provide the tag names and then Click on Configure Security Groups
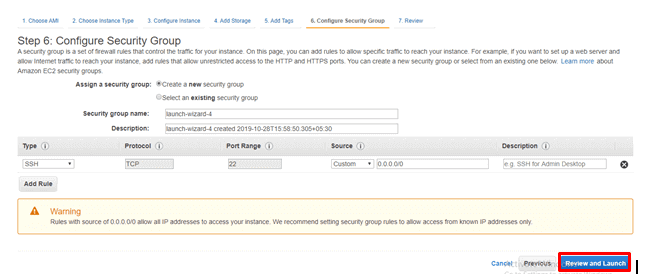
step - 7 :
Click on Review and Launch
step - 8:
Click on Launch
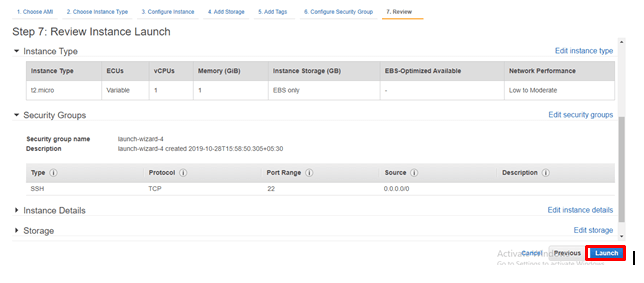
And Save the Keypairs for further use.
step - 9:
So likewise Create one more instance with private Subnet
And once you created, you can see you running instances as shown below

And try to access the Public as well as the private subnets. As everybody knows Public Subnets works fine. But we cannot access the private subnet. So in order to connect to this instance (Which is connected to the Private subnet ), we need the NAT Gateways
Connecting the Private subnet Instance through NAT.
step - 1:
Navigate to VPC service and Click on NAT gateways.
step - 2:
Click on Create Gateway.

step - 3:
Select the public subnet and then click on Create NEW EIP and then Click on Create a NAT Gateway

step-3 :
Click Close
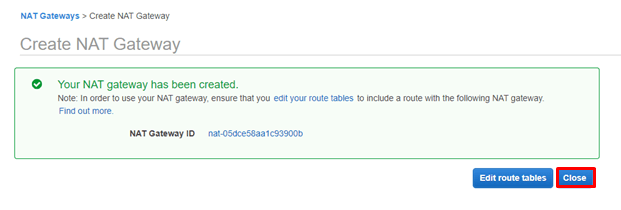
And once you have created, you can see the gateway as shown below
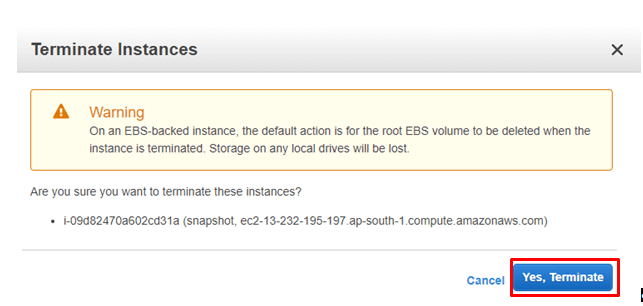
Adding NAT Gateway to the Route Table:
step -1:
Navigate to the Route tables that you have created previously. Click on the private Route Table.
step -2:
Click on Edit Routes

step - 3:
Provide the address as shown below and click on save routes
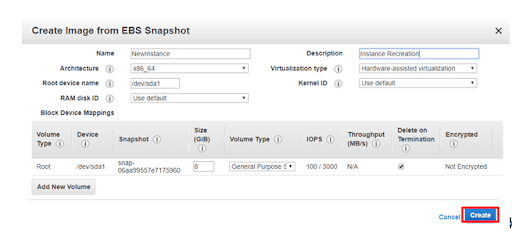
step - 4:
Click on Close.

And try to connect to the private instance, then you are INN......
Flow Log:
Since the Network, we perform a lot of operations. So there is a need to check the activity log. So let us see how to create the log function. But prior to the Flow logs, we need the Destination log. so lets first create the destination log
Step - 1:
Search for the Cloud Watch in the search bar
step -2:
Click on Logs

step - 3:
Click on Create Log group

step - 4:
Click on Create log group

Then you can see the Flow logs screen as follows:
 Flow Logs Creation:
step -1 :
Navigate to VPC and Click On Flow Logs.
step - 2:
Click on Create Flow Log

step - 3:
Fill the details as shown details
step - 4:
Click Close
Click on the Cloud Watch that you have created. Then you can see the logs as shown below
So perform some activity like Creating an instance and one you have created, you can see the logs as shown below
And if you struck up anywhere feel free to contact AWS trainingVPC Endpoints:
A VPC Endpoint enables you to privately connect your VPC to Supported AWS Services Endpoints were the virtual devices. These components allow the communication between the instances in your VPC and services. In AWS VPC these endpoints were classified into two types like the Interface Endpoints as well as the Network Endpoints
We can create Endpoint in our Account as shown below
step - 1:
Log in to the Amazon account and search for the VPC and Click on End Points.
step - 2:
click on Create Endpoint

Step - 3:
Select the service ( Make sure it must be Gateway Type). Here I'm selecting S3 Gateway. Also, select the VPC and the subnets. And Finally, click on Create Endpoint.


step - 4 :
Click Close
Since we have chosen the S3 Perform any action like creating the S3 bucket. Then monitor the Log changes in the CLoud Watch.
Network ACL:
It is an optional security layer that acts as a firewall for controlling in and out of the subnet. This platform allows you to associate multiple subnets with a single network ACL. But the subnet can be associated with one Network ACL at a time. Besides, in order to add more security to your VPC. this platform allows you to set up the network ACL's Similar to the security groups. So you can create the Network ACL as sown below
step - 1:
Navigate to Network ACL in VPC Column of the AWS Account
step -2:
Click on Create network ACL

step -3:
Provide any name, select the VPC and Click on Create

Since we have created the Network ACL, we need to add the rules
select the Network ACL that you have created previously. and specify the inbound as well as the outbound rules. And then check the access.
Get the practical explanation of adding these inbound as well as outbound rules at AWS certification training
VPC Services:
And this VPC offers several different services. So now let's discuss one by one in detail
Subnet and its Utility:
In general, maintaining a smaller network is easy when compared to a large network. Usually, a large network is divided into smaller units. And each smaller network is known as the subnet. Take the instance as an organization. And each organization contains the different teams such as operations, sales, HR, Technology. The data that belongs to one department cannot be given to other departments. So here you can create the subnetworks such that accessing and maintaining the network easier. Moreover, there are several different components responsible to grant as well as the restrict access. So let us discuss those components in detailed
Route table:
This is a table, which contains the rules for routing the traffic within and outside the subnet. We can use this route table to add the Internet Gateway to the subnet. Moreover, in a VPC, there can be multiple AWS VPC.
Internet Gateway:
Internet Gateway is a very important component which allows your instance to connect to the internet. Moreover, it allows the user to make the subnet public by making by providing the route to the internet. Moreover, with the help of Internet Gateway, an instance can access the resources.
What are the advantages of AWS VPC?
With VPC, you can launch the instance in a subnet that you are choosing. Besides, we can assign the custom IP Address ranges in each subnet. And we can configure the routing table between the subnets. Furthermore, we can create an Internet gateway and attach it to the VPC. And we can assign the security group to the individual instances. And we can also have the subnet network Access Control, List.