
So till now, we have how to connect the database in your systems. Now its time to connect with the Pycharm, let's discuss about crud operations in below.
Till now, we have used the Community version of the PyCharm. This works best for the programs till we have used. But if we go into the advanced step like the connection with databases this won't work. So, to perform this kind of operation, we need to use the commercial version of the PyCharm. And this commercial version has a trial period for some days. So to explain to you the examples, I have used the trial version of Professional Pycharm.
Note :
The Professional version of Pycharm is the same as the commercial Version of Python. If you are still unable to install in your systems, feel free to contact python online training.
Hope you have successfully created the database in your system, now its time to create Databases and perform crud operations.
So now initially look at how to connect database. Since you have installed the database, now, I would like to know how to open the database. And now open the script at the following location.
C:\Program Files\PostgreSQL\11\scripts\runpsql
Once you went through the location and have opened the exe, then you would have seen the following screen.
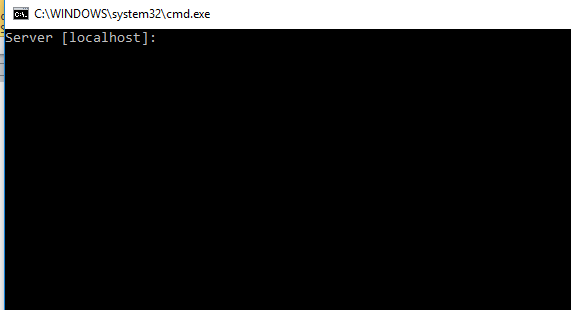
So after seeing this, there is nothing to give at this moment. Just Only press Enter . for 4 times.
Soon after that, you will see the following screen.
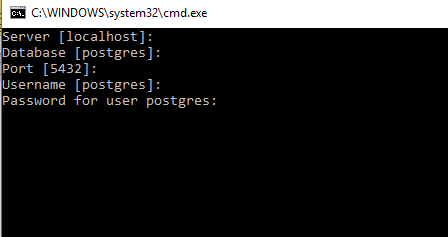
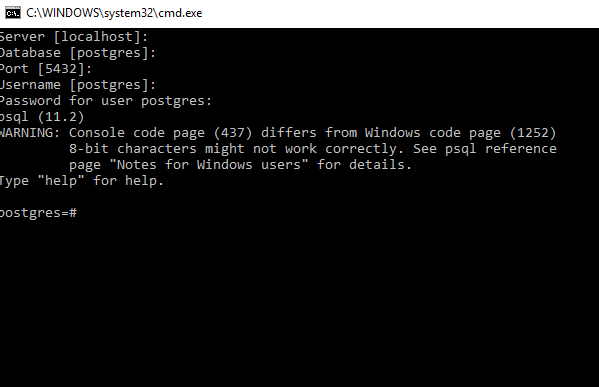
So its time to provide the password that you have provided at the installation time. So finally you will see the following screen.
We will create the database now.
Let us first create the function
CREATE DATABASE database_name[description];
Ex: CREATE DATABASE ONLINEITGURU;
The create Database consists of the following parameters.
| S.no | Dbname | Parameter |
| 1 | Dbname | The database name to create |
| 2 | Description | It specifies a comment to be associated with the newly created database. |
| 3 | Options | There are the command line arguments that accepts the database |
The create DB consists of the following commands:
| Option | Description |
| -d tablespace | It specifies the default tablespace for the database |
| -e | It echos the command created generates and sends to the server |
| -E encoding | It specifies the character encoding scheme in the database |
| -U username | It specifies the username to connected |
| -w | It never issues a password prompt |
| -W | It forces the database creation to prompt for the password prior to the database connection |
| -p port | It specifies the TCP port (or) local Unix domain socket extension. This is used for listening to the server connections |
| -h host | It specifies the machine name on which the server is running |
| -l locale | It specifies the locale used in the database |
| -T template | It specifies the template database |
| -h help | It helps the create db arguments and exit |
Since we have created the database, it time to use this database. We can easily move to the database through the following command.
Syn : \c DATABASE_NAME
Ex: \c onlineitguru

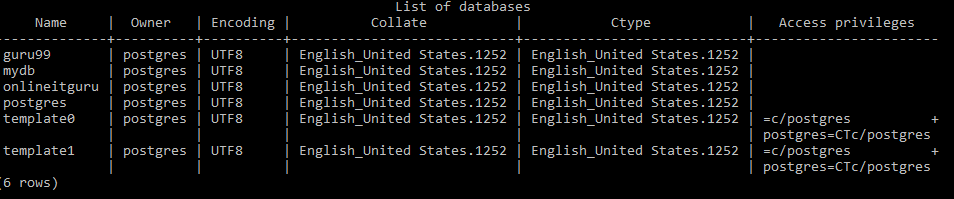
So Since we have moved to the required database, its time to display the database list. This can be done using the \l command. Here I'm showing my database list tables
Once again give the command \c database_ name( Ex: \c onlineitguru) to move into the desired database. (if required)
Hope you are in the desired database. Now its time to create a table in the desired database. (In my case, I have gone through OnlineITGuru). Now you can easily create a table using the following name.
Syn :
Create table table_name(var_name1 datatype constraint, var_name2 datatype constraint ----------------);
Ex:
Create table emp_list(id INT, name text, address char(50), salary REAL);
Since we have created the table in the database, it time to insert data into the database. We can create the database using the following command.
Syntax:
Insert into table_name(‘variable_name1, variable_name1 ,variable_name1 ,variable_name1)
Note : Use single cotes (‘’)for the string values. But this is not necessary for the integers.
Ex:
Insert into emp_list values (10,’balajee’,’kphb’,25000);
Insert into emp_list values(21,’sai’,’nizampet’,35000);
Insertinto emp_list values(22,’prasanth’,’miyaput’,20000);
Insert intoemp_list values(27,’ramya’,’sr nagar’,25000);
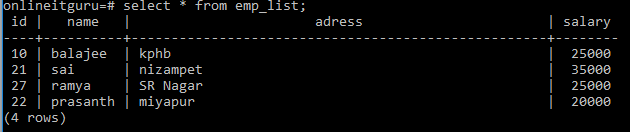
So now the table consists of 4 rows. Now you can get the output of 4 rows as below
Query: select * from emp_list;

Since rows were created now manually using database , now its time to create more using python code
Since we have downloaded the professional version of Pycharm, now its time to connect to the database. The database connection in pycharm consists of the following steps :
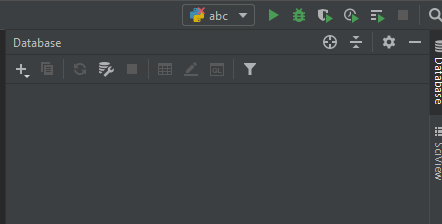
When you have opened the pycharm, on the right corner, you will be finding the database. Just click over it.

Once you clicked over the database, you will be finding the plus symbol over it.
When you have mouse over the ‘+’ you will be finding database over it and select your desired database. In my case, I'm selecting the PostgreSQL database. When selected, you will be taken to the following screen.
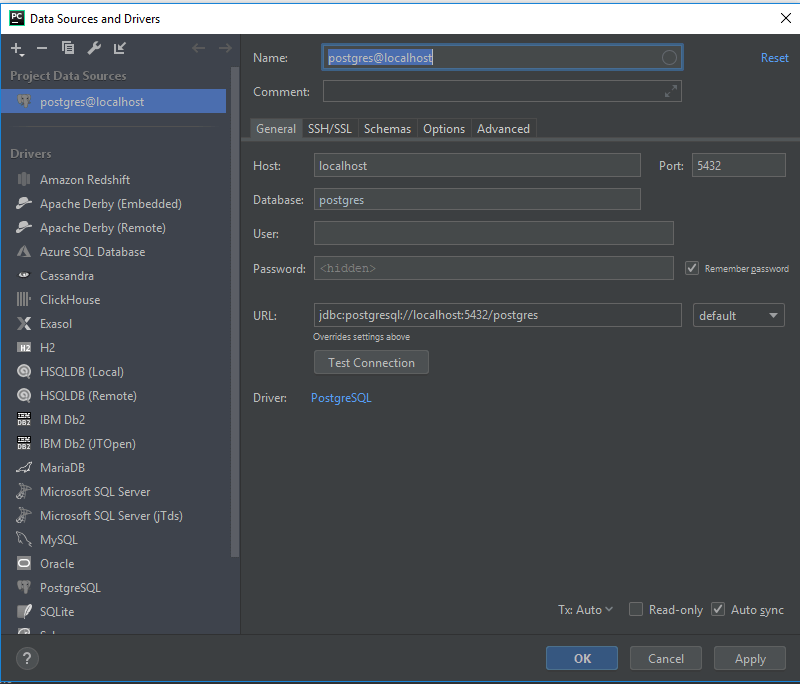
So here you need to provide your database name, username as well as the password. ( these names were given by the user at the time of database installation.
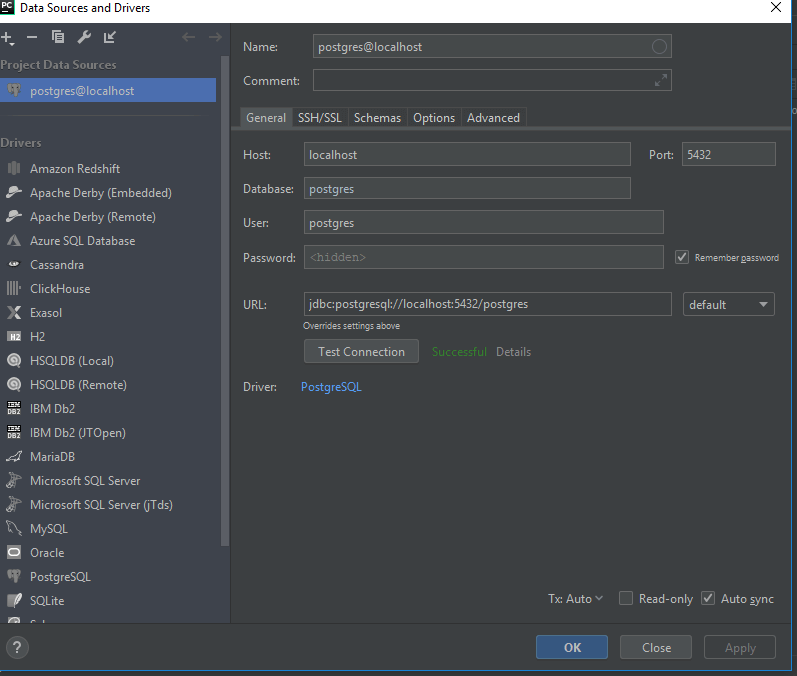
When provided, you will be asking for the Pycharm to test the connection. (We can proceed further when the test is successful).
Note :
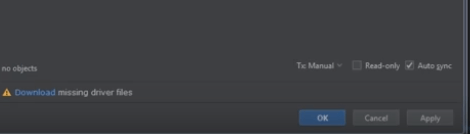
In prior to the test connection, you will be seeing the option like Download the missing driver files. Just click on it to download missing driver files. (We cannot see this step in all systems. It may (or) may not be ).
So, I hope you people have given all the necessary details. Now its time to test connection. You can do this by just clicking the Test button. So soon after the TEST completion, you will be seen as Test is successful as shown below.
So till now, we have configured the data using pycharm. Now its time run the sample program
But before we were going to run the sample program, we need to configure the psycopg2 in our system. You can do this in the Command prompt (CMD).
Go to your windows search bar and type CMD your system. So soon after opening your cmd prompt, you must give the command as shown below.
Cmd :
Pip install psycopg2
So once you have given the command, the required package would be installed in your system and its time and its tun the py file. So lets have a look at the code .
import psycopg2
try:
connection = psycopg2.connect(user="postgres",
password="mydatabase",
host="127.0.0.1",
port="5432",
database="onlineitguru")
cursor = connection.cursor()
postgres_insert_query = """ INSERT INTO emp (id,name,adress,salary) VALUES (%s,%s,%s)"""
record_to_insert = (5, 'sampu', 'one town', 95000)
cursor.execute(postgres_insert_query, record_to_insert)
connection.commit()
count = cursor.rowcount
print (count, "Record inserted successfully into emp table")
except (Exception, psycopg2.Error) as error :
if(connection):
print("Failed to insert record into mobile table", error)
finally:
#closing database connection.
if(connection):
cursor.close()
connection.close()
print("PostgreSQL connection is closed")
So soon after the execution, you can see the effect of databases in the table.
Here I have given only the basic connection of the database through python. Likewise, by changing the commands, you can do any crud operations.
But I have given all the database operation that PostgreSQL and you can perform the same using Python. ( from .py file)
Now lets move to other database operations
So in the above example, for emp id “22”, we have given the address as miyaput which used to Mayapur. So we need to update the address of the prasanth.
This can be done using the following command.
Syntax:
update table_name set column =value where condition;
Ex:
update emp_1 set address=’miyapur’ where id =22;
So now if you see the table we can update the address of prasanth. So now have a look over the table once again.
Deleting the Query:
Now its time to delete the row from the table. Now I would like to delete Ramya from the table
Syn :
delete from table_name where condition;
ex:
delete from emp_list where id=27;
![]()
Now we will verify the table
Select * from emp_list;

Great! The row successfully deleted!!!
Deleting the table :
Since we have deleted one row from the table, now I would like to delete the table;
Syntax:
drop table table_name;
Ex: drop table emp_list;
![]()
Now we will select the tables in our database;
Syn: \d
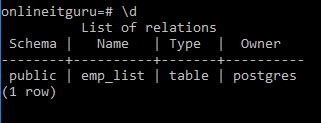
Now its time to check the tables in the database;
Ex: \d
![]()
And the last operation that we need to discuss is about dropping the database.
Dropping the database:
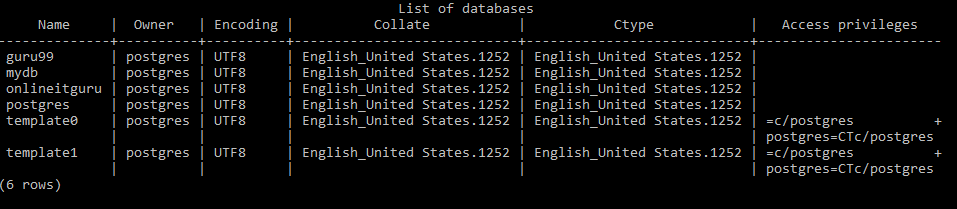
Dropping the database is nothing but deleting the database. Now, before deleting the database, let us first have a look over the databases we have. This can be done using the \l command
Now I would like to drop the database named onlineitguru.
Syn: drop database database_name;
drop database guru99;
Now its time to chek all the databases
Ex: \l