
In this modern computerized world, e-mail is considered as the most common medium to communicate with the people. Moreover, while sending the e-mail there are some common parts. So writing these parts repeatedly is a time waste process. So people use templates to send e-mails to the people. Since these templates save time, people opt for this method. So through these templates, they can save time in rewriting the same text again and again. So we will see salesforce cloud implementation.
How to configure the e-mail?
Follow it certifications steps to configure the e-mail.
step -1 :
In your application ( banking) click on set up and search for the e-mail templates. So once you search, you will find the email templates under communication templates.
Step - 2 :
Salesforce environment provides you some e-mail templates. And you can select the templates as per your requirement. And these templates were given in two folders by default. But if not satisfied with any of the predefined templates, it allows you to create some default templates. So now we will see the customization of e-mail templates
E-mail customization templates:
step - 1 :
So once you have selected for the Classics e-mail templates, the screen you have entered will be consists of NEW Template options. Click on it.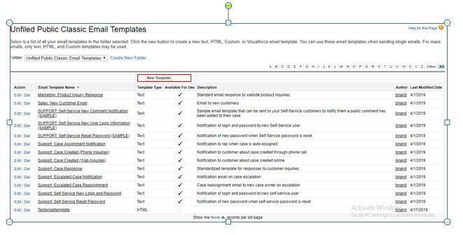
Moreover, you should remember that the Salesforce environment lets you customize the email templates in the existing folders (or) allows you to create new folders and can add the existing templates(or) can add the new templates to the new folder. Moreover, once you have created a folder, and you can set the access rights to the other users in the environment.
step - 2 :
so once you have selected for the new template, the environment allows you to customize the e-mail template in four different formats as shown below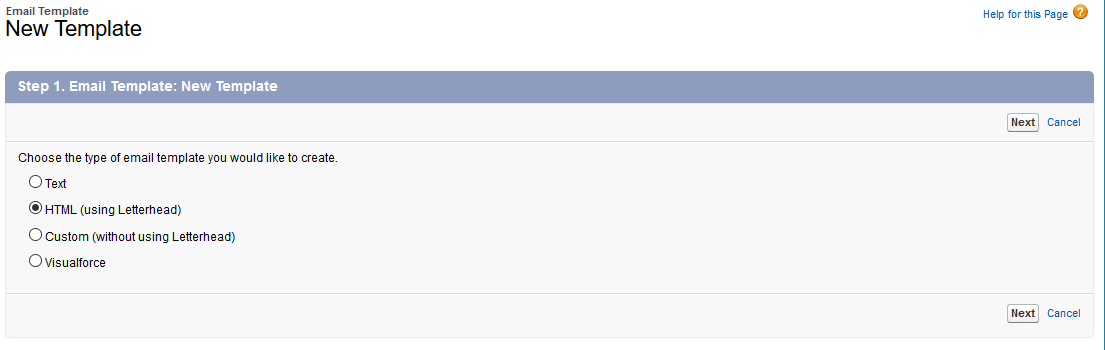
. So as of now, I would like to choose the HTML template. So if you observed the screenshot clearly, besides HTML you have an option using letterhead.
step - 3 :
So once you have selected the HTML template and click on NEXT, you will be entering into the following screen.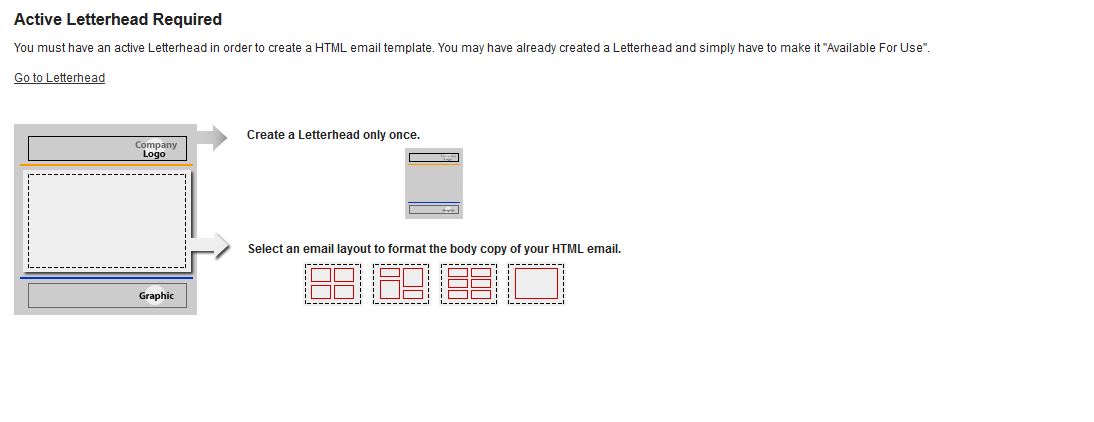
step - 4:
So it clearly says, a letter creation is mandatory to create an HTML template. So now, we will create the letterhead.and then start customizing the e-mail templates. For this Click on Go to Letterhead.
step - 5:
click NEXT
step - 6 :
Select the NEW letterhead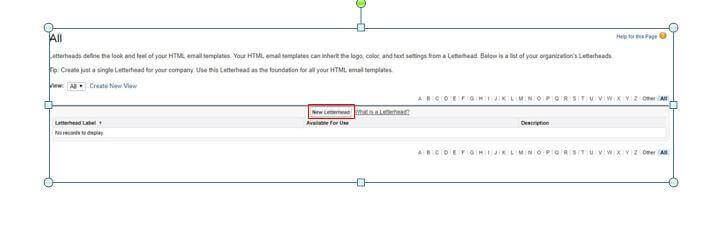
So once you have selected, you need to provide the label name and must check the checkbox(Available for use). This is mandatory because the letterhead would not be visible for the user unless it is checked.
step - 7 :
And I would like to give the names as shown below and click on SAVE.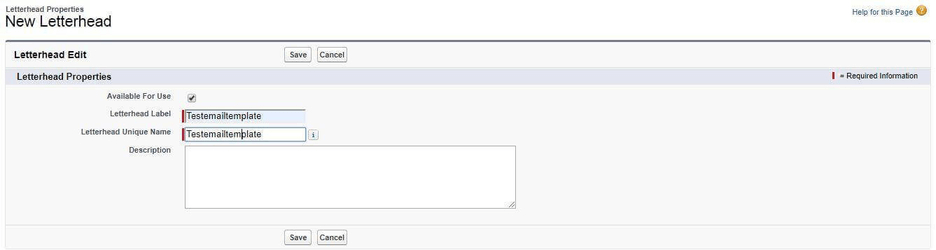
Step - 8 :
So, once you saved, you will be entering into the following screen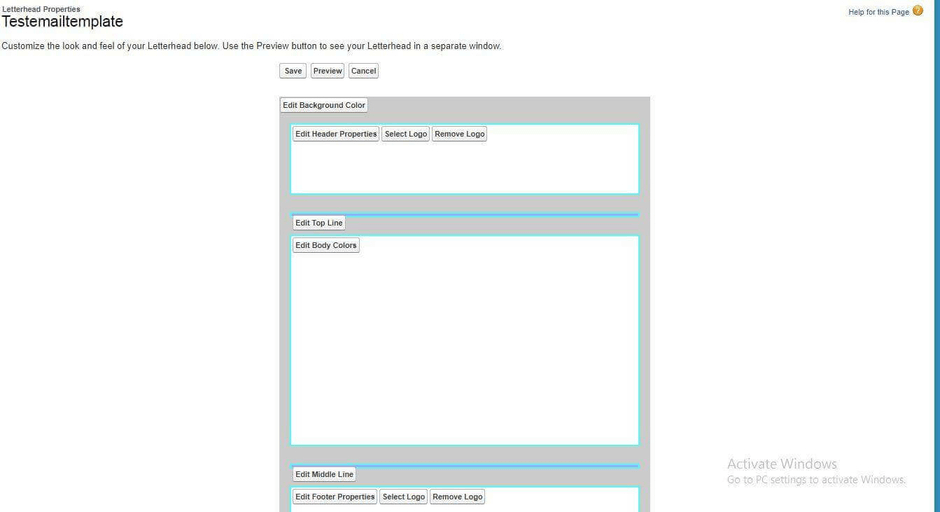
Here, it allows you to customize various parameters like background color, height, width , logo insertion, deletion and so on. So soon after your requirement satisfaction, you have an option to view a preview. And if you are satisfied with that preview, you can save the letterhead. Here I would like to show you my letterhead preview and finally click on SAVE.
step - 9 :
So once you saved, you will be entering into the following screen.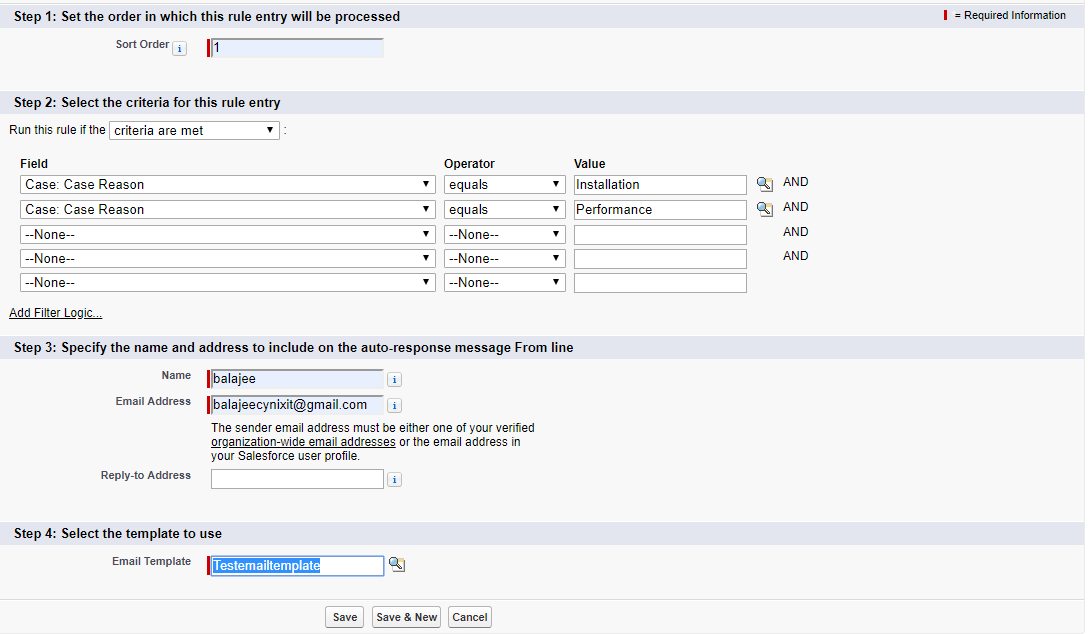
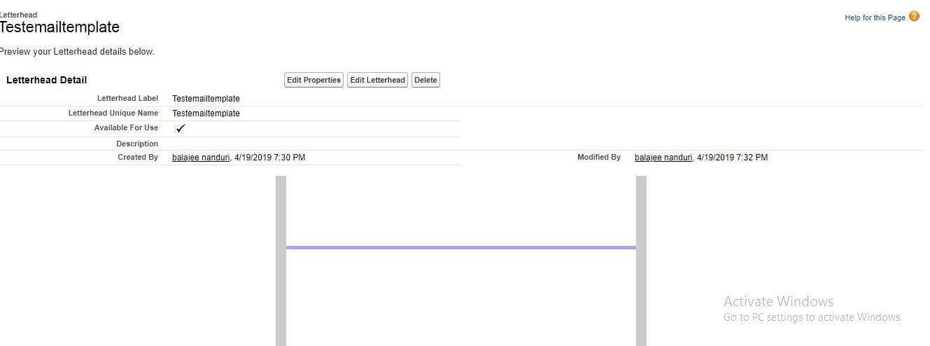
So since a letterhead has been created, now its time to go back (<--) to the e-mail templates and start customizing the e-mail template with this letterhead.
E-mail Template customization:
So once again search for the e-mail templates, in the search bar of set up and select the NEW templates and select the HTML templates. SO once you have navigated through the mentioned path, you will be entering into the following screen.
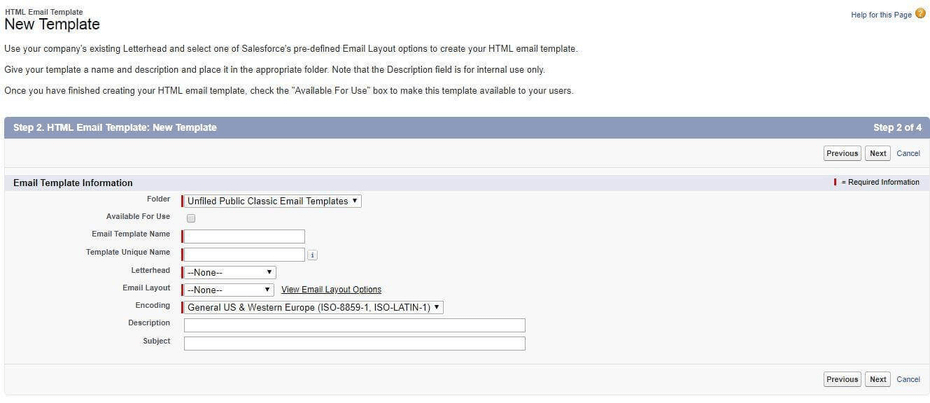
So once you have navigated to the above screen, then fill the details as shown below and click on NEXT.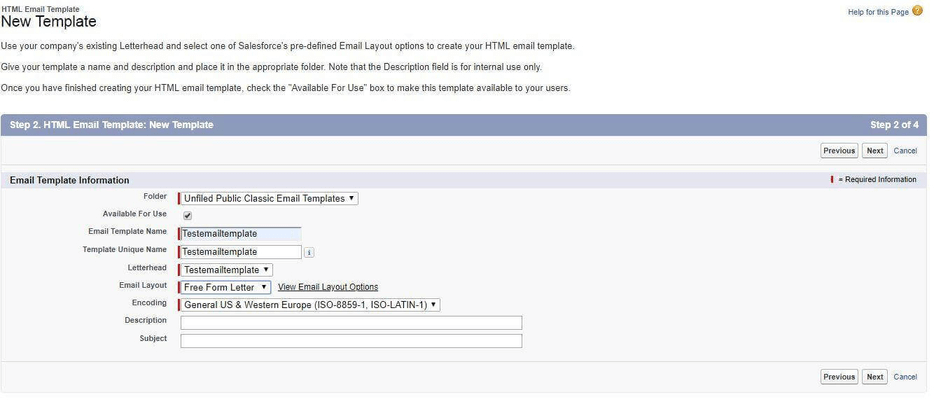
So once you click on NEXT you will be entering into the following screen.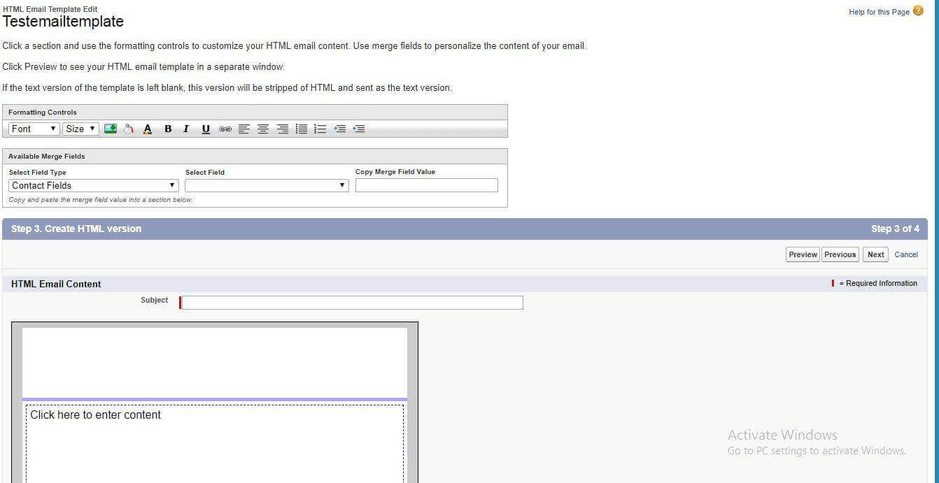
So once you observed the screenshot, it has many options like Fields type, Field as well as the merge value. So select any option from the drop down for the field type as well as filed to get the Merge value. (I recommend to check all the possible values).
So for an instance, I would like to opt the Case field as well as the Case number, so that it would automatically create a merge field. as shown below.
So once you have selected the field, then its time to write some custom text.
So for an instance, I would like to take the Case as an object and Case number as a field. And this template is basically used to generate the auto- emails to the people. And here our agenda is to generate an auto -email whenever a case has been created. So I Would like to mention the subject as Case with case number and fill the custom template as shown above and Click NEXT.
So from the above screenshot, Contact, as well as the case number, will be generated by default and the remaining text will be generated default.
So whenever an email has been generated, this would be received at the sender's side.
And you will be entered into the following screen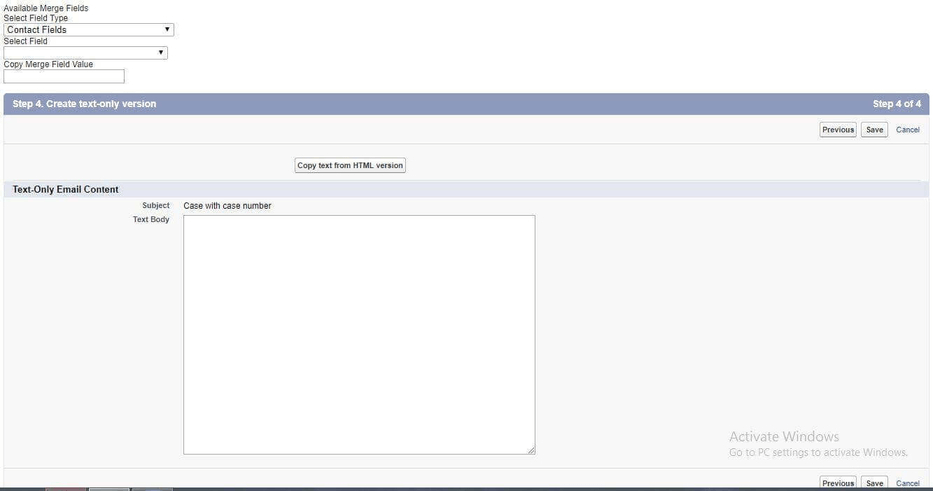
Scenario:
But there are some situations, where the receivers can receive only the Text Format. So in that case, if the receiver cannot support the HTML template, the sender must have some default text. So in the above screenshot, in the middle, you have an option Copy text from the HTML version. And the body will be automatically filled with the text as shown below and click on save.
And if you have entered into the following screen you are win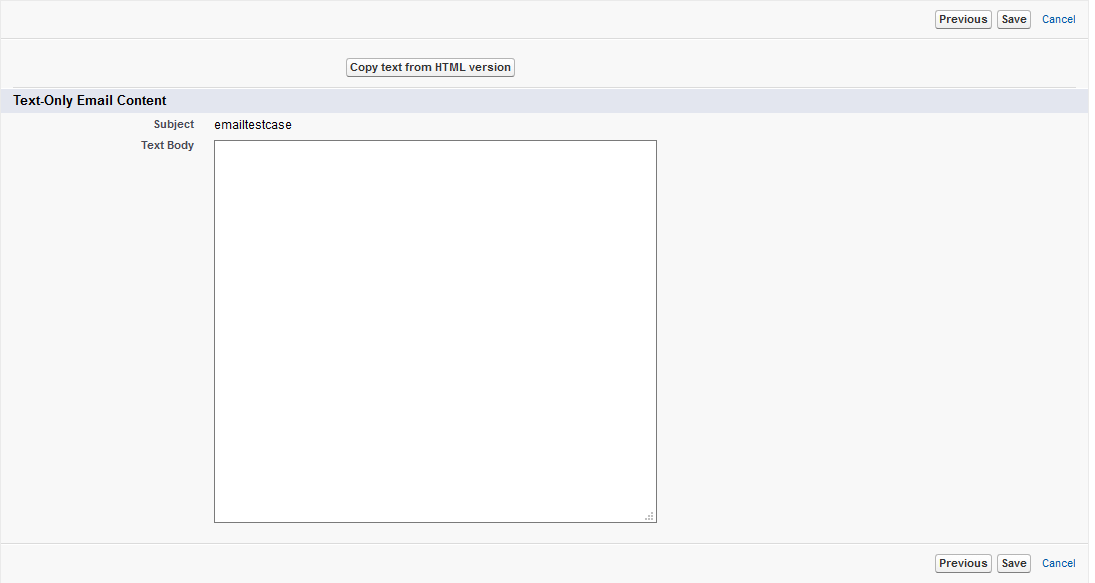
And you can check the e-mail using the test case object.
Assignment:
Test your self the working of the e-mail templates with the Case objects. And if you struck up anywhere in generating the auto e-mails feel free to contact Salesforce online training.
So, I hope with the step mentioned above, you people have successfully configured the e-mail template. So in this tutorial, we will now, move further.
Whenever a case has been created, it must be assigned to the team to process further. And in real project developer creates the multiple cases. And we cannot assure that all the cases will be handled instantly. So the developer uses the queue to store the case object, and the other team would like management, as well as the support team, uses these cases to process the cases sequentially. So the records once placed in the queue, remain until they are reassigned (or) taken out of the queue
so now we will see the
Queue creation:
step - 1 :
in your application, click on set up and search for the queue.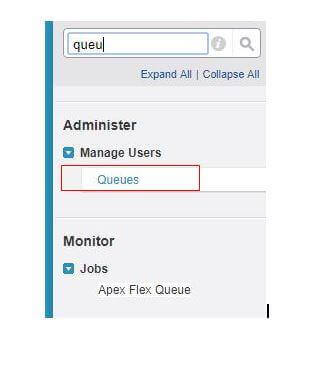
step - 2 :
Click NEW
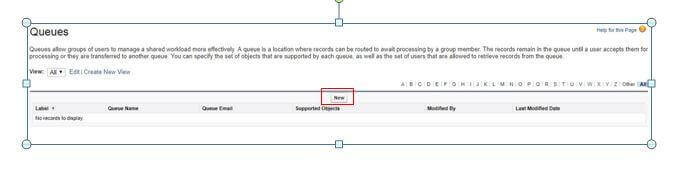
step- 3 :
provide the label as well as the queue name. And the object for which you want to create the queue. So as of now, I would like to use the case as well as the lead objects. And finally, select the queue members as shown below and finally click on save.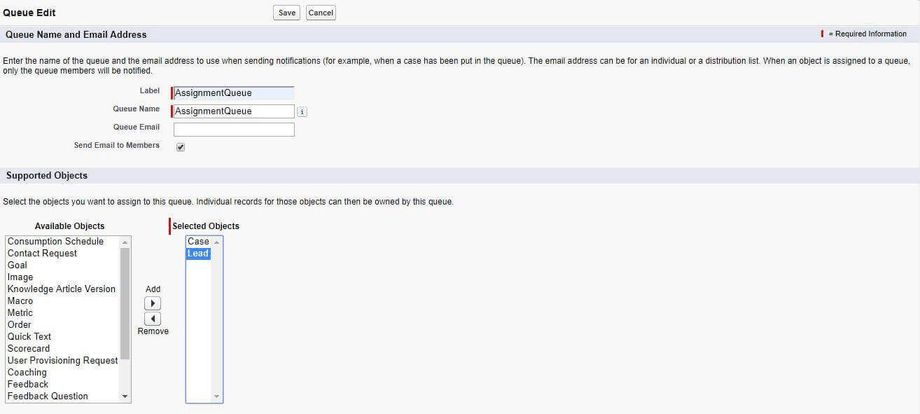
step - 4 :
And if you can able to see the following screen, you are inn!!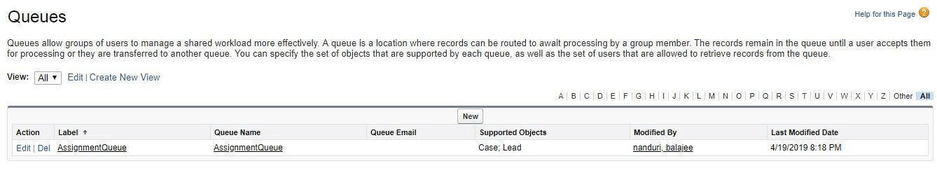
So now, move on to
Case Assignment rules:
Case Assignment rules are nothing but assigning some rules to the Case object
So like Queue, you will be finding the case assignment in the Application set up search bar.
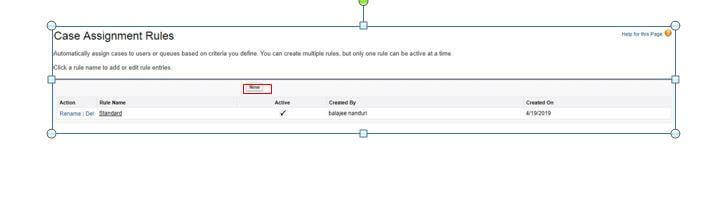
And the environment by default creates some Case assignment rules. And it allows you to create some case assignment rules. But one should remember that only one case is active time. So whenever, you add a case, a default case will be deleted automatically.
So for learning purpose, I would like to customize the new case assignment.
Step - 1 :
In your application, Click on Case assignment rule and click on NEW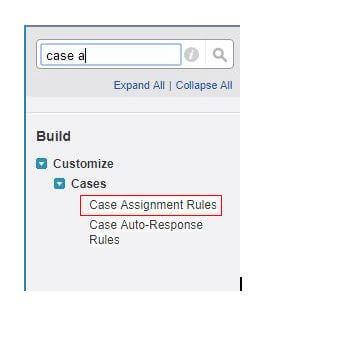
step -2 :
Provide any name and check for the active checkbox. So once checked, the current case assignment will be deactivated automatically and click on SAVE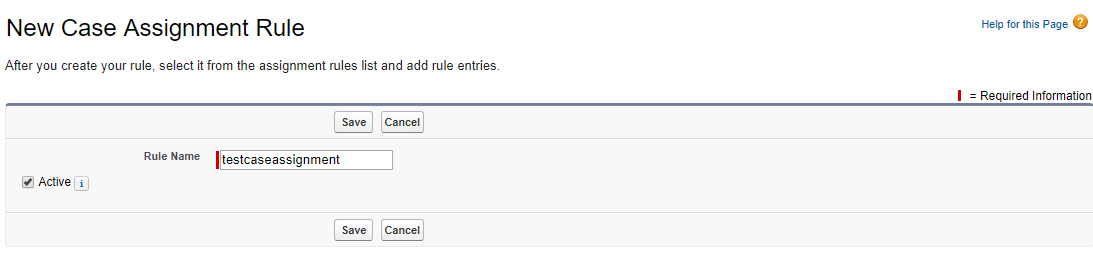

And you are inn if you have entered to the screen as shown below.

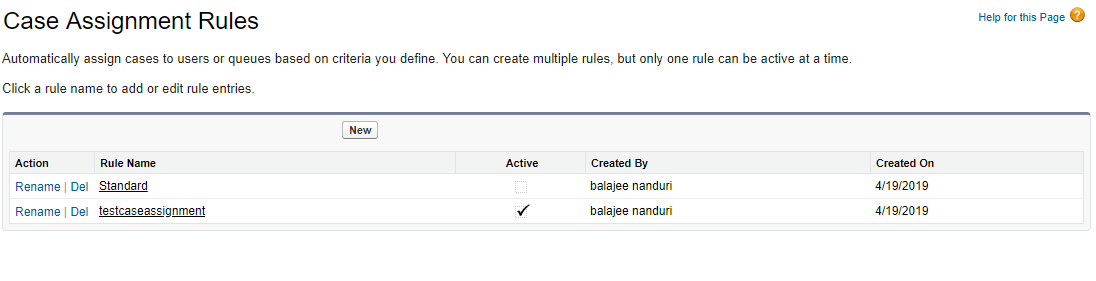
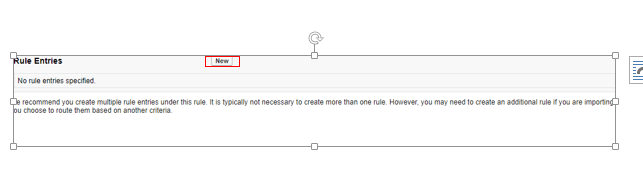
Since we have assigned a case. now, its time to assign some rules to the case. So to create the Rules in the case assignment, click on the rules that we have created. And click on NEW in rule entries.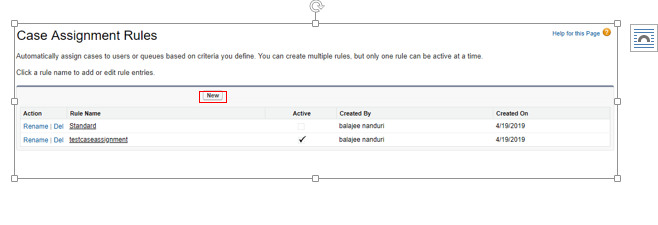
Here the fill the details as shown below.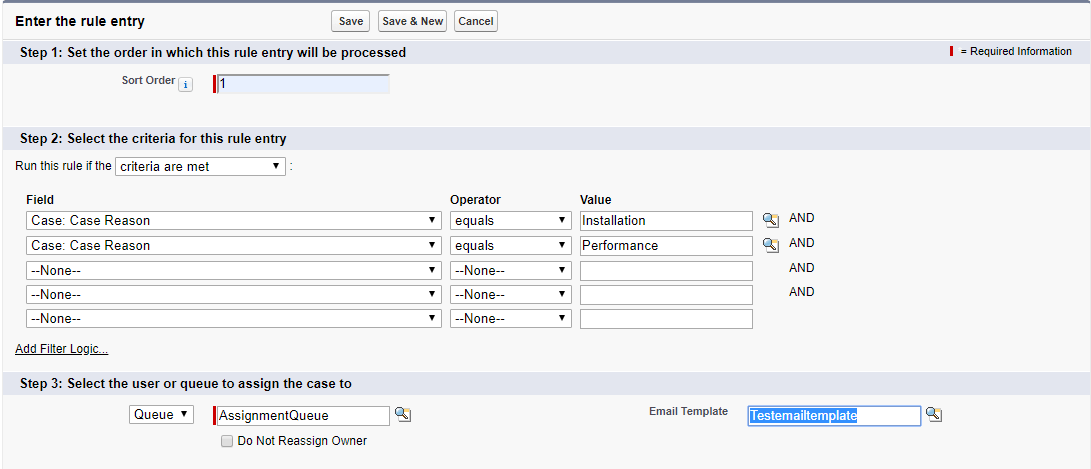
So in the above screenshot, For the sort order given any number( I would like to give it as one (1) and give some criteria) and apply the filters. Besides select the people for whom you want to assign the queue and click on SAVE.
So similarly create few more rules with different orders as shown below
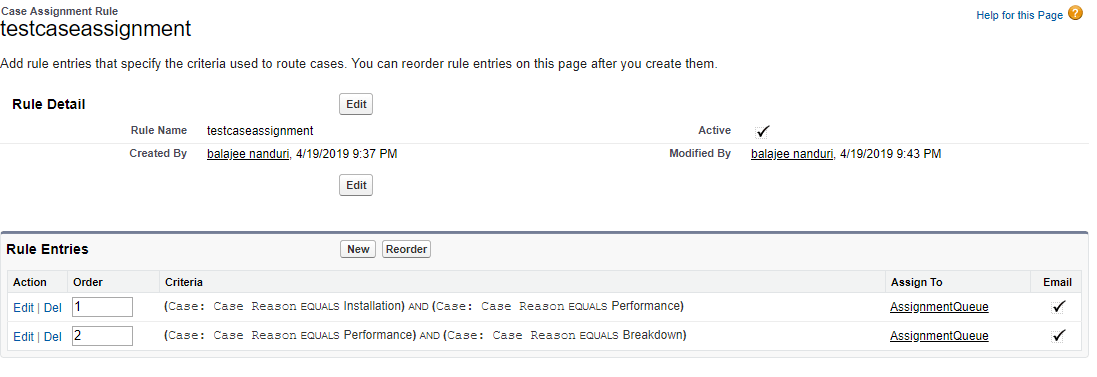
So now, we were done with the case assignment rules.
Note:
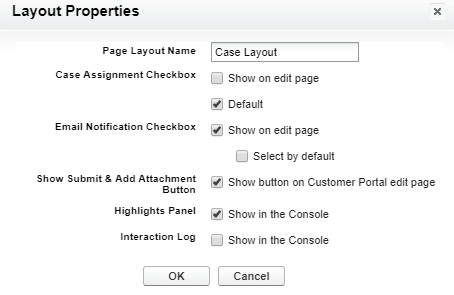
We cannot fire a case unless a layout is assigned to the default. So to do this, visit the CASE object, from the quick view access click on Edit layout and click on the Layout properties change the case assignment check box to default and click on SAVE

So we will check for its working.
Navigate to the case object and click on NEW. And edit the case as shown below and click on SAVE.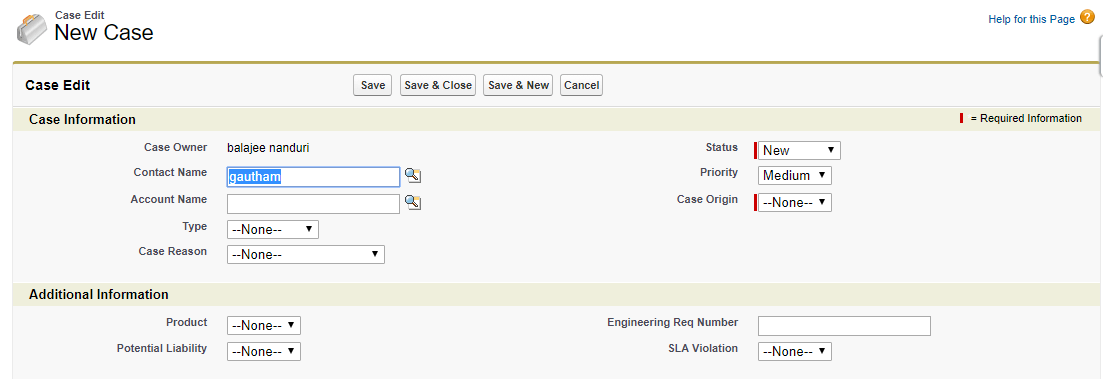
So once you have saved, you will be entering into the following screen.
And if you have observed the above screenshot, the owner has been changed from balajee to the assignment rules.
Lead Assignment rules:
It is similar to the case assignment. So follow the steps mentioned below to assign the rules
step -1 :
In your application, click on set up and search for the lead assignment. And once selected, you will be finding the standard rules. It allows you to edit the rule (or) allows you to define your own rules. So like Case assignment, I would like to create a new case. So click on New and provide some name and check on Active. So soon after the creation, you will be entering into the following screen.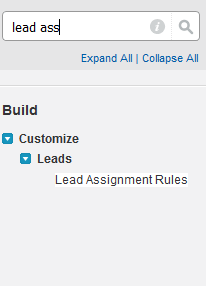
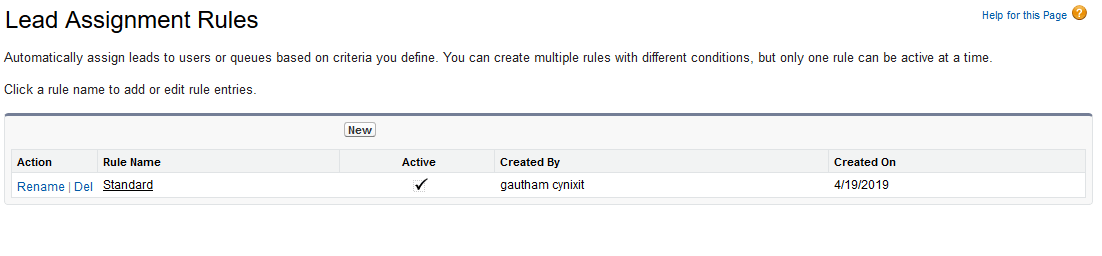
So if you observe the above screenshot clearly, the inbuilt Lead assignment rules were replaced with the newly created assignments. let's continue with defining the rules. So to do this click on the new assignment that you have created and navigate to Rule entries and click on NEW.
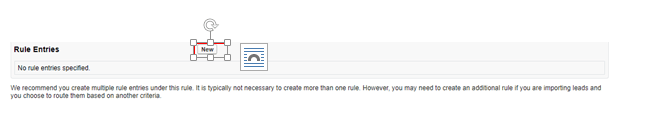
soon after the entry, fill the details as shown below and click on save
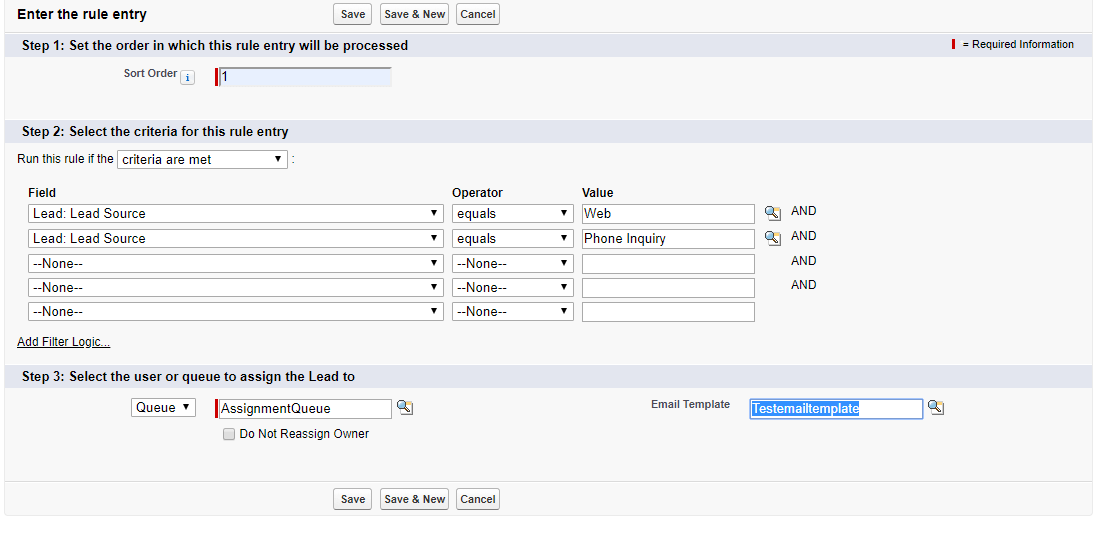
similarly, create another rule and click on save.
So like in case assignment, here also, we need to check for the page layout properties. And you can check this as shown below
In your application, click on set up and search for the lead page layout and click on it as shown below.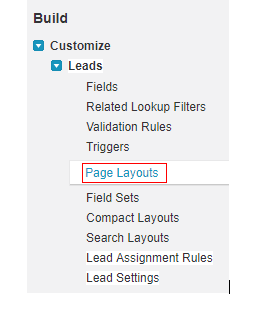
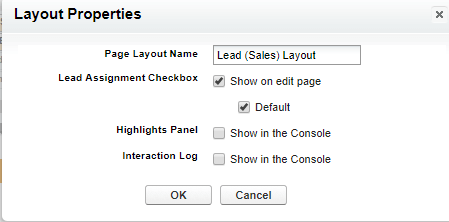
click on Lead sales layout. so here, you will be finding the layout properties. And here you can change the assignment checkbox to default and click on SAVE.
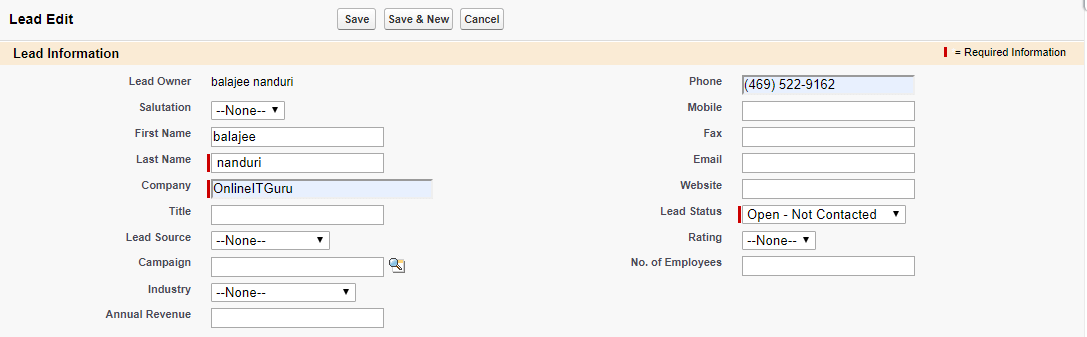
So now change your application to sales and click on leads and then click on NEW.

And then fill the details as shown below and click on SAVE.
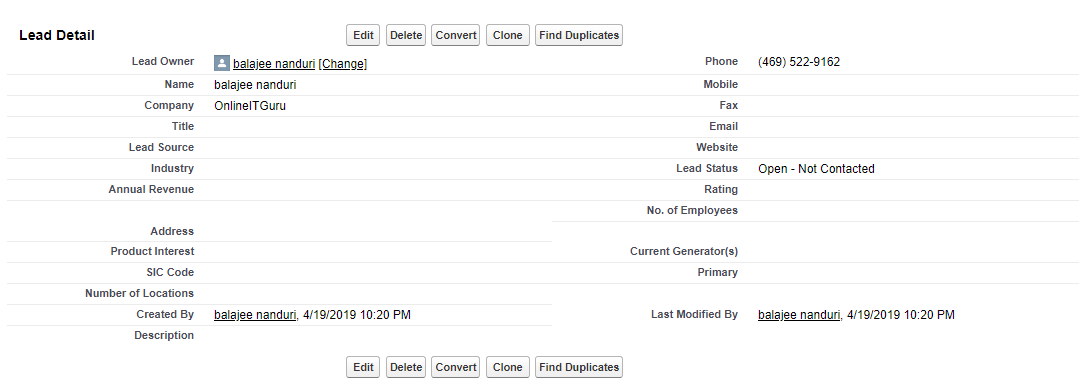
and if you have seen the following screen, you are Inn!!
Auto response rules:
Let me explain the auto response rule with a scenario
Scenario :
When a case has been created, a mail should be sent to the registered e-mail id.
So to achieve this we need to use auto-response rules.
Since, we have understood the agenda clearly, now, we will create the case once again and then the e-mail.
So follow it online training steps to create the case
step -1 :
In your application, click on Set up and then search for the auto-response rules. And you can find this option in both Leads as well as cases. And the application is similar in both the objects as well as cases. so let us see one by one in detailed
In your application (I'm using Sales ) and click on set up and search for Auto responses. As said above, you will be finding this option in both leads as well as cases. And I would like you to let you know initially with the case object. So click on auto-response rules under the case object.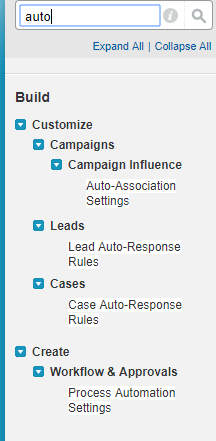
step - 2 :
Click on New
step -3 :
Provide any name (autoemailtest) and check on active and click on SAVE
Step - 4 :
And finally, you will be entered into the following screen.

So from the above screenshot, we can conclude that a rule has been created.
And now click on the case, that you have created previously. And Click on NEW in the rule entries. So once selected, fill the details as shown below and then click on SAVE

Till now, we have created the auto responses message. So through case creation, we will check the auto response e-mail.
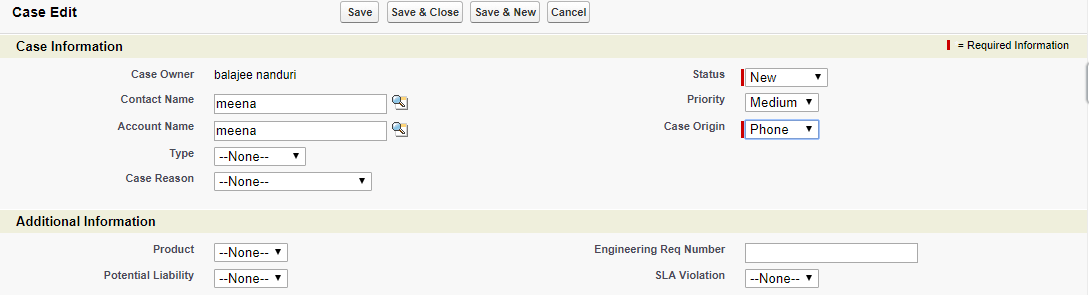
In order to create the case, visit the case object and click on NEW.

And the fill the details as shown in the above the screenshot and then click on SAVE
And Now, its time to check your mail. Initially, ill check my e-mail and place the e-mail screenshot as shown below.
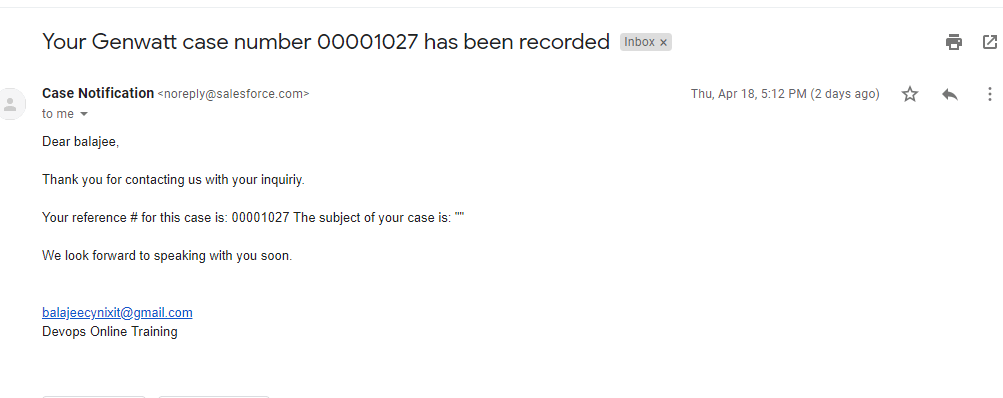
So I succeed in autoresponse e-mail.
Note:
All the received emails would not be alike. It would depend on the template that you have selected.
So now, let's move on to the
Lead automation rules:
This is very similar to the case automation rules. Just follow the steps mentioned below to achieve this.
step - 1 :
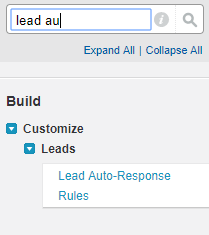
In the application, Click on set up and then search for the auto-response rules.
step - 2 :
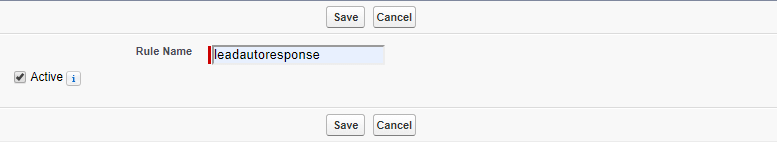
Click on NEW

And assign any name and click on SAVE.
Step - 3 :
So soon after the creation, click on it and select on NEW in the Rule entries.
Step - 4 :
Specify the rules as per your requirement.and then create a lead and finally, you will be receiving an email. If you have received the e-mail so, you succeed in lead Auto response rules.
And I hope you people succeeded in achieving it. And if you struct up anywhere feel free to contact Salesforce online training
Escalation rules:
In a rule entry, escalation rules are used to escalate the rules automatically whenever they meet the required criteria. We usually create the rule entries, where the criteria are defined to escalate the case. whenever an escalation rule is applied for the case, it checks the rule entry criteria.
So we will start defining the escalation rules
In the application, Click on Set up and search for the escalation rules.
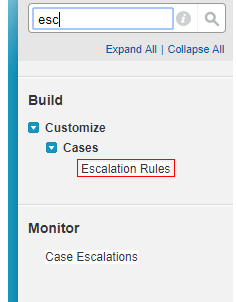
So when you have entered, you will be seeing some default (Standard escalations rules). I personally suggest using these standard rules. So you can edit these rules.

So select the standard rule and click on edit in any of it. For instance, I would like to edit order 1. My intention is to change the age over ( Initially it was 2 ) and then save
So likewise, you can change the options and then create the escalation rules.
I hope, you people were familiar with the case creation. But in real time scenarios, this looks very odd. Because in real time, the salesforce may experience hundreds of cases in days. So to do this kind of mechanical work and is a waste of time. And need more and more manpower. So the salesforce team has researched for some time to auto case creation. And finally, they came up with E-mail to the case.
So What actually E-mail to the case?
It's nothing but the auto case creation when the case is requested for the particular issue via E-mail. So when we do this, we can reduce the manpower and can increase the smart work.
so now we will see this in a practical way.
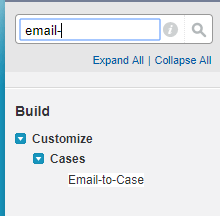
step - 1 :
In your application, click on Set up. And search for the e-mail-to-case
step - 2 :
click on Continue

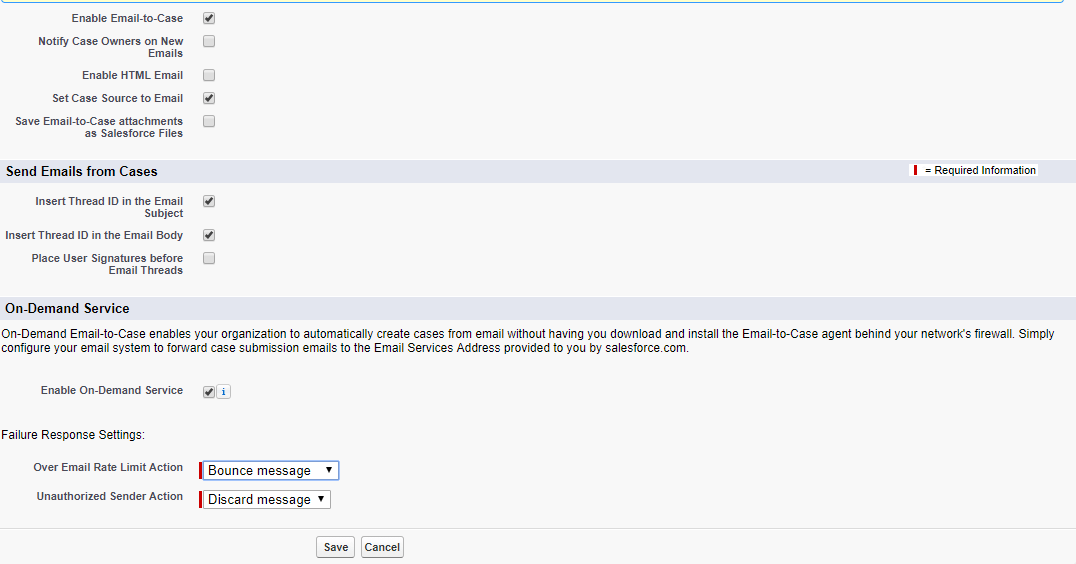
step - 3:
click on Edit and Enable the E-mail to case as well as on-demand service and click on SAVE.
step - 4 :
in the routing address, Click on NEW.

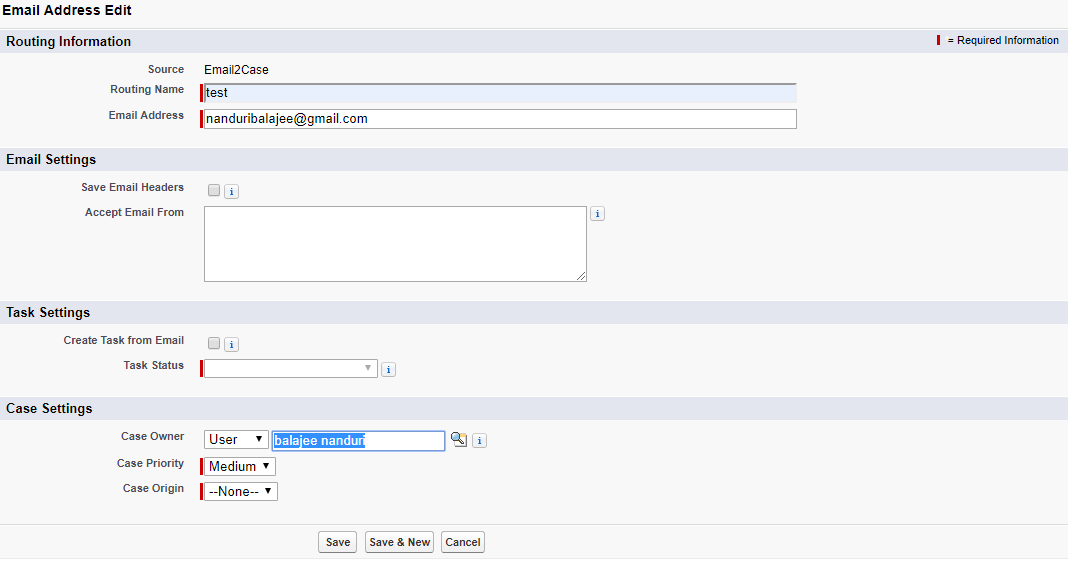
step - 5 :
Fill the details as shown below and click on SAVE.
step - 6 :
So you can easily check the created routing address as shown below

And if you observe the above screenshot, the verification is pending. So visit your mail and verify it. And refresh your page and observe the change in verification.
Since a routing has done and verified. Now we will send the e-mail and check for the auto case creation.
step - 7 :
So navigate to your e-mail and start sending the e-mail ( you must send to the service e-mail address) as shown below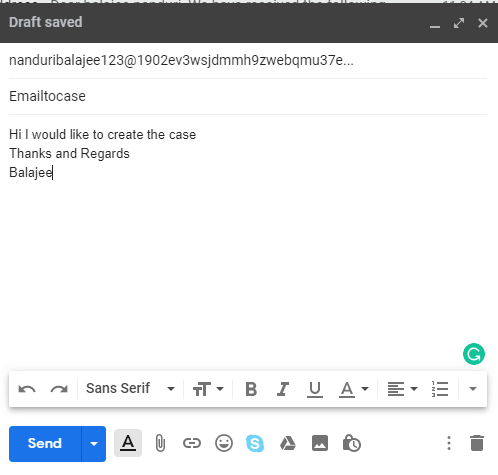
step - 8 :
So now check for the case creation in Case object. I have succeeded in creating the case.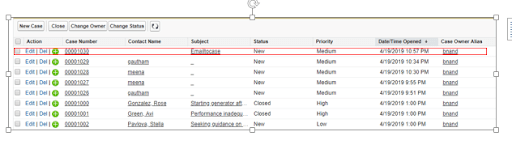
So we have successfully created some case to automatically through the e-mail. But in real time, other than e-mail people may request the team even through the web. So we will now see the web to case
What is web to the case?
It a means through which end user allows the customer to submit the cases directly to the salesforce.com instance. This usually works through an HTML form. So whenever, a user submits the HTML forms, the information on this form is directly posted to the Salesforce.com server and finally gets converted into the case.
so now we will see the practical implementation
In order to explain to you in a practical way, I would like to change my application to Services.
Step - 1:
In this application, click on set up and search for a web -to-case. So once you search you will be finding two options like Web -to-case and Web-to-Case HTML generator. So open those two in two different tabs.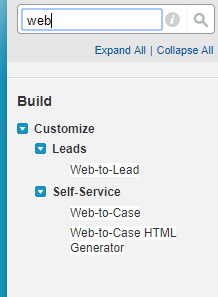
Step - 2 :
so in Web to the case, the default case is Web. Since the user submits the queries through forms, some people would like to send the query repeatedly. So to avoid this usually forms contains the captcha verification. so that end users cannot automate the form filling. And if you think, that your form requires this kind of verification, you can enable it. Moreover, in records it allows you to hide sensitive information. So you can check out if you would like to hide some information. And then select the e-mail that you would like to send the e-mail as an autoresponse. And finally, provide some email signature if you would like to provide.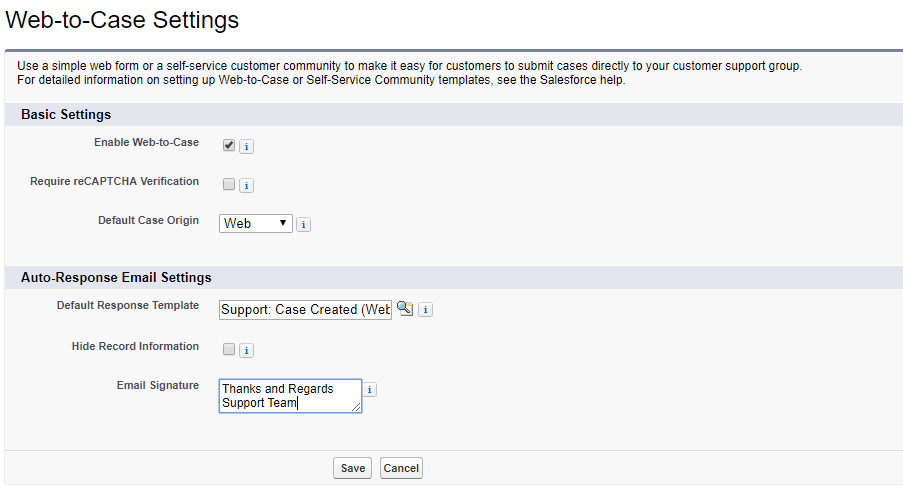
step - 3 :
As mentioned above, a form is essential to send a query from the end user. So now we will create an HTML form. So to do this, go to Web -to- Case HTML generator. Here, you to create a form, you have some default fields and it allows you to add some fields as per your requirement. So I would like to add the case reason, in addition to the default fields. And finally, Click on Generate.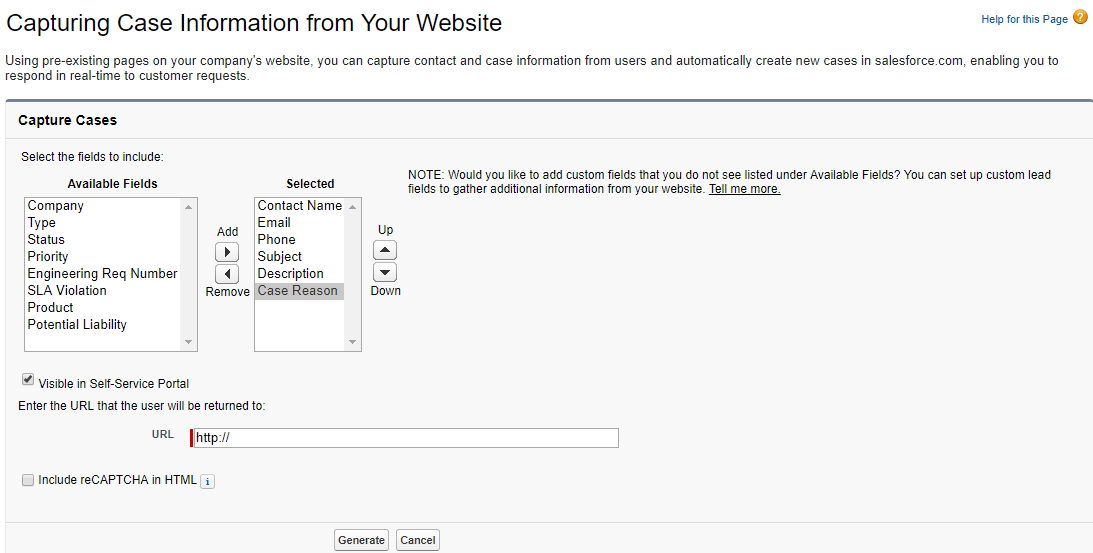
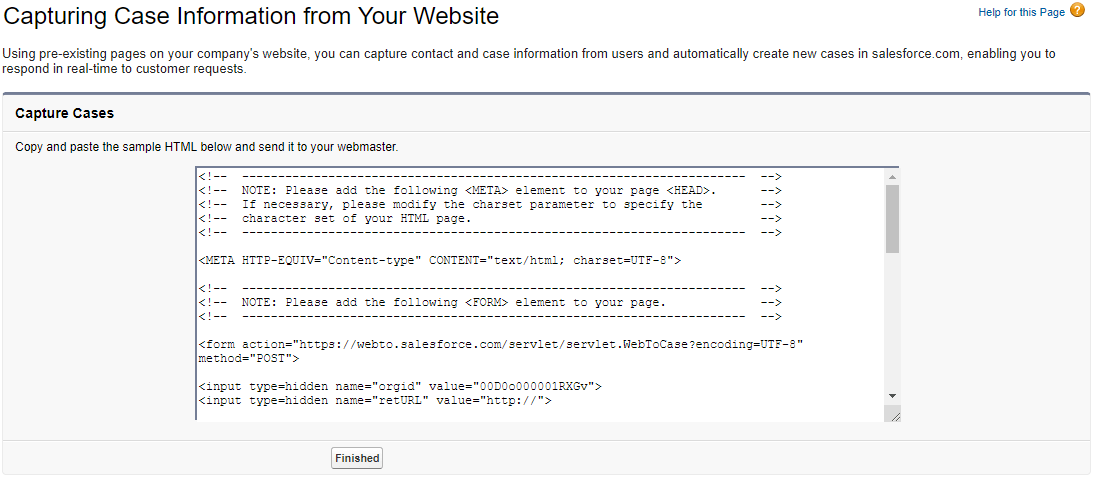
So now copy the code and click on Finish. paste in any editors like notepad and save these files as a .html file. Besides, in this form, you can add some CSS as per your choice. And my form would look as shown below.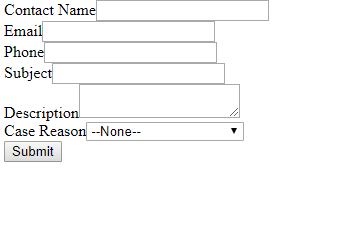
Since we have designed a form, we will now submit the form and then check for the auto case creation. So fill the form as shown below and click on Submit.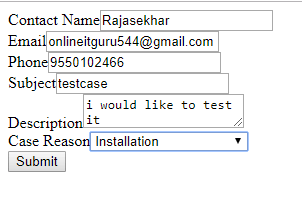
So now go to cases and check for the case creation. And I have successfully achieved in creating a web to the case.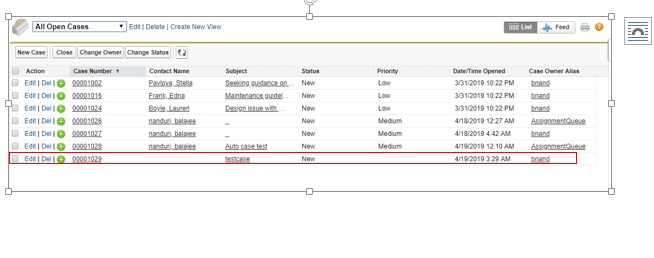
Similarly, we can do the same for the lead objects. So follow the steps to do this.
Web to lead:
So to create the web to lead, I would like to change my application to Sales.
Step - 1:
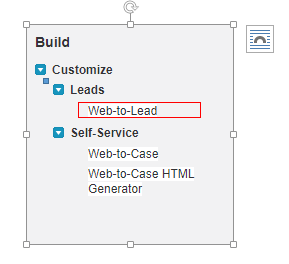
In your application, Click on set up and search for the web to lead.
step - 2:
click on Edit
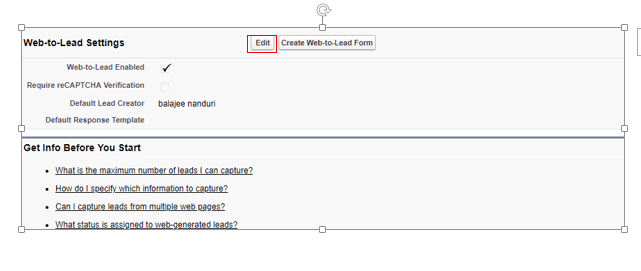
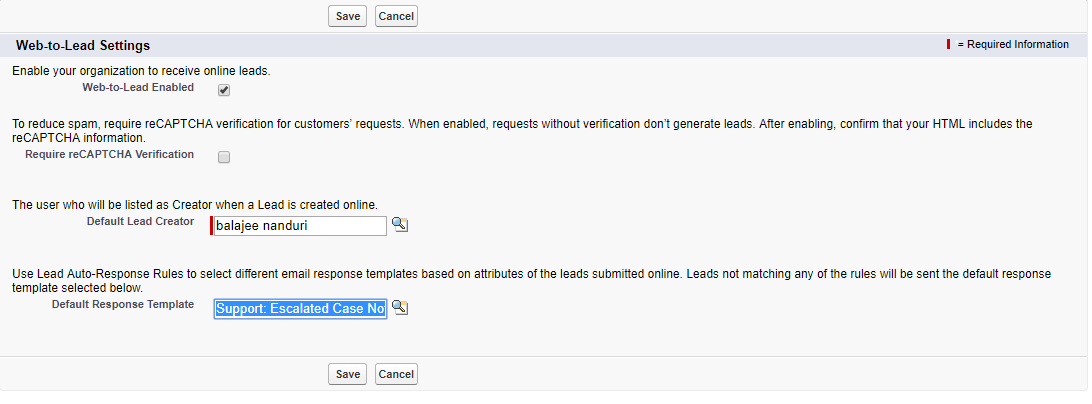
Step - 3 :
Fill the form as shown below and click on SAVE
So now we will create the HTML form.
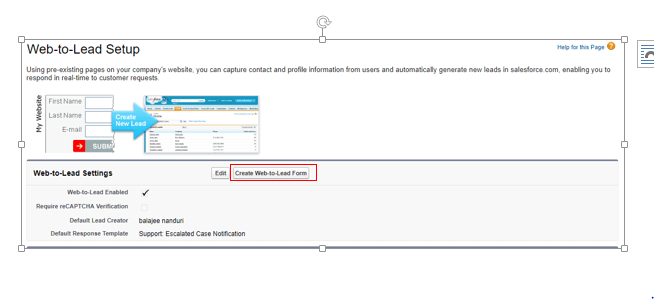
step - 1 :
So to do this click on Web to Lead form.
step - 2 :
Add some fields to the HTML form ( I would like to add Country as well as rearrange the fields as shown below) and uncheck the captcha and finally generate the HTML code.
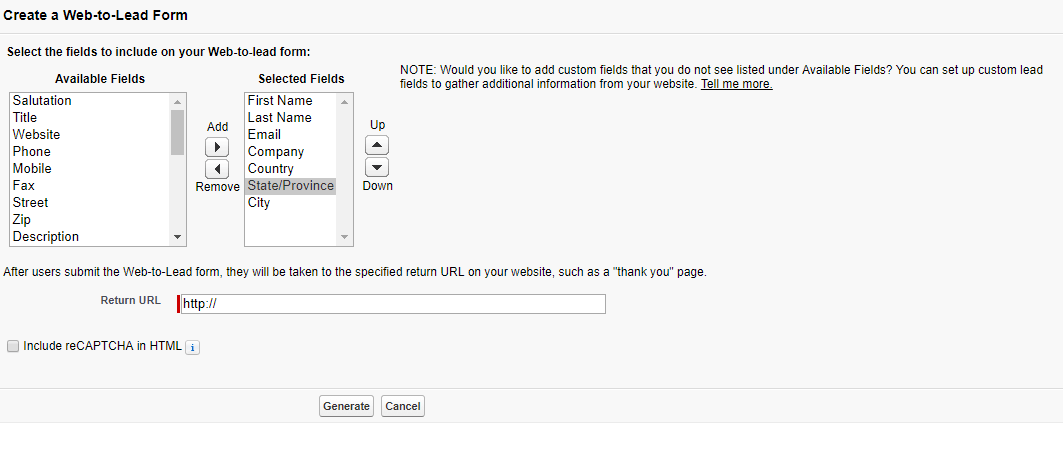
So once the code generated, copy the code and click on finish. So now paste the code in text editors like notepad and save the file with .HTML.
step - 3 :
So now the save HMTL file through any browser and fill the fields and finally click on Submit.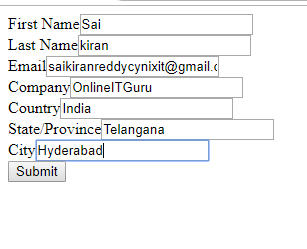
So now, its time to check the Lead
Click on the lead object search for the newly created lead. if you are created the lead, you are Inn as shown below