
In salesforce tutorial, we will now discuss about salesforce relationships. So now, let us start with
what is a relationship?
A relationship is a connection between the different objects in each other to replicate the real-life scenario (or) a business process.
Salesforce supports three types of relationships. These are
One- Many
Many - Many
One-one.
So let us discuss one by one in detailed.
One- Many :
In this kind of relationship, one object has a relationship with many other objects. It just like a parent has many children. Here all relationship must be established w.r.t child objects. In simple words, a child object tells itself their parent. Salesforce supports One-Many relationship in two ways:
lookup relationship
Master-detail relationship
so now, let us discuss more regarding this elaborately:
Look up the relationship:
In this relationship, the child object represents the parent. Here, the parent object does not have a dependent relationship with the child object. i.e if the user/ developer deletes the parent object, the child object still exists. Moreover, the relationship will always be created on the child. Besides, it allows a maximum of 40 lookup child relationships. And it has a no impact on deletion. So now let us create a relationship between the Contact and the load process. So follow the step to establish the relationship
step -1 :
Select the application and click on the object that you want to create a relationship. Now from the quick menu access, click on the View Fields and click on NEW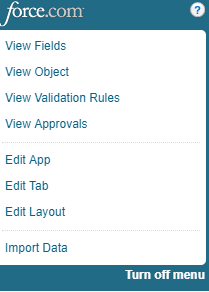
Step - 2:
Select the Lookup relationship from the data type list and click on Next.
Step - 3 :
since we have gone through from Bank Processes the child object will be Bank processes by default. And we need to select the Parent object ( Contact). So in this step, we need to relate this object to Accounts. So from the objects click on Contact and Click on Next.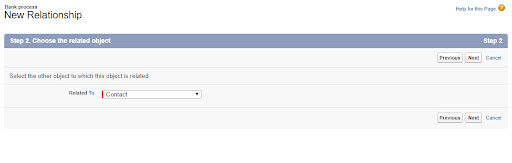
step - 4 :
in this step, give the field label as contact and click on Next.
Step - 5 :
Here, like in other sections we provide the visibility permission to the end user. Now I would like to give the visibility permissions to all the people and click on Next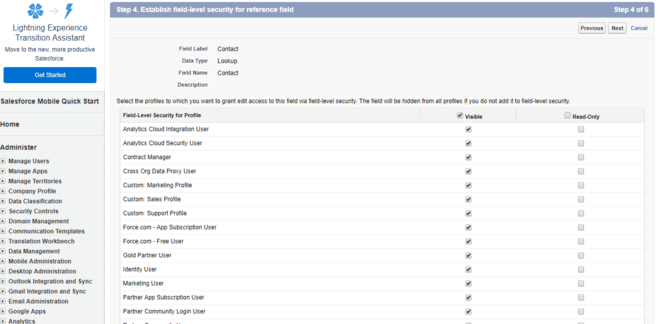
step - 6 :
Click on Next.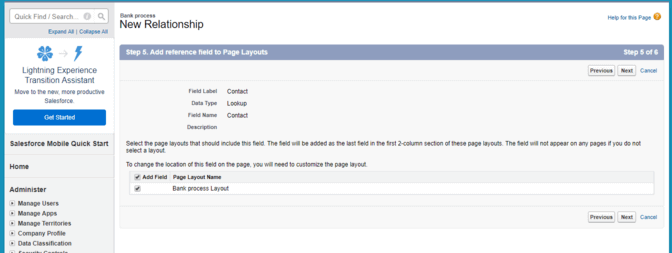
Step - 7 :
click Save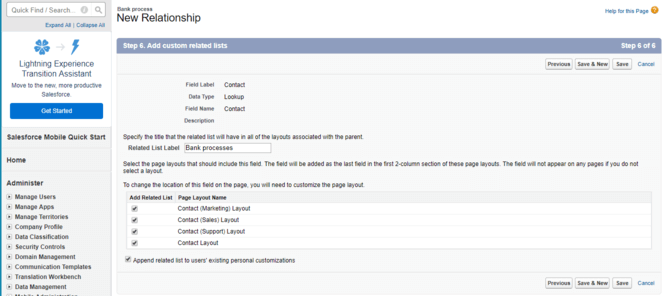
Step - 8 :
Finally, you will be entering into the following Screen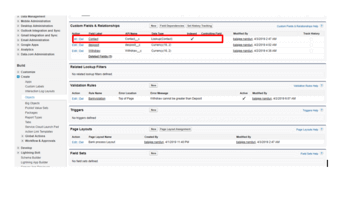
So if you have observed the above screenshot, besides contact we can observe the lookup. Since now we do the operations in Banking process, we can say that it is the child of Contacts.
And if you succeed in all those steps, then you are well done in establishing the Lookup relationship. I hope you people were in these steps . and if you are lagged anywhere feel free to catch me at Salesforce Online Education.
And before going further, we will now discuss,
look up disadvantages:
It does not have any strong bonding
If the parent record is deleted, no impact will be found in the child record
so now let's move forward in One - many relationships.
Master-detail relationship:
This relationship is unlike the lookup relationship. Here, there is a strong bonding parent as well as the child. So in this case, if the parent record deleted, the child record will automatically get deleted. Moreover, for each object, it allows a master child relationship. Furthermore, these records do not have any ownership. But it takes the parent owner as its owner. Moreover, we can create the relationship if the object does not have any data. if it does not have Besides Rollup summary (RUS) fields are also created on master records. So now let me explain you this relationship between the account and the bank process.
So to create this relationship, follow the steps shown below.
step- 1 :
In your application ( Banking), select the quick view section. And from there click on fields and then select NEW.
Step - 2:
In the step select the data type as master Detailed and then click on Next.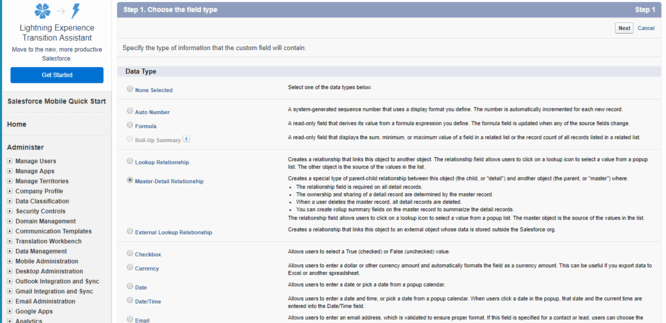
step - 3:
In this step, Select the parent object as Account and click on Next.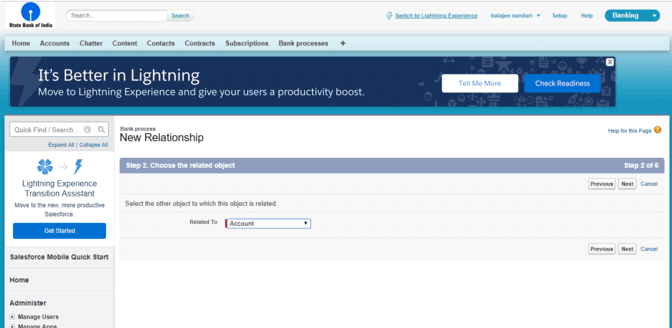
Step- 4 :
Copy the Field label to the Field name. Besides select the access level of the parent as well as the child records. And as of now, I would like to provide the Read-only access to the fields. It means it allows the user to have the Read-only access on the master table. But have edit permission for the Child records. And finally, click on Next.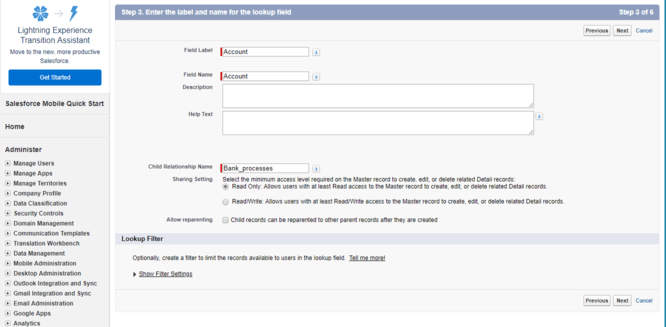
Step - 5 :
click Next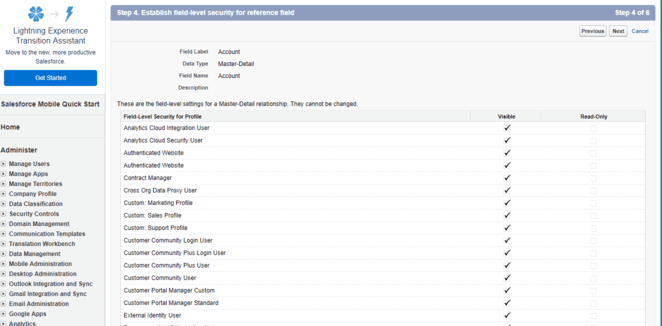
step- 6 :
click Next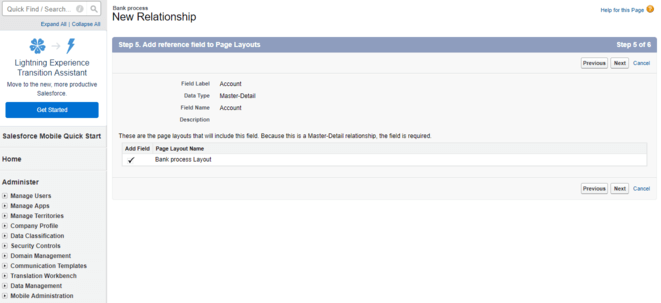
Step - 7 :
Click on save.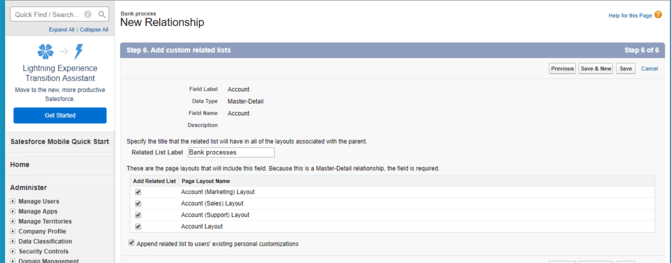
Step - 8 :
And at this place you will be finding an error like this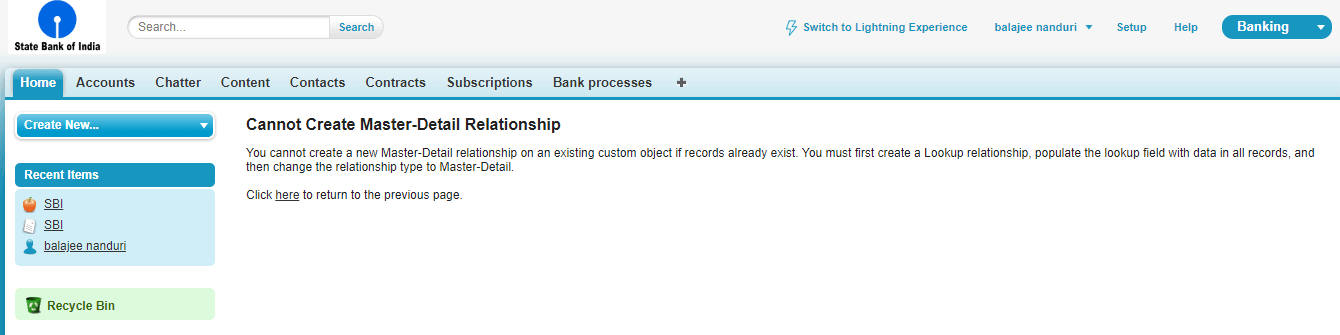
So have think why we have struck up with this problem?
If you are careful with the text that I have given above, you people would definitely get an answer. Anyway, I will explain to you the answer.
As said you earlier, it accepts two objects. Since we have already created two objects, it does not allow us to create further. So at this time, we have 3 options
option -1:
Delete all the objects if is not important. So that we can create the relationship. Since here our application is a test .we can remove all the previously created objects. And as of now, I'm opting this option.
But this method is suggested for the freshers, but we cannot perform the same in real time scenarios. So in real time, we need to opt one of the following methods
Option - 2 :
Take a back up of all the records and save it on your local disk. ( you can use any data loader tools)
Delete the records from the organization
Create a Master detail relationship and insert the records into the Org.
Option - 3 :
Create a lookup
Convert the look up to master details ( But you must follow the steps in option -2 )
Note :
You can expect the question of look up and Master-detail relationship in Salesforce administrator certification.
So let us differentiate these two Relationships.
| Look up | Master-Detail |
| Each object allows 25 – 40 lookup fields | Each object allows 2 master detailed relationships |
| Fields are optional | Fields are mandatory |
| The object has an owner fields | The object does not have an owner field |
| The child has independent sharing and security | The child is always dependent on the parent. i.e if the parent record has deleted , child record gets deleted automatically. |
| It does not contain the roll – up summary fields | It contains the roll-up summary fields |
So now let's move to
What is the roll-up summary?
In a related list, a roll-up summary determines the values of the related records. Besides, we can create a roll-up summary to display the values of the master record based on the field values in a related record. Moreover, to implement this in your application, one should remember the record must be related to MDR.
So now we will see
How to implement the Roll up summary?
To implement the roll-up summary people should remember that, this option will be visible in data types on the Master fields. So switch the master object ( Account) and follow the steps given below.
Step - 1 :
On the Master ( Account), switch to a quick view. and from the View fields, click on NEW.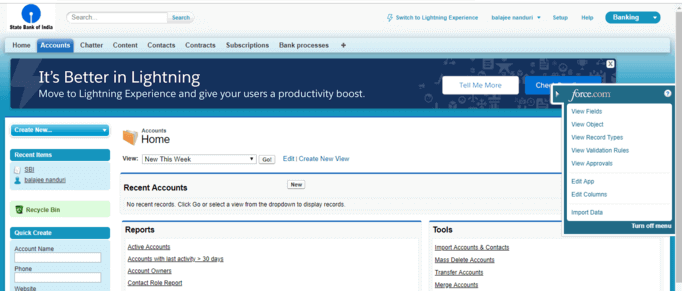
Step - 2 :
Select the data types as Roll-up summary and click on Next.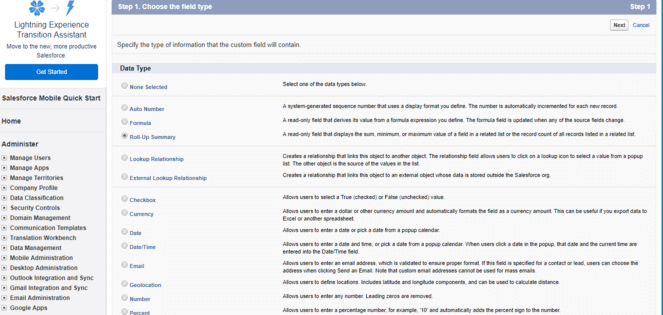
Step - 3 :
Give the field label and Field name. (Both must be same) and click on NEXT.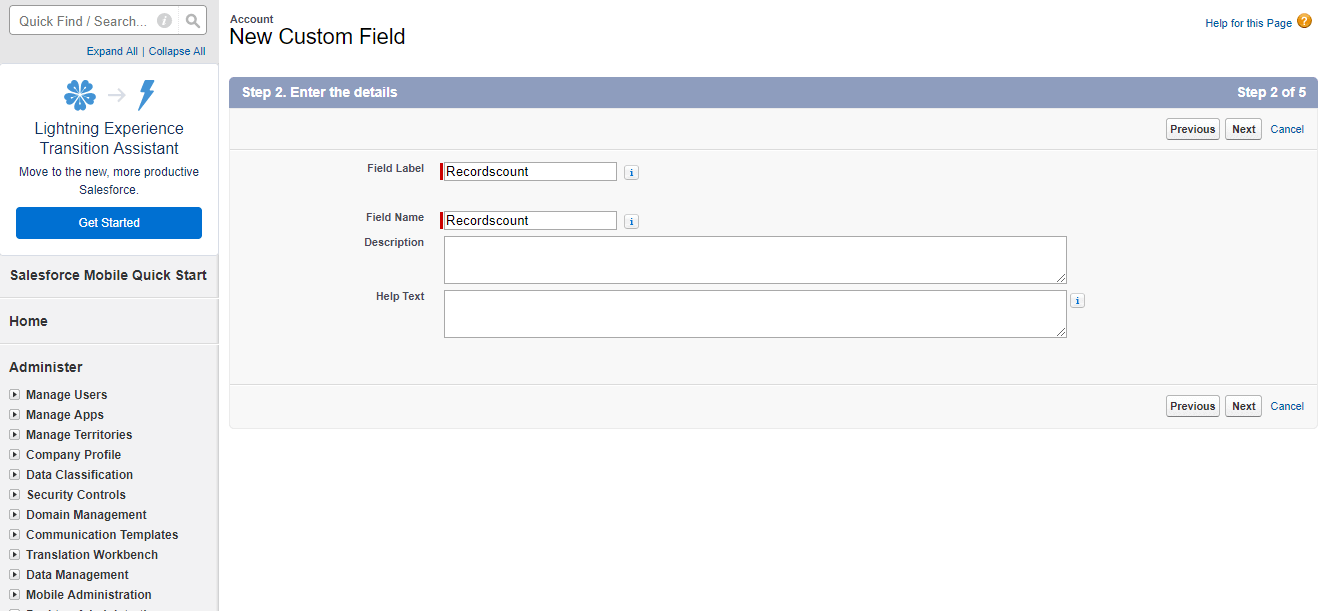
Step - 4 :
Since the master object is Account, so we must select the child account from the drop-down list. since we know the child object as Bank processes. And select the Roll - up type. Besides this allows to you select the roll-up types for all the records, (or) allows you to select the roll type for each field. But as of now, I would like to select the roll-up type for all the types. and I would like to set up the roll-up types as Count and select NEXT.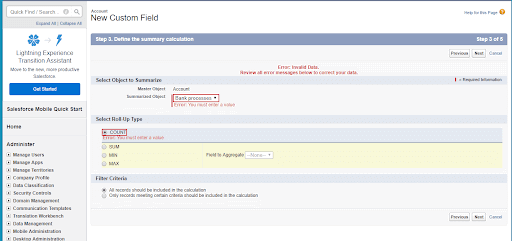
Step - 7 :
In this step, assign the visibility permission of the user. Here I would like to make the visibility to all the people and click on Next.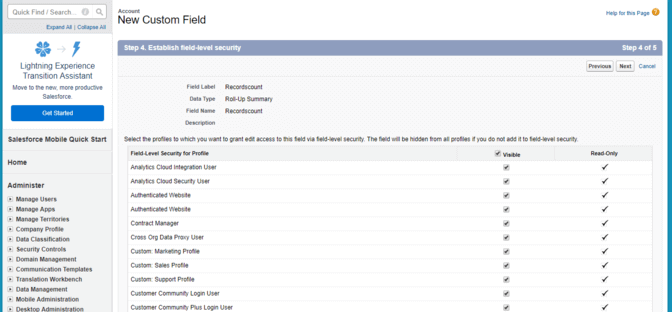
step - 8 :
Click Next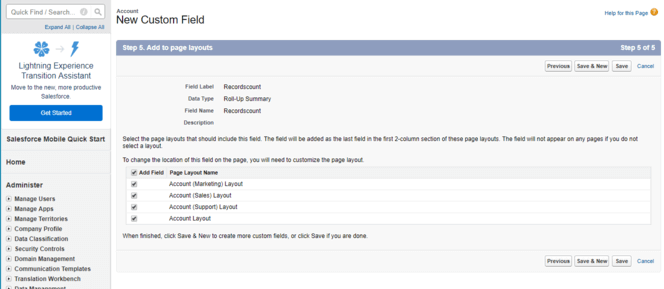
Step - 9 :
And you can check field in the Account objects as shown below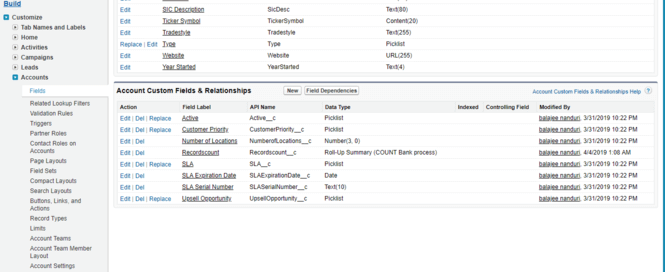
So we have successfully created the Roll up a summary. And we can check the field count at the Bank process.
So now we will move further in the salesforce tutorial.
Many - Many Relationships :
Till now, what we have seen in one- one relationship. This is acceptable in some cases. But there are some cases, where one option needs to interrelate with one another.
For an example consider a case of JOB posting. A job usually consists of several kinds of posts. It may be of the developer, administrator, team leader, manager and so on. And the HR usually posts this vacancy in multiple web sites like Naukri, Monster, indeed, etc. It means a single job vacancy will be published by different job posting websites and likewise, one job portal will post all the different jobs of the company. So, in this case, each object has a relationship with another. And this is the best example of many -many relationships. And it allows you to create a Master - child relationship between the objects.
.So let us apply the same thing practically.
Step - 1 :
As said above, we need to create three fields named positions and Employment websites
And you can create this as explained in the Salesforce Objects. So soon after that, your account will be as visible as shown below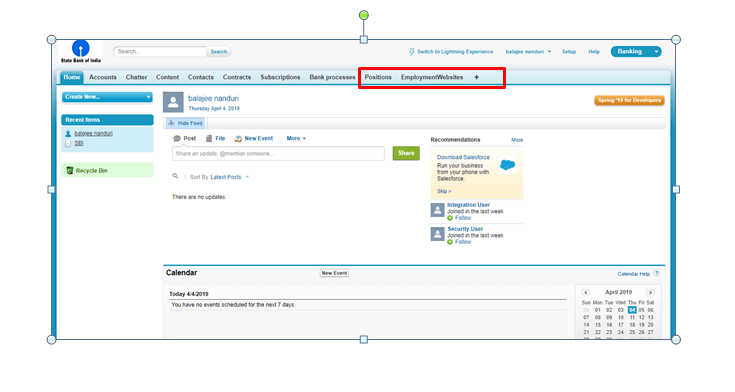
step - 2 :
So soon after the object's creation, we must create the add records in those objects. And you can do this as shown below by clicking NEW.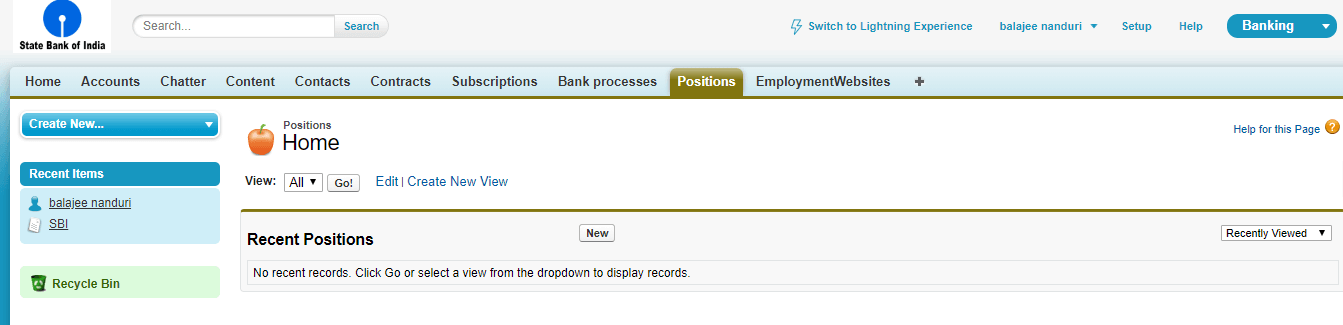
So soon after this, your screen will be visible as follows: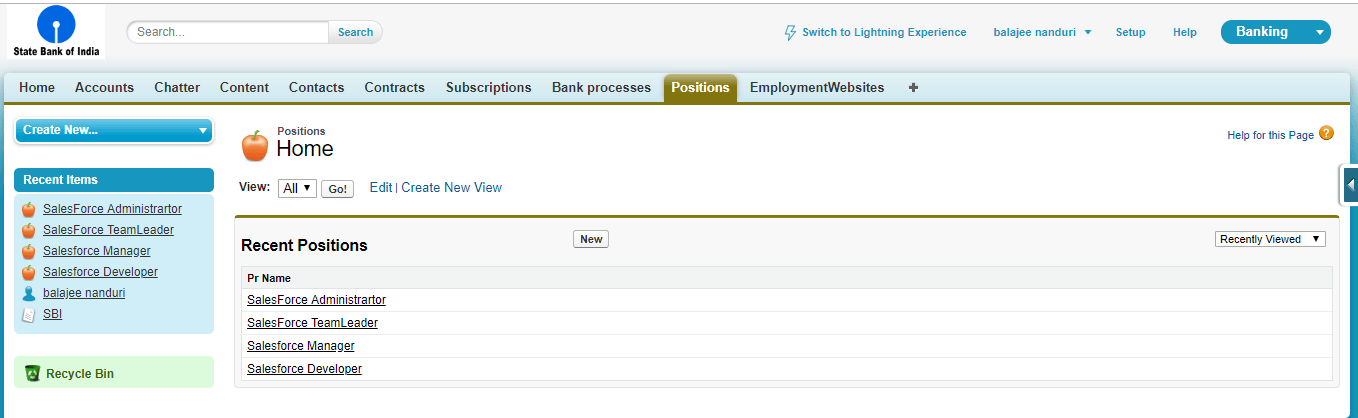
Step- 3 :
And you can perform the same in employment Websites too.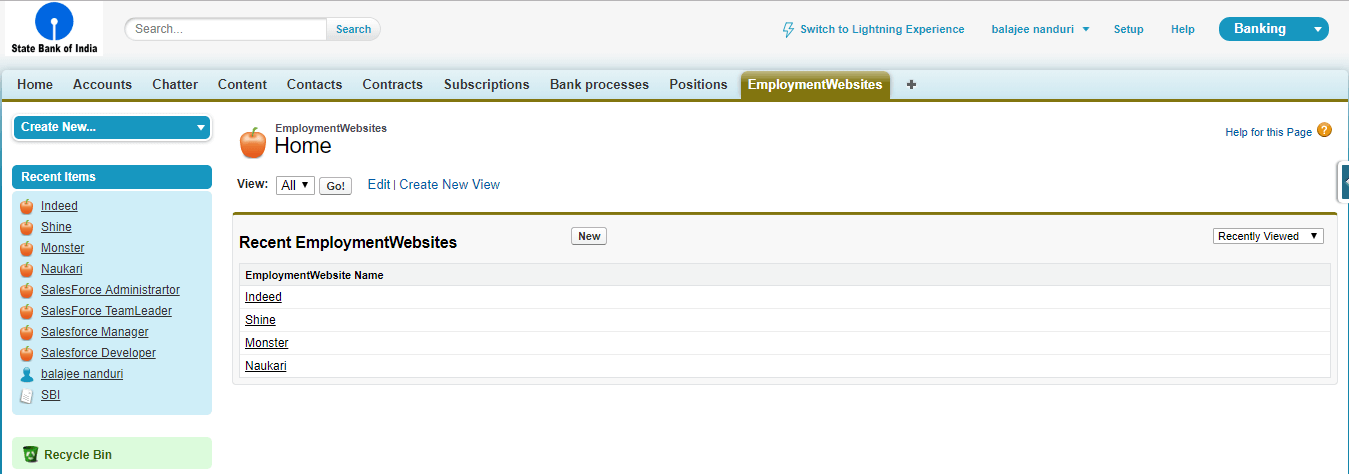
So now need to connect these two objects. And we can do this as follows
It is similar to the tab creation. Since a connection does not require a tab to be created, we do not need to check the launch custom tab from the object creation objects. And the rest is similar to other tab creation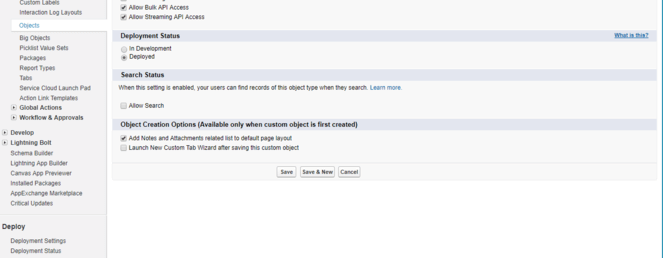
So a junction object has been created as shown below
So since a junction has been created, now its time to create a relationship between them. And we can create by clicking on NEW from the Custom Fields and Relationships.
step - 4 :
Select the Data type as Master-detail relationship and select the relationship to the positions. Besides, enable the child records can be re-parented! and click on Next.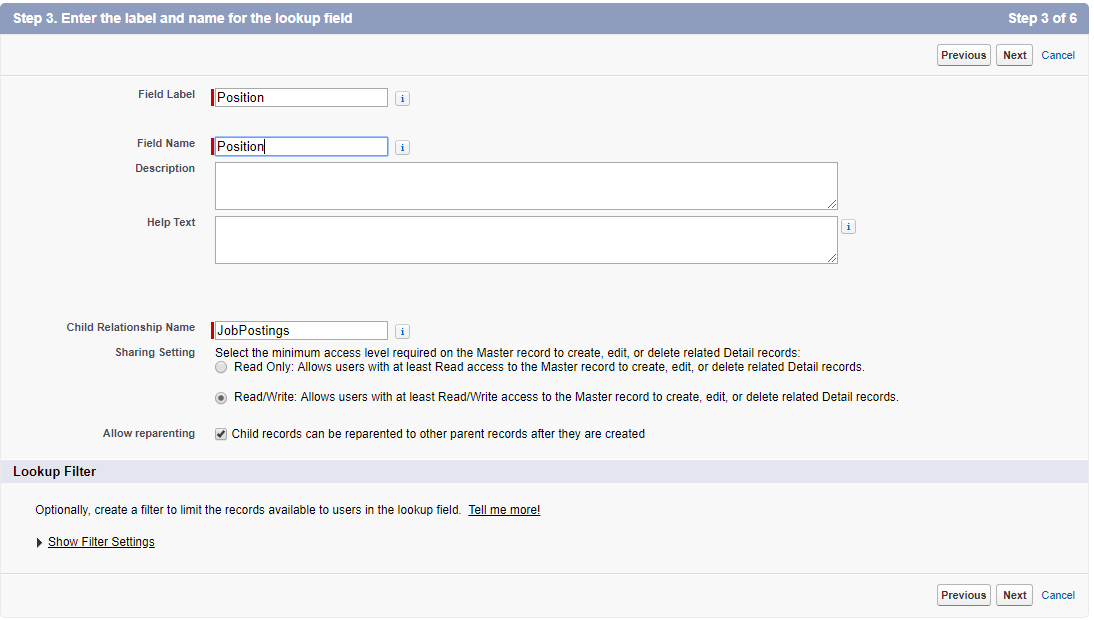
step - 5 :
Click on Next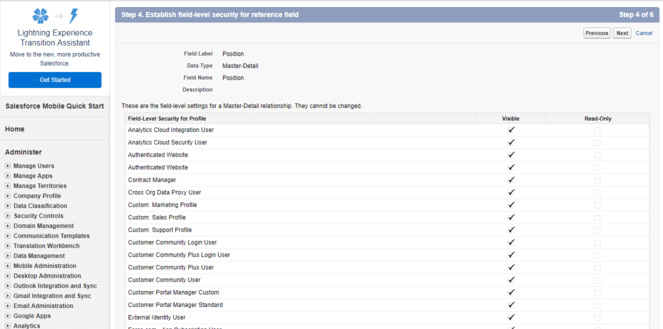
step - 6 :
Click on Next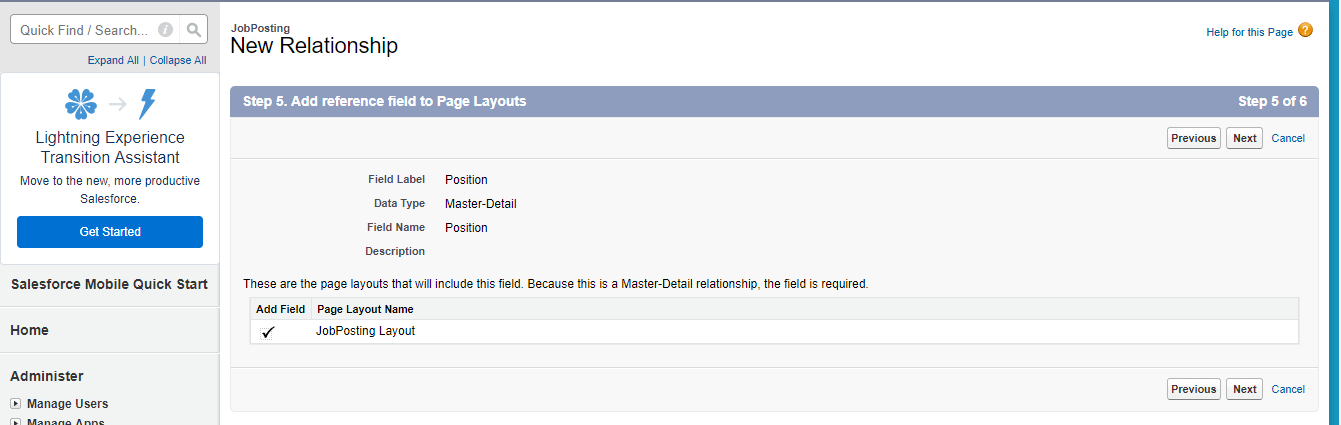
step - 7 :
click on save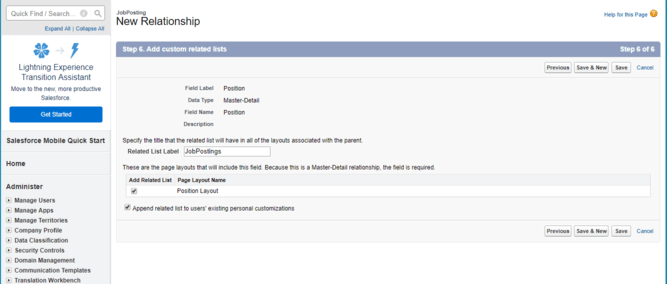
Similarly, Create another object with the name for Employment Website. Soon after the creation, you will be entering into the following screen.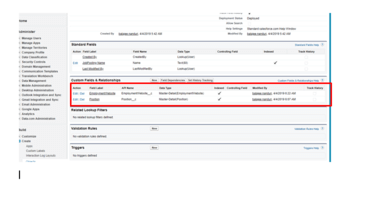
So till now created a junction between the object. So we will create fields and then check the relationship between them. Follow the steps below to establish the relationship between the objects.
step - 1 :
click on Positions objects and select any one of the positions that we have given previously. As of now, for example, I would like to give Salesforce Administrator for the job posting.
Step - 2 :
Click on Job posting (SalesForce Administrator) and navigate to the job posting and click on New Job posting 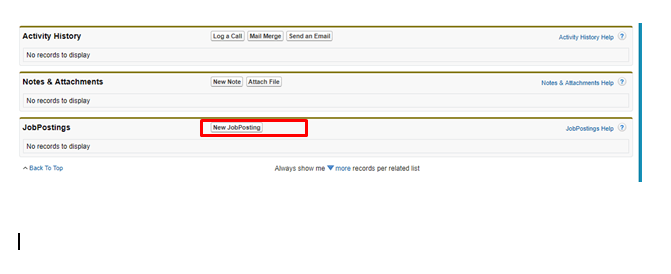
step - 3 :
Since we have gone through the position object, the position will be taken default. And we must provide any meaningful name for the job posting name and the Employment website and click on SAVE and NEW.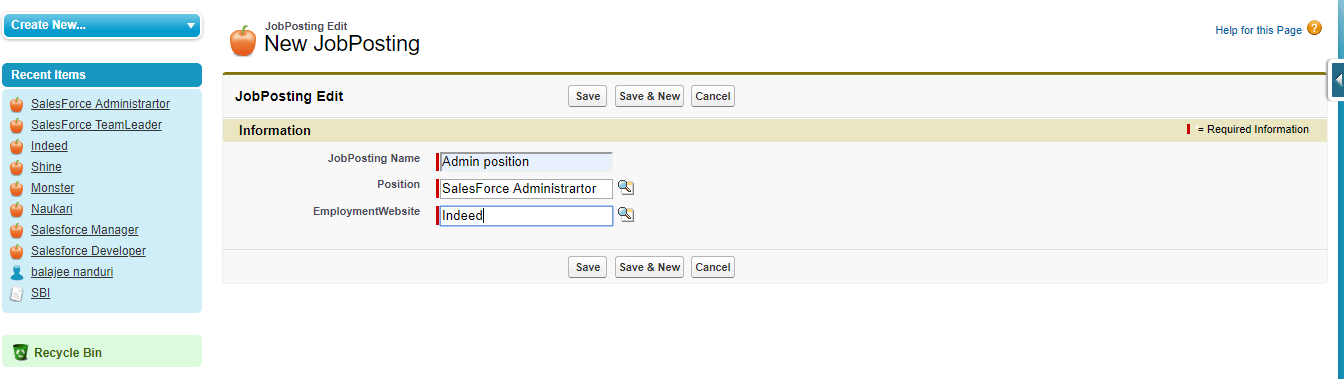
Likewise, post the same vacancy in other job posting too.
step - 4 :
Visit Employment Website and select on the website (for an instance Naukri) and post different vacancies that were given in the Position object. And if you navigate to Job posting column in the position object you will be finding a position by default. It indicates, that a filed has been already in connection with this object. This can be found as shown below.
step - 5 :
And you can check the created position from Position object too.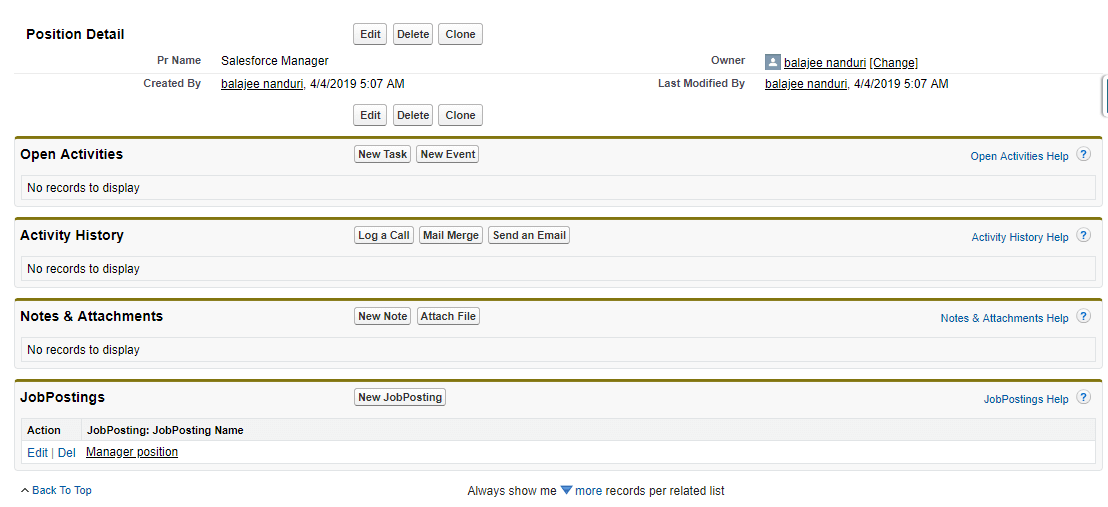
So likewise, we can establish a many - many relationships between objects. So now let's move on to the
Hierarchical Relationship:
It is a special lookup object available for the user object. It is used to associate one user with another. These are usually based on super ordination and subordination. Here the super ordinate term represents the class (or) the whole and the subordinate term represents its members (or) parts. And you can implement this as sown below:
step - 1 :
From the application ( banking) click on Set up. From the left search bar click on users. So once you have typed, you will be finding Fields under USERS.So once clicked, you will be finding NEW under user custom fields.
step - 2 :
Here you need to select the data types as Hierarchical Relationship and click on NEXT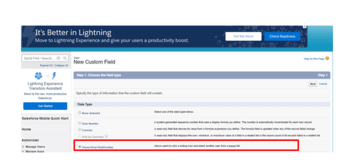
step - 3 :
Provide the field label and the Field name as Manager. Besides, give the child relationship as My team and click on Next.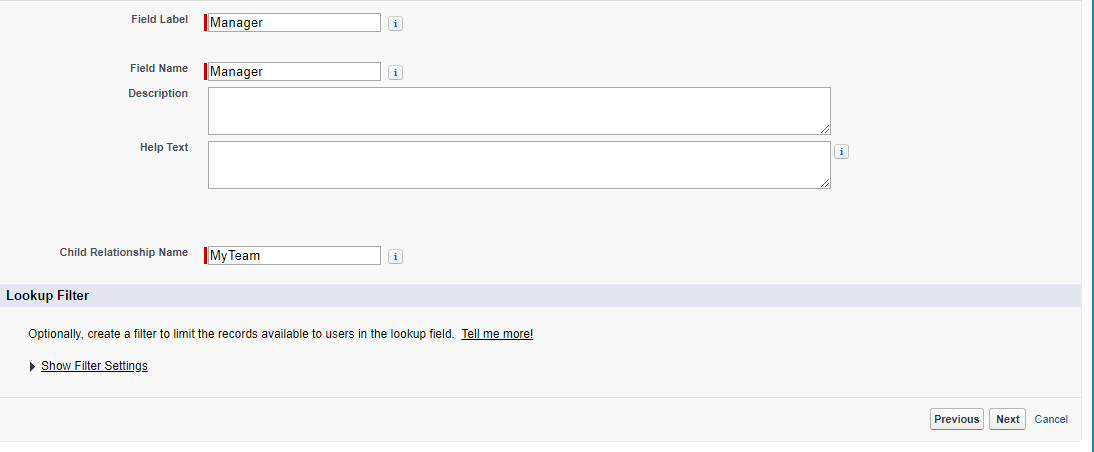
Step - 4 :
Select the visibility permission of the user. As of now, I would like to make visibility for all the people and click on NEXT.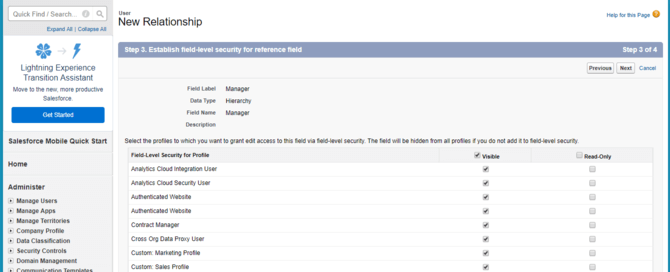
step - 5 :
Click Save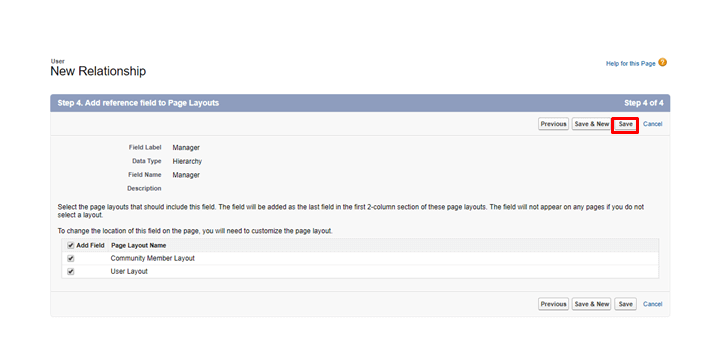
step - 6 :
And finally, you will be finding the field as shown below.
So like this, you can create relationships. Click the link to know more on relationships in salesforce