
So till now, we have created various rules manually. But in the real-time process, this seems a repeated task. So in some cases, it better to automate those processes. And in order to automate those process, we use the workflow process.
What is the workflow Rule?
Workflow is an automated mechanism, through which a record is created (or) edited). Through this concept without any code, we can create the 4 action types and can automate the business. Moreover, we can automate the business in the following ways
1)We can create a task for someone
2)We can send the automated e-mail
3) we can update the database with any field
4) we can send OBM to the external platform
So based on the organization process, workday automates the following action types
Task:
It assigns a new task to the user, role (or) the record owner. So here, we can assign the follow-up task when the case is updated.
E-mail Alerts:
It usually sends an e-mail to one (or) more recipient So for an instance, sales department, get notified, whenever, there is a change in sales.
Field updates:
It updates the field values on the record. For instance, it can change the owner field on the contract ( three days) before it gets expired.
Outbound Messages:
It sends a secure and configurable API message(XML format) to the designated listener. And this can be done only with the help of workflow rules.
What Workflow rules consist of?
1)Criteria that causes the workflow rule to run
2)intermediate actions that execute, when the record matches the criteria.
3)Time-dependent actions that queue, when the record matches the particular criteria and execute according to the time triggers.
So now will see the workflow implementation in a practical way.
step - 1 :
To create the Workflow rules, we will now navigate to the banking application and click on set up and search for the workflow rules.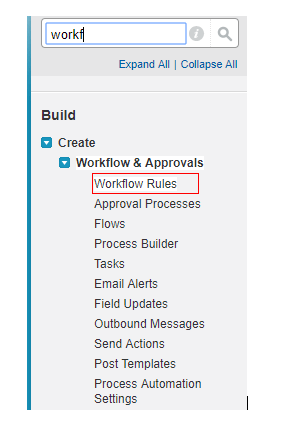
step -2 :
Click on Continue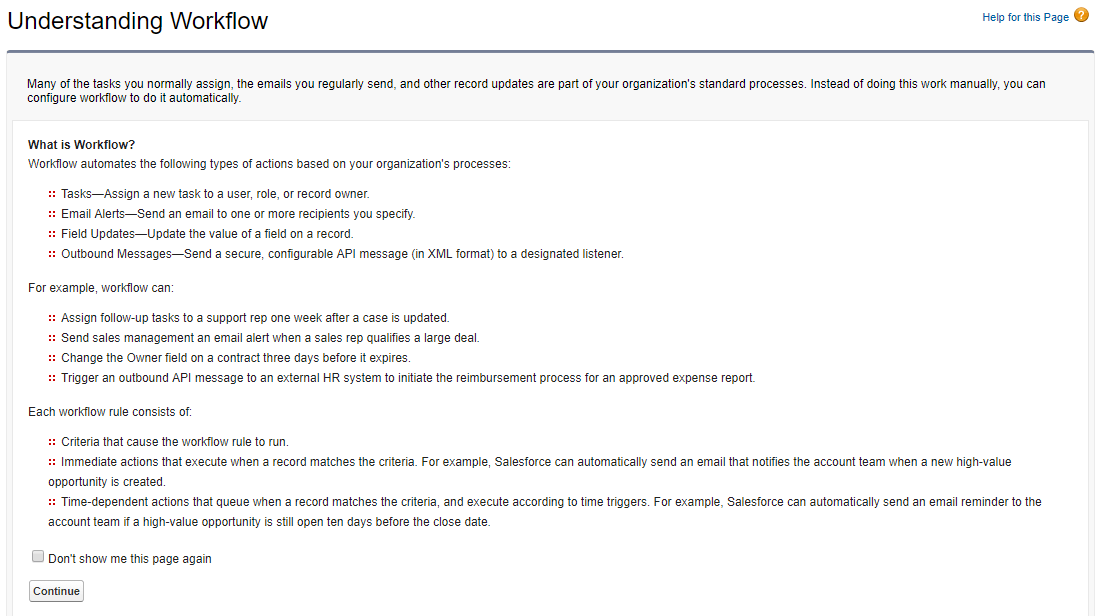
step - 3 :
Click on NEW Rule.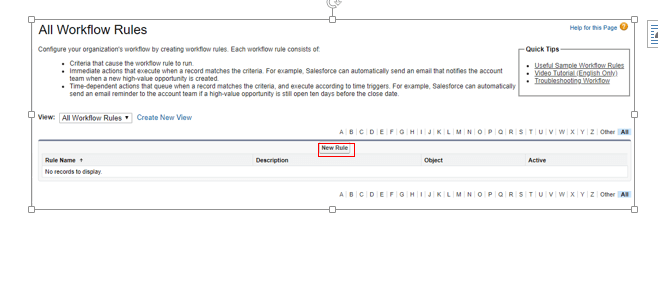
step - 4 :
Select the object that you want to create the rule. (Now, I would like to select the Bank process ) and click on Next.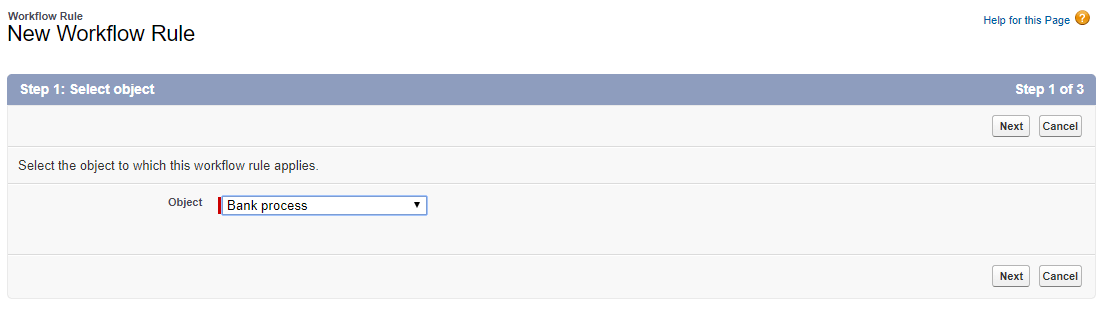
step - 5 :
Here you need to provide any workflow name (I would like to provide workflow test rule).
So you will be finding the three options for evaluation criteria as shown below.
So let's discuss each topic in detailed.
created :
Evaluates the criteria each time a record is created
Created and every time edited
Evaluate the rule criteria each time a record is created (or) updated. But this cannot add the time-dependent actions
created any time it's edited to subsequently meet criteria:
a)Evaluates the criteria each time, a record is created (or) updated
- b) In the new record creation, it runs the rule if the rule criteria are met.
c)For an updated record, rule runs if the record changed from not meeting the criteria to the record meeting the criteria.
d)If the record edits do not match the rule criteria, the rule will not run
For instance, I would like to evaluate with created option
Rule criteria:
Note:
If you observe the rule criteria drop down, you will be finding only the Account and Bank process and the rest were hidden. Do you why?
Reason:
since we have selected the bank process object, which is related to Account objects via Master detailed relationship, Only those two options were visible.
So give some criteria as per your requirement ( you can add one (or) more) and you can add the filter logic and then click on SAVE.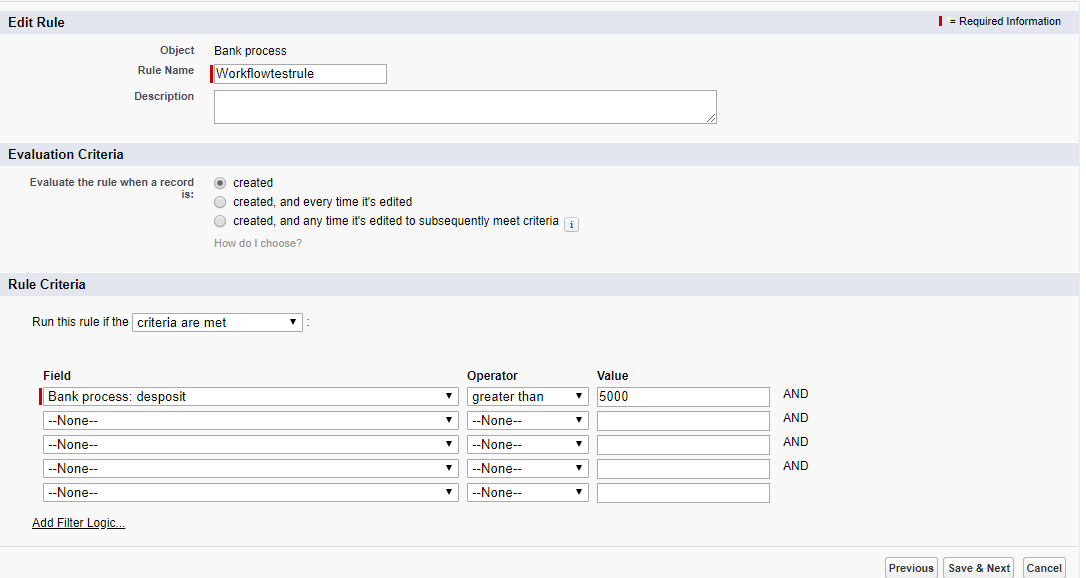
So we have successfully created criteria for the rule creation. And its time to define the workflow actions. initially, we move on with Immediate workflow actions.
So in the immediate workflow actions, select any action ( I would like to select the e-mail ). i.e whenever the filed meets the mentioned criteria, a rule must be triggered! And file the details as shown below and click on SAVE.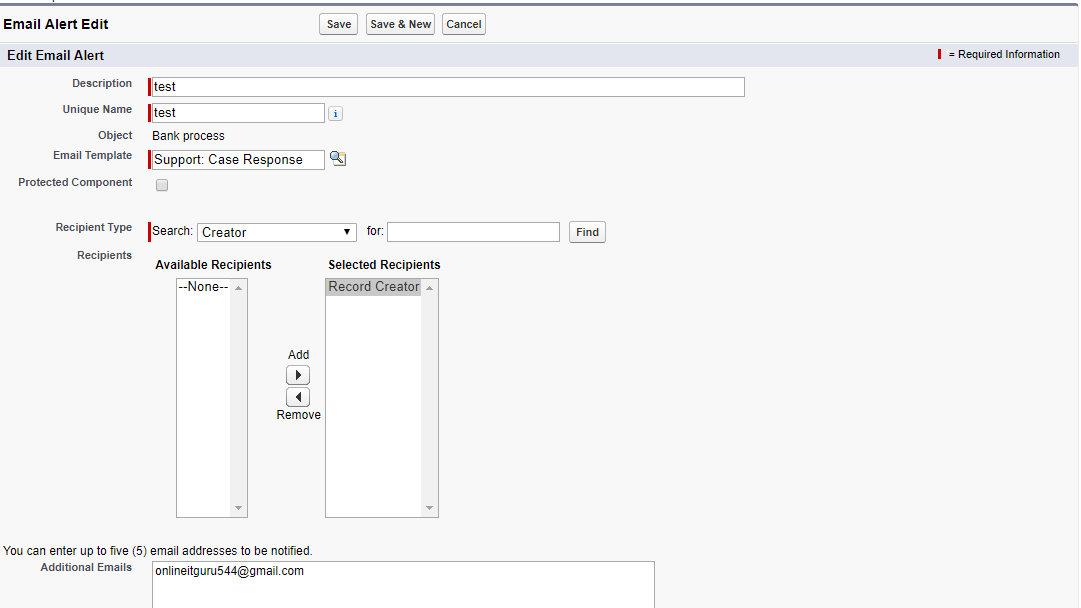
So once you have saved, you will be entering into the following screen
So likewise, you can add any work that was mentioned in the drop down. Moreover, this environment allows you to add the previously created workflows ( Select existing workflow) in other objects as well.
Since, we have created immediate triggers, its time to define the time-dependent workflows. But to create the time-dependent workflows, we need to initially define the time triggers. So now let's move on to the time trigger creations. In order to do this, in your workflow created rule(workflow test rule), click on Add time trigger.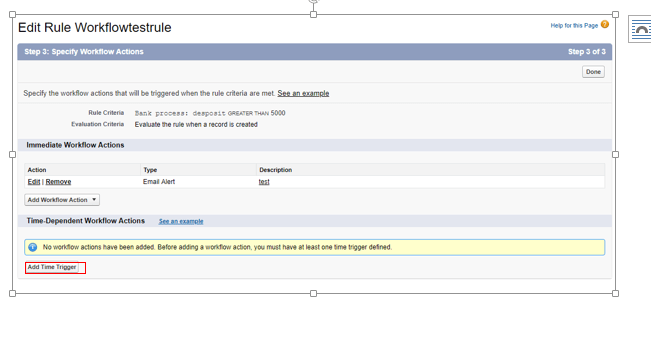
Fill the details as shown below and click on SAVE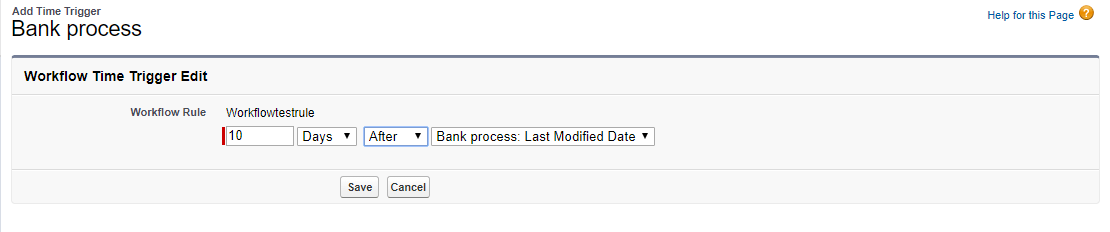
And finally, you will be entering into the following screen.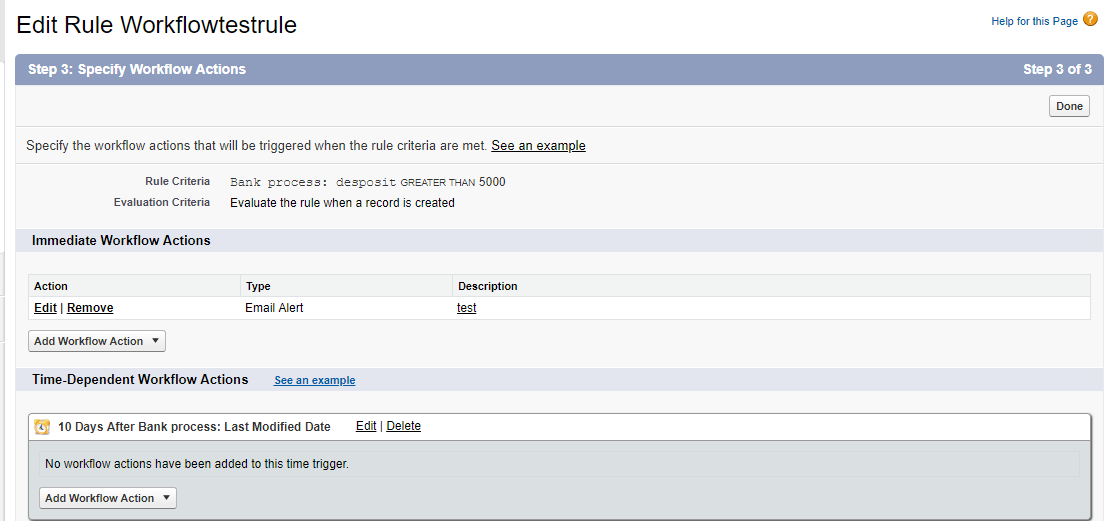
And click on Done.
Since now, even though, the rule has been created, it has not activated. so click on Activate.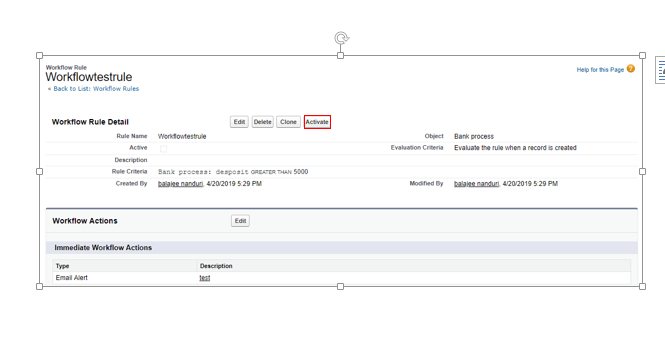
So now, select the default workflow and click on SAVE.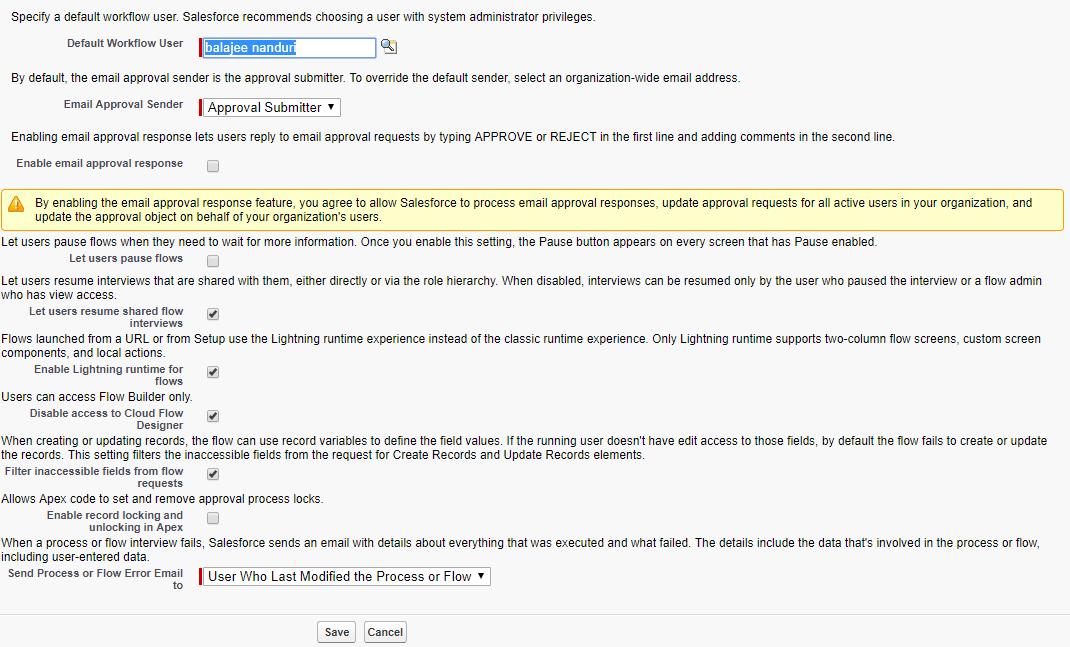
Verification:
So we have successfully created the workflow and activated. And we can easily check the rule creation in the bank process object. For this, create a record in the bank object and then SAV. And I have successfully created an e-mail as shown below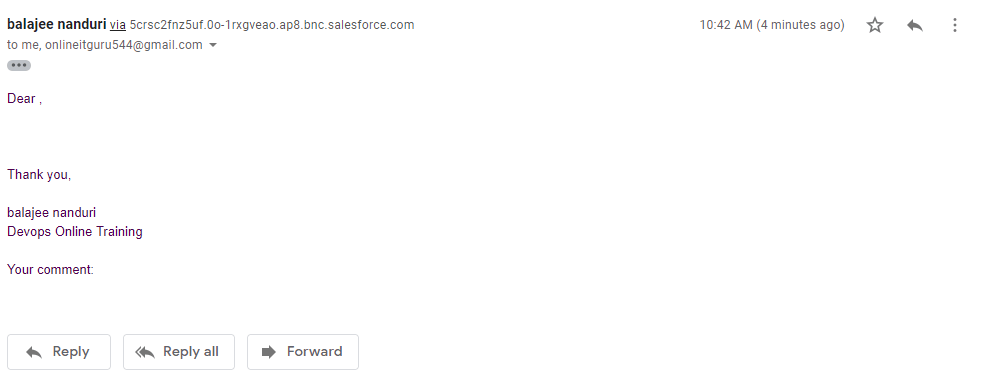
Note:
Only search for the e-mail you have received. But not think regarding the internal message. Because it completely depends on the template that you have chosen and the internal message that you have given. And if you people don't receive it feel free to contact Onlineitguru
Click the link to know more on the Salesforce workflow
Drawbacks of Workfule:
It allows the user to create only one criteria for the rule. But in the real-time projects, one criteria is not enough to run the application. So we need an alternative to this process. Then the salesforce team has come up with the solution of process builder
What is meant by a process builder?
It is a powerful tool, that you can automate the business process. It has a simple interface, that allows you to point and click the selected fields. it allows you to set up the immediate as well as the time-based actions. And the advantage of this process builder is it allows you to create multiple criteria which are not possible in the Workflow process.
So now, we will implement it in a practical manner.
step - 1 :
in your application(Bank processes) click on Set up and search for the Process builder and click it.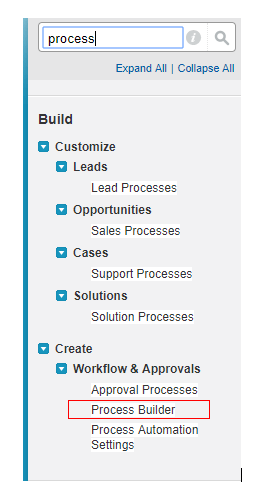
step - 2:
click on NEW.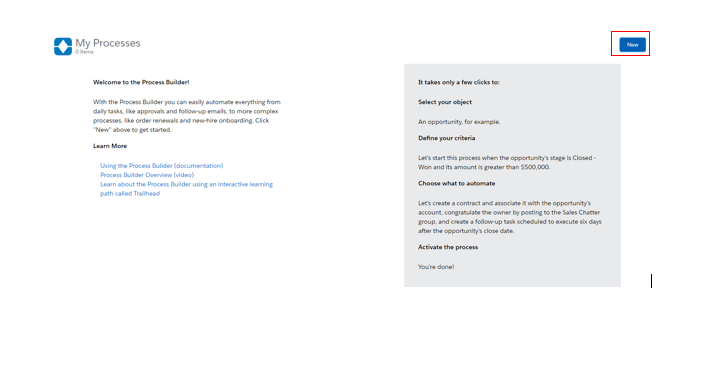
step - 3 :
Fill the details as shown below and click on SAVE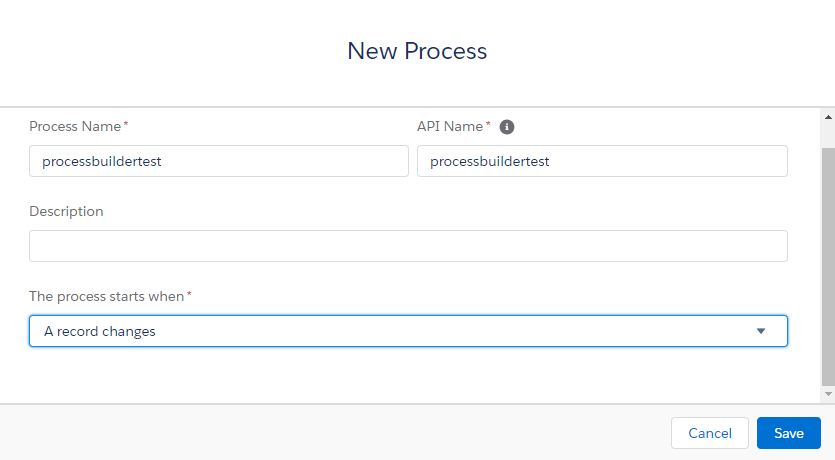
step- 4:
In this step, select the object and the criteria as shown below and click on Activate.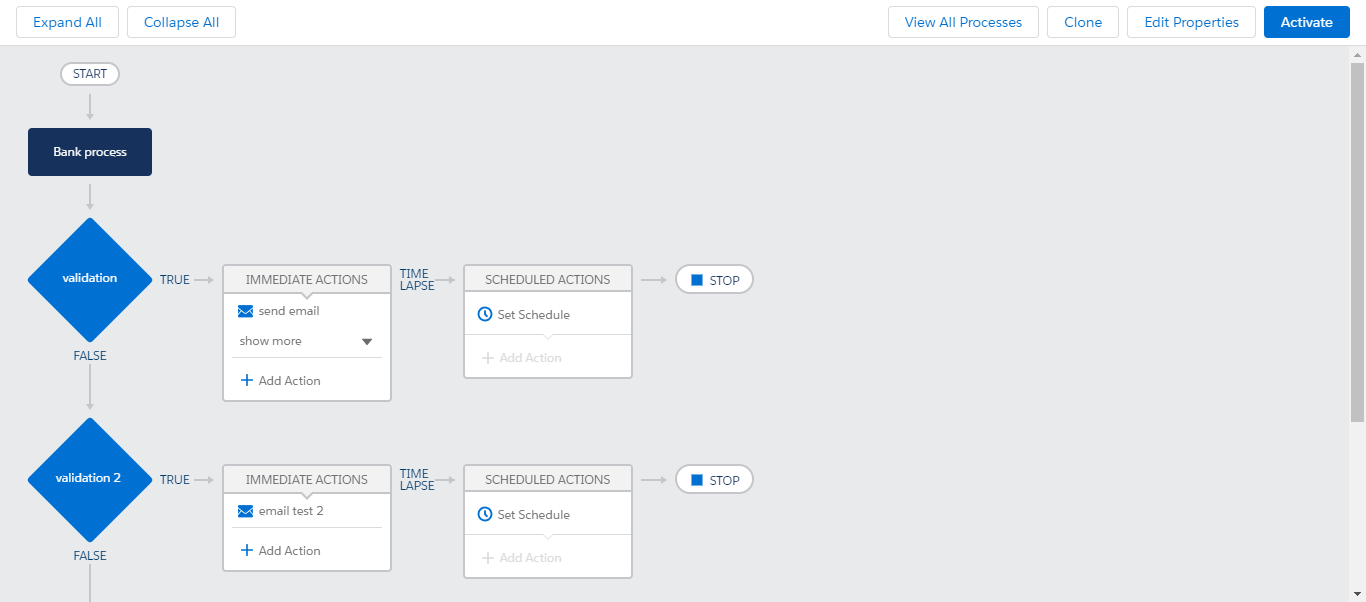
Like Workflow, we can create records and can check the email for notifications. And I have successfully received the emails for both the cases. And now it's your turn.
Note:
In process builder, we will not only receive email notifications, besides, it facilitates you multiple options like Apex, Filed update and shown.
Click the link to know more on the Salesforce process builder
Approvals:
we can create a case in many ways that we have discussed in the above topics. But in real time projects, the environment cannot allow the end user to create a case for all types of request. If it allows so, the environment is full of request. So it's a good idea to use some kind of criteria like approvals to stop the continuous flow these case creation.
For example, if the person would like to take a loan from the bank, he must submit his salary payslips to the bank manager, and the manager checks his payslips and let him know the maximum amount that he can get. So in this case, the manager is the approve. And likewise, we can keep the approvals in Salesforce too.
So let us implement this in a practical way.
step - 1 :
In your application, click on set up and search for the approval process.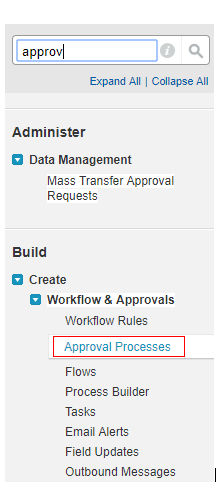
step -2:
Click on Create New Approval process. (I prefer, use Jump start wizard).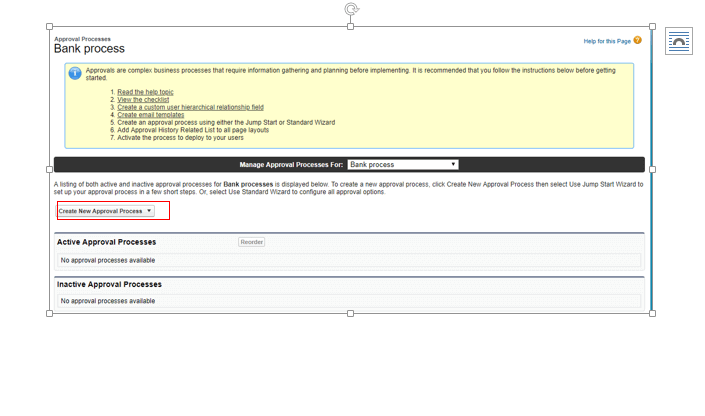
step -3:
Fill the details as shown below and click on Next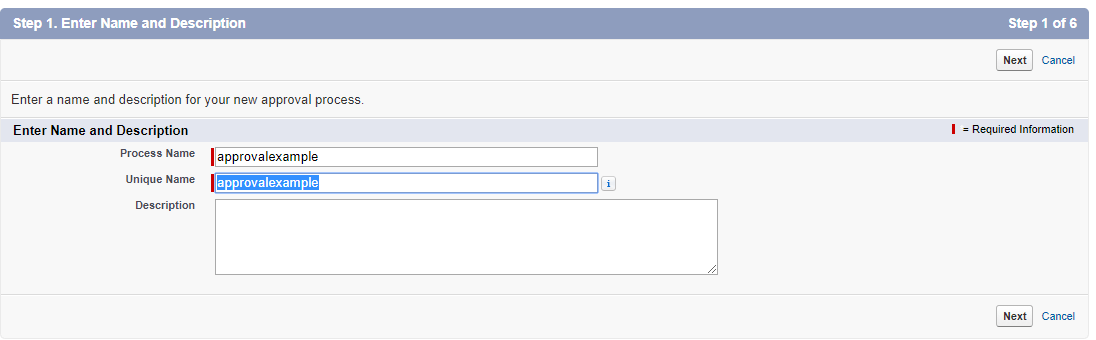
step - 4 :
Fill the details as shown below and click on Next.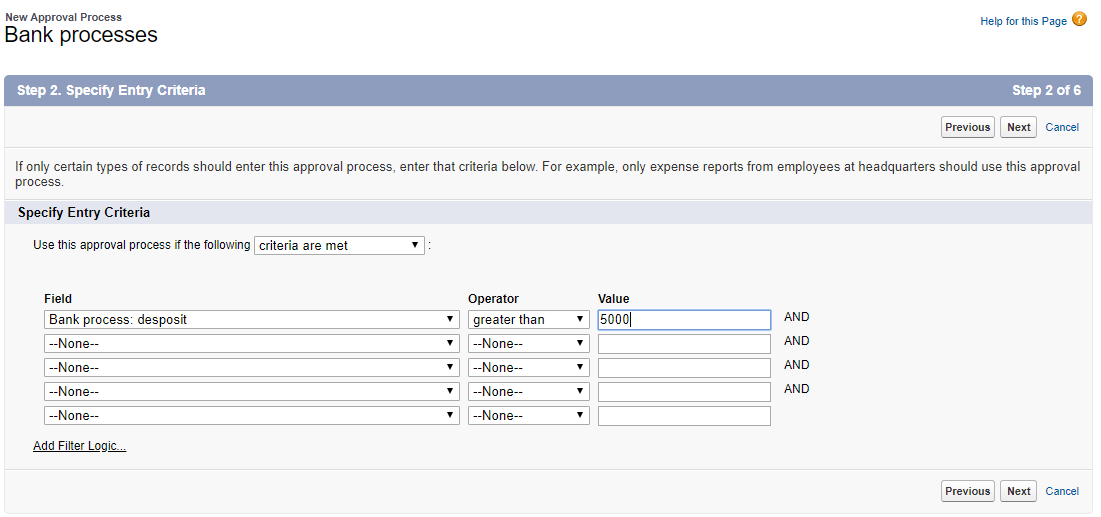
step- 5:
select the automated approval people and the Record editable properties as shown below and click on Next.
step - 6 :
Select the email template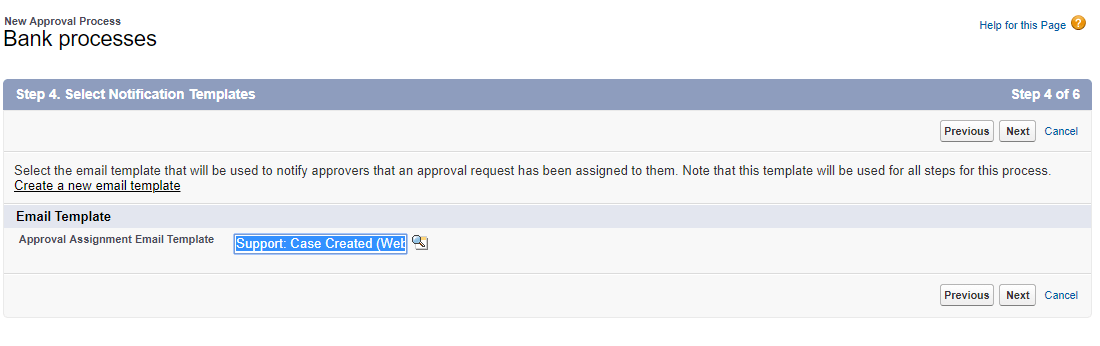
step - 7 :
Add your required fields and click Next.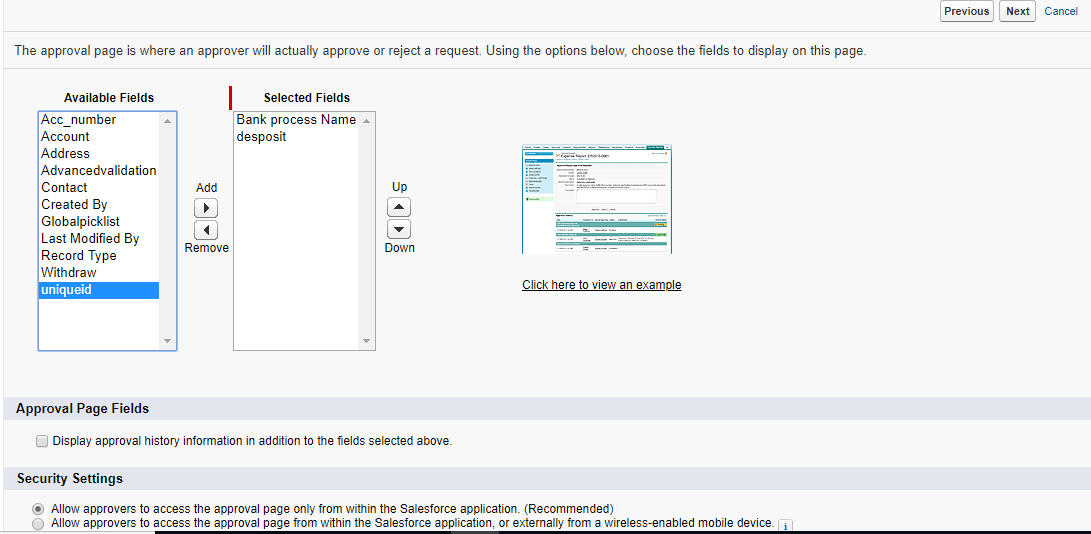
step - 8:
select the initial submitter and click on save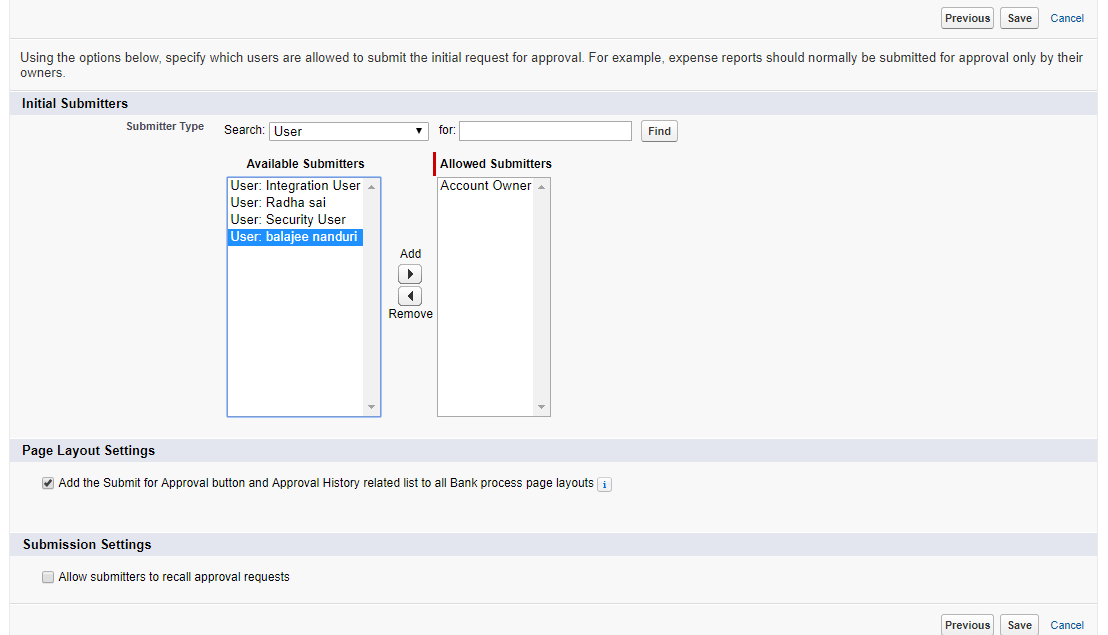
step -9:
click GO!
step -10:
provide any name!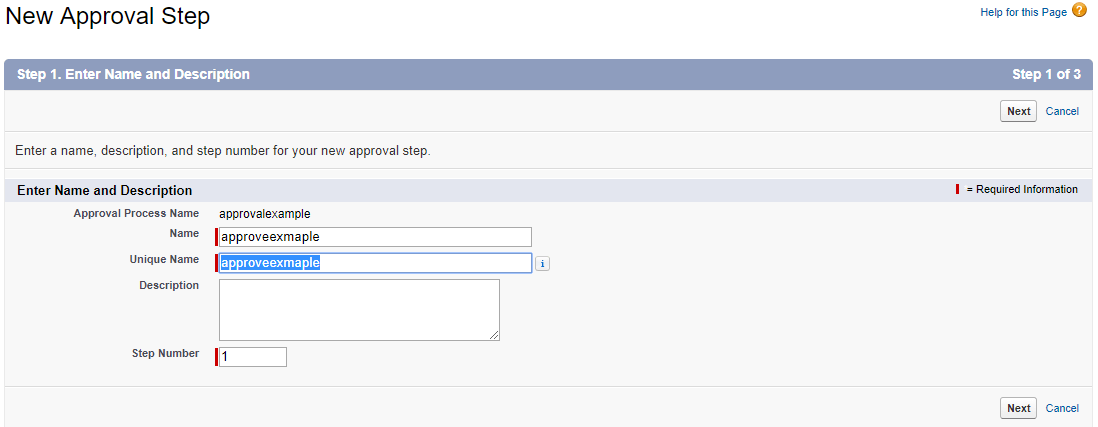
step - 11:
click Next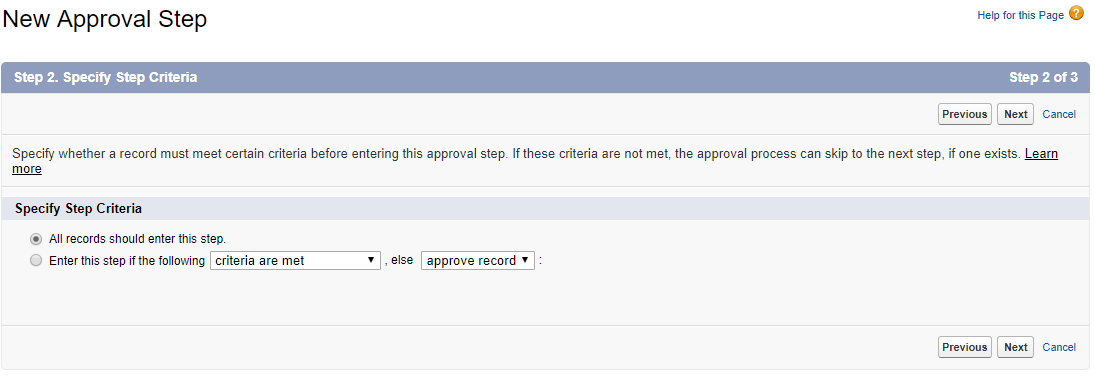
step - 12:
click on SAVE.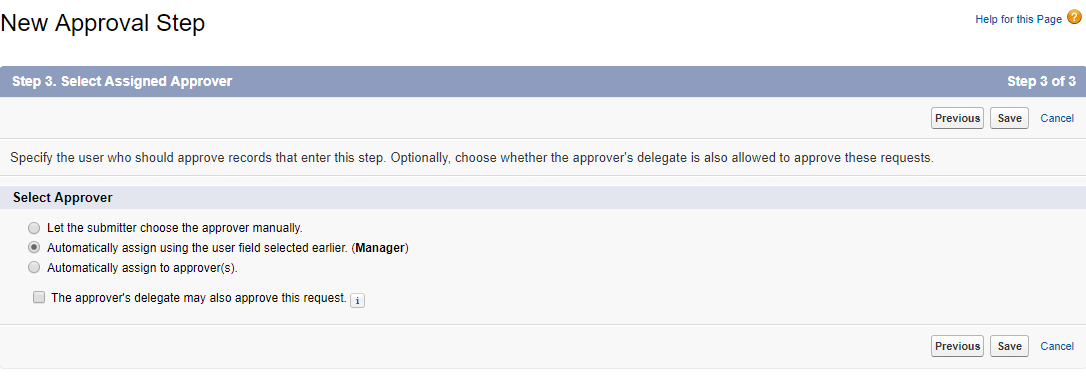
step - 13:
select the 3 rd option and click on SAVE.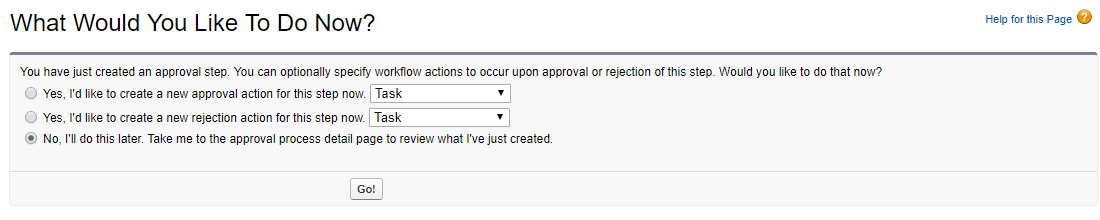
step - 14:
Make it active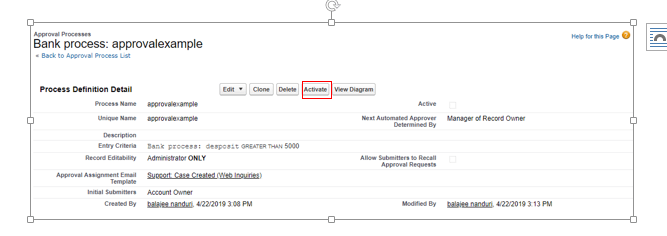
Verification:
so when an enter submits the record, it will be notified via the manager. And the manager takes the action regarding the approval (or) rejections
And I have successfully edited the records and has notified via mail
so people start creating the record and check your mail. And if you people struck up anywhere feel free to contact salesforce online course