
So till now, we have seen the theoretical definitions of various AWS services. So let us see those services practically.
Before going to see those services, we require a putty session to check those services. So lets us first install the putty session and then move to the various AWS services
What is a putty session?
Putty is a free and open-source terminal emulator, serial console and the network file transfer application. It supports several network protocols including SCP, SSH, Telnet, rlogin and the raw socket connection. Besides, it supports users to connect the serial port.
So let us see its installation
install putty on windows:
step -1 :
visit https://putty.org/ and click on here

step - 2 :
select the operating system of your machine with your requirements

step - 3 :
Once select the file from the org, download the .exe and open it(double click)
step - 4:
Click on Run

step - 5 :
then you will be entering into the following screen

EC 2 Instance:
So I hope the learners have installed the putty session in your systems. And we will now discuss the various services in AWS. So now let's login into its actual portal.
visit https://aws.amazon.com/ to login into the account.
initially, for the first time, you people need to sign up for the account. And at the time of signing up, you people need to rs.2 for the purpose of validating the account. And it will be credited to your account in 3-5 days. Moreover, this platform provides free services for 360 hours(approximately) and further, if you would like to continue, you need to pay for the usage of the resources.
So after activating and logging into your account you can see all the available services in the services account as shown below

So now let's start our session with Amazon EC2. So whenever you click on EC2, you can see the following options in the dashboard.

So initially we will launch the instances in the AWS cloud. So click on Launch instance.

step - 1:
select the image from the available images.

step - 2 :
select the instance type. For the practice purpose, I prefer the free version

step - 3 :
select the number of instance. Since we were launching only the one instance. I would like to continue with the default setting and move to the next options
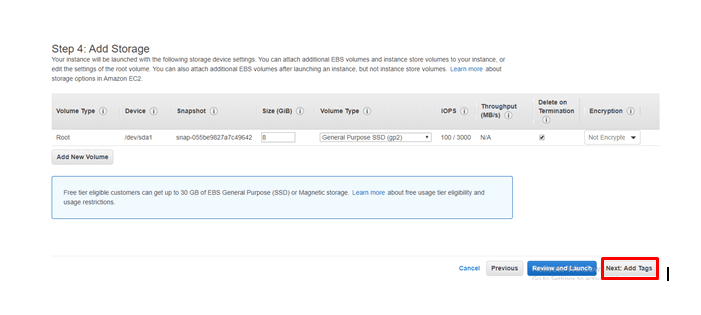
step - 4
initially this instance provides the 8GB storage. Moreover, you can change as per your requirement. And as I said earlier, I would like to move with the default storage. And click on Add tags
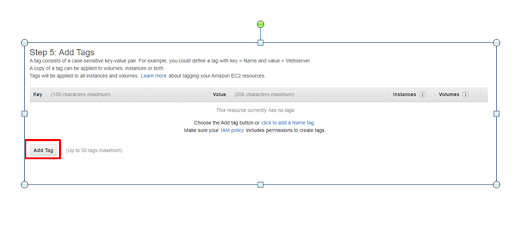
step - 5 :
Since we can launch many instances, it's different to identify the instances with the numbers. So to overcome this problem, we people prefer names to identify the instances easily. And in this step click on Add tags
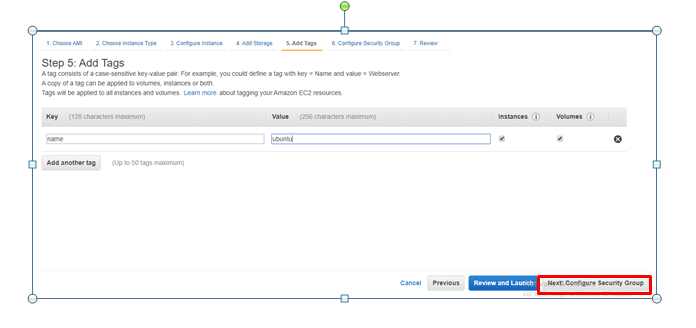
provide the tag details and click on configure the security group.
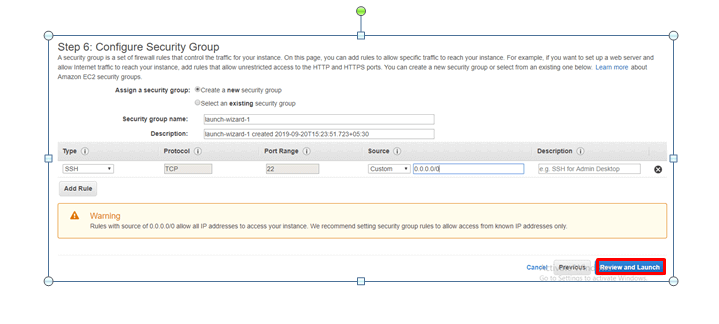
step -6:
if you have any security select that group. else start creating new security. Moreover, by default, a security port will be provided. And I recommend the beginners to use the Instance recommended security group. So just click on Review and Launch.
step - 7 :
verify all your detail and click on launch
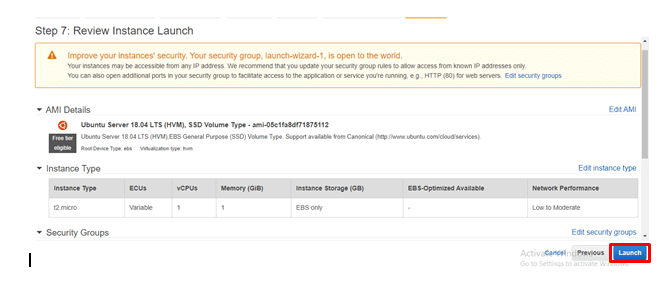
So once you launch you can the following pop box.
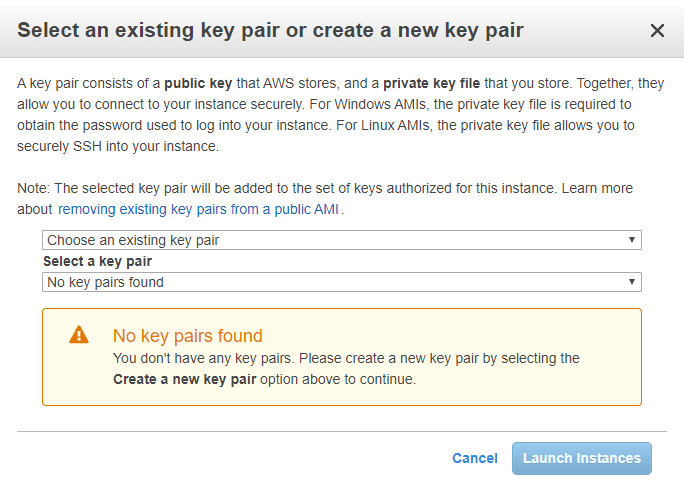
So in order to connect to these machines from the putty session, we need key pairs. So in the above screenshot select create a new key pair and provide any name (Ubuntu) and click on Download key-pair
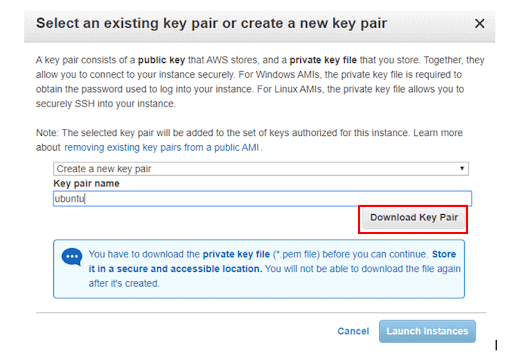
And now click on launch instance. And when you launch the instances, you can see the instance in the instance column on the EC2 dashboard.
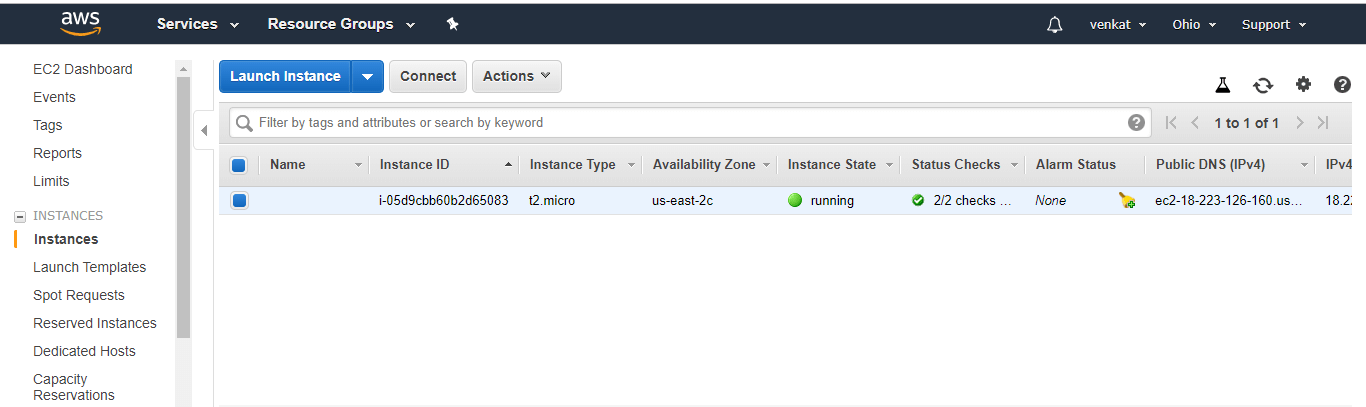
So once you downloaded, you will get a .pem file. But this putty session does not support the .pem file. And this .pem file suits good for the Mac systems. But if you are using Windows machines, the problems. This is because this widows system cannot accept the .pem file. so we people need to convert this file.
puttygen configuration
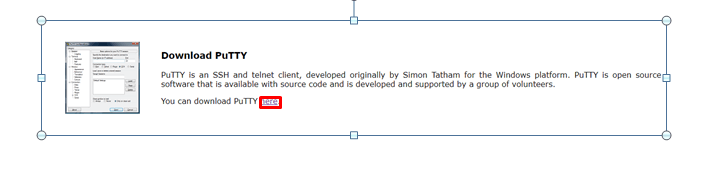
And in order to convert this file visit https://putty.org/
In the first row, click on download here
select the putty-gen windows version as shown below
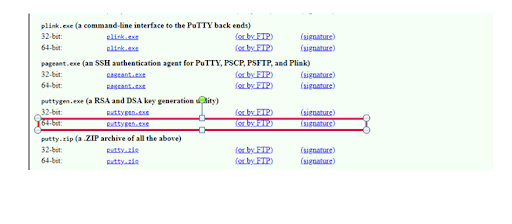
Once you click on the above link, you will be getting an .exe file. And when you open the exe file, you will see the following screenshot
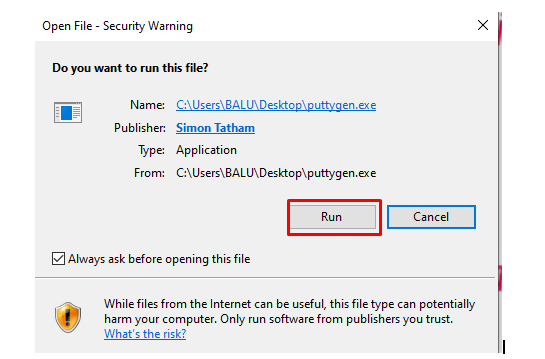
Once you click on run, you will be entering into the following screen
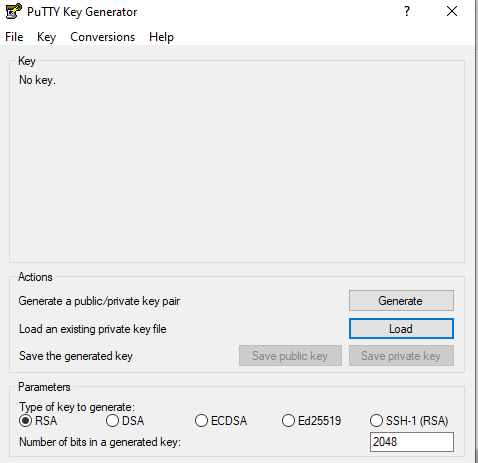
If you are entered in the above screenshot Go to file menu and click on load private key. And once you click on that select the key that you have downloaded before and click on load. And once you added the file then click on generate. Once the key generated, you will see the following screen
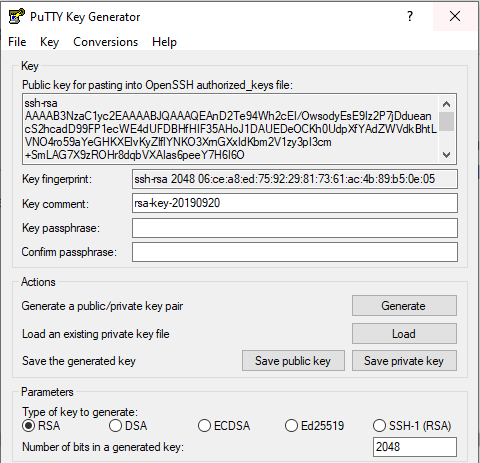
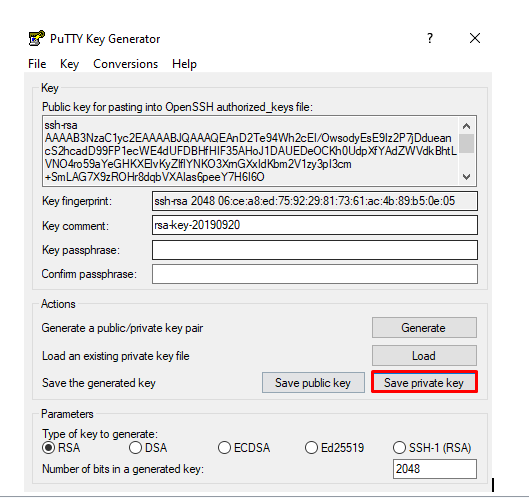
So once you have entered the above screenshot, now click on save private key
Once you clicked, click on Yes
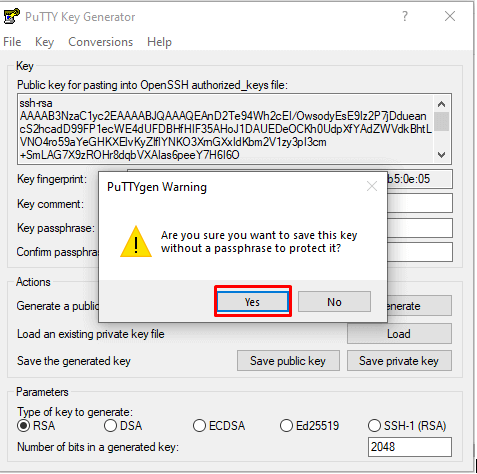
Remember the location that you have saved the private key.
And I hope you people have successfully saved the key at some location and close the putty generator. So now open the putty session and navigate through the following path
putty session --> SSH--> Auth
Once you have open this path, then you can see the putty session as follows
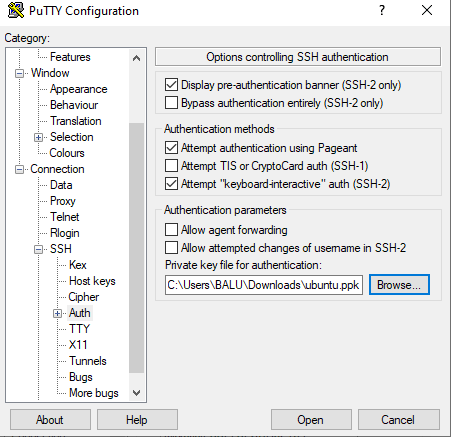
browse the .ppk that you have saved before and click on open. So once you open it will ask you the username. Moreover, the default username is Ubuntu and once you enter, you will be able to access the machine. And once you have crossed all these steps, you will be entering into the following screen

Read these useful blog for aws instances concept at AWS Instance Types