
Data is one of the important things in the IT industry. Today many companies were working on data generation. And companies were paying the best salaries to these people. And this data contains a large amount of useful information. So we need to maintain this data carefully. Since the data is increasing in an exponential manner maintaining this large amount of data is not a simple task. And it requires various parameters to maintain this data. So it means, in this case, there are two problems namely maintaining the data as well as maintaining the database. So if one takes the care (database requirements) maintaining any amount of data is easy. Then Amazon comes with the concept of AWS RDS to maintain all the requirements of data handling. So let us see
What is RDS?
RDS is the web service that makes it easier to set up, operate and scale the relational database in the cloud.
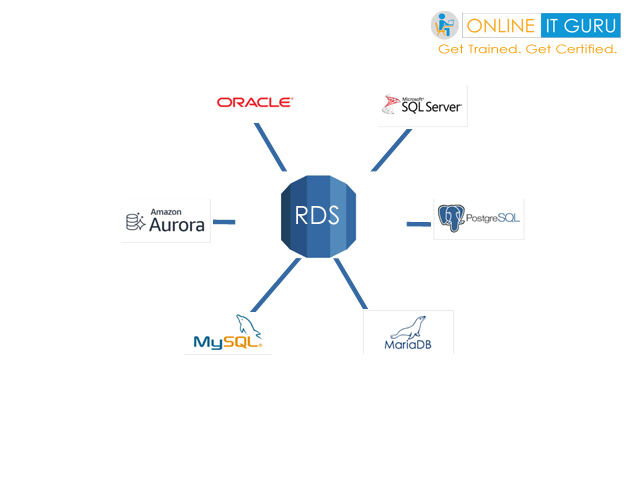
Click the link to know why is data security is important?This provides the cost-efficient and resizable capacity in an industry-standard relational database and manages the database administrative task. RDS makes it simple and easy to set up the relational database in the cloud. Basically, RDS is a fully managed RDMS service. With RDS, instead of concentrating on database features, you can concentrate more on the application feature to provide high availability, compatibility, and security. Moreover, this database service is available on several database instance types.which were optimized for memory, I/O and provides the six familiar database engines. This includes the Amazon Aurora. My SQL, Maria DB, Oracle Database, Postgre SQL and SQL server. Besides, this platform also provides AWS Data Migration service which allows you to easily migrate (or) replicate your existing database to RDS.
Note:
RDS is not the database, it is the service that manages the database.
So let's create the RDS practically.
RDS Creation:
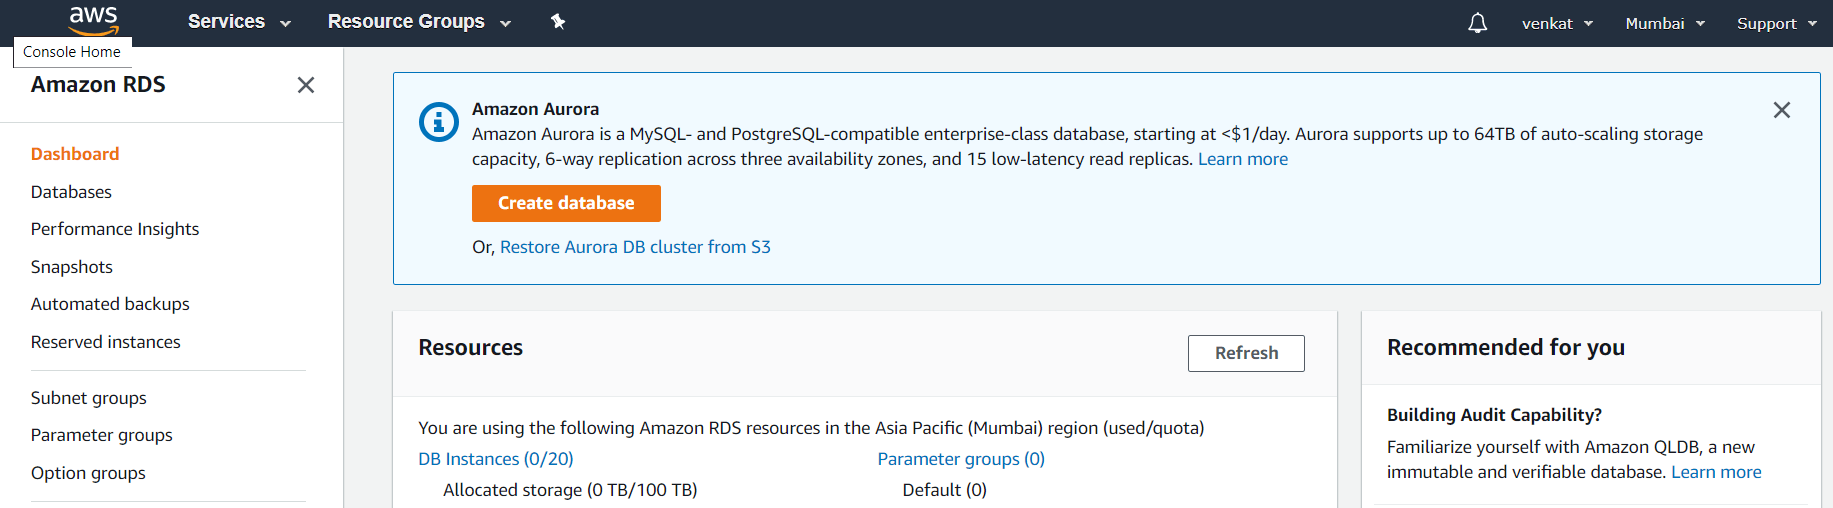
step -1:
Login to AWS account and search for RDS, then you can see the screen as shown below
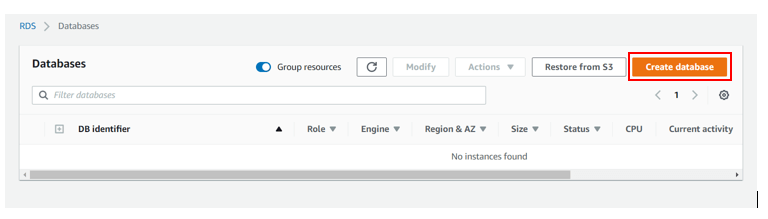
step - 2:
Navigate to databases and click on Create Database
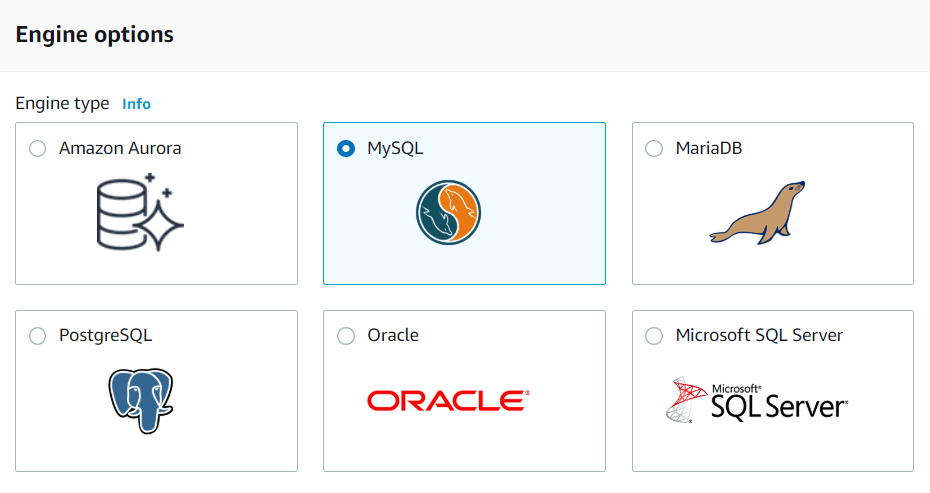
step - 3:
step - 3a:
Select the Database ( Here I'm selecting MYSQL)
step - 3b:
Select the template as free tier

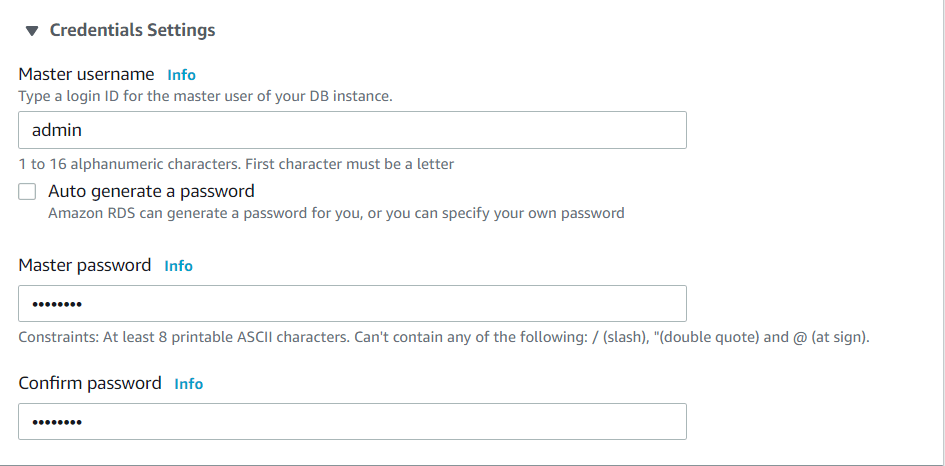
step - 3c:
Change the name of the database (if you required) and assign some password to the database.
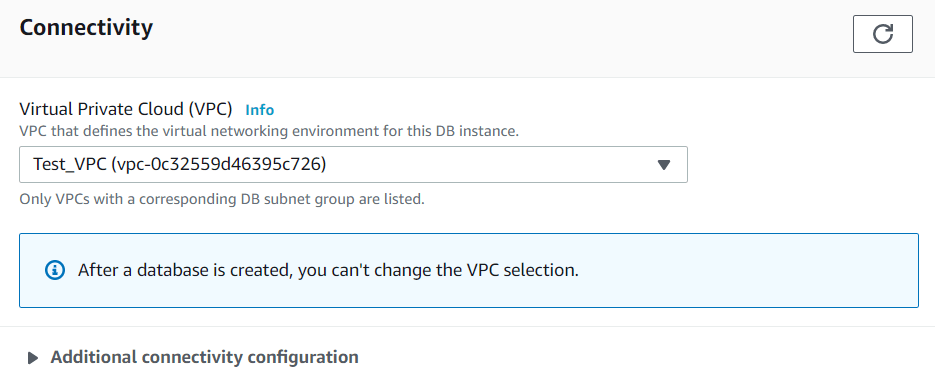
step - 3d:
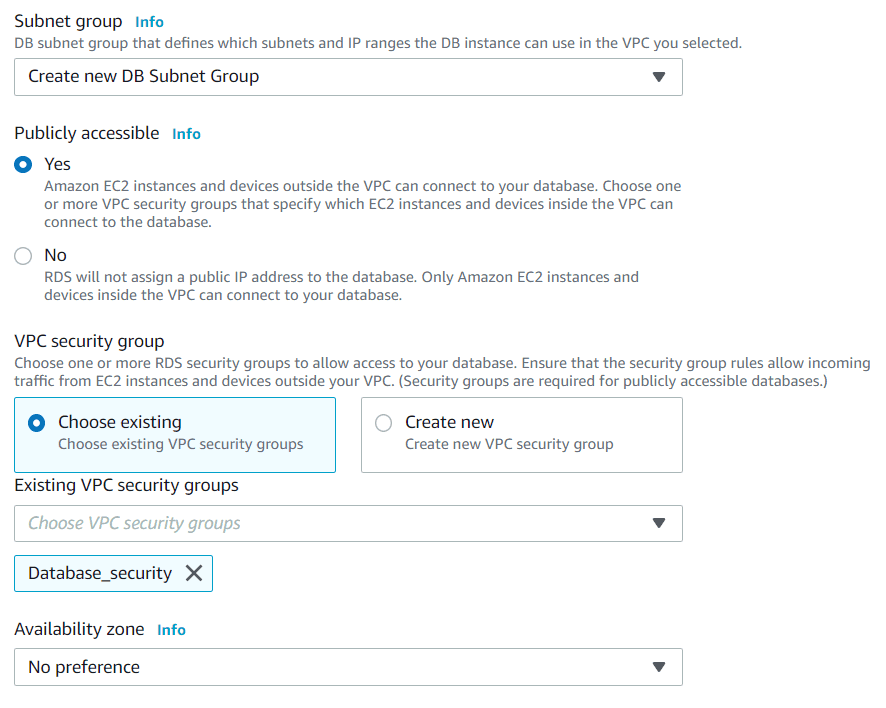
Select the required VPC( if you were not interested to move with the default one)
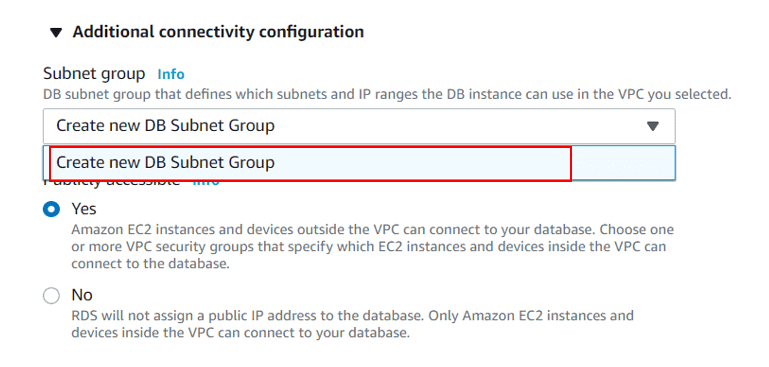
step - 3e:
In the additional connectivity Click on Create new DB subnet group
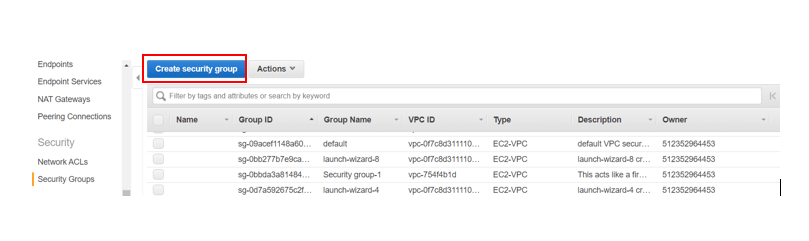
step - 4:
Now navigate to VPC and click on create security groups
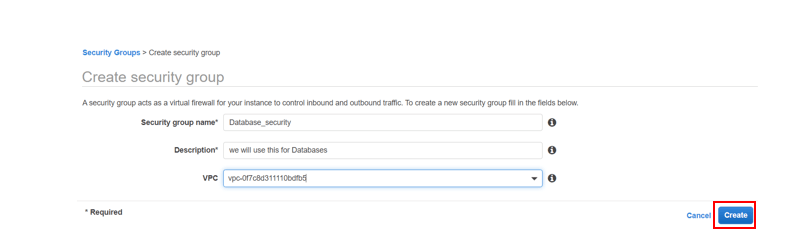
step - 5 :
Fill the details as shown below and click on Create
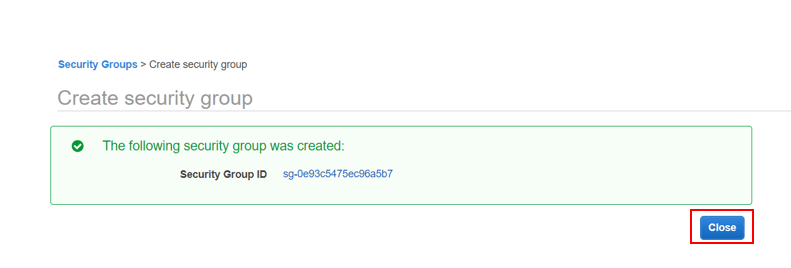
step - 6:
Click on Close
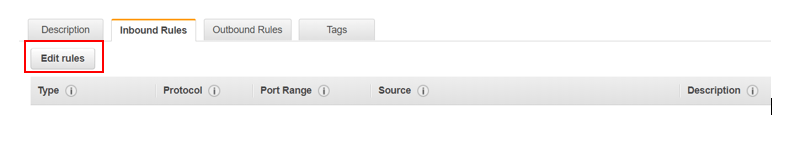
step - 7:
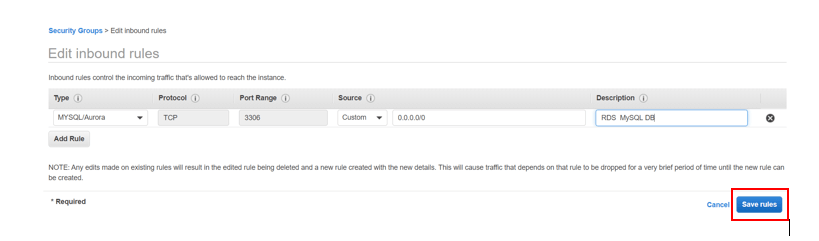
Select the Security group that you have created now and navigate to the Inbound rules and click on Edit rules
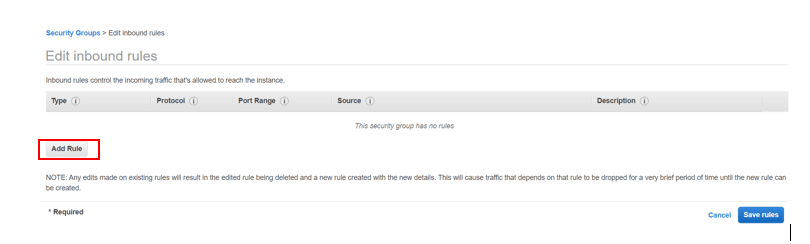
step - 8:
Click on Add rule
step - 9:
Create the rules as shown below and click on Save rules
step - 10:
Click on Close

step - 11:
Navigate back to the RDS Console and visit additional connectivity configuration.
step - 12:
Provide any database name as shown below
step - 12 (b):
Select the logs as shown below
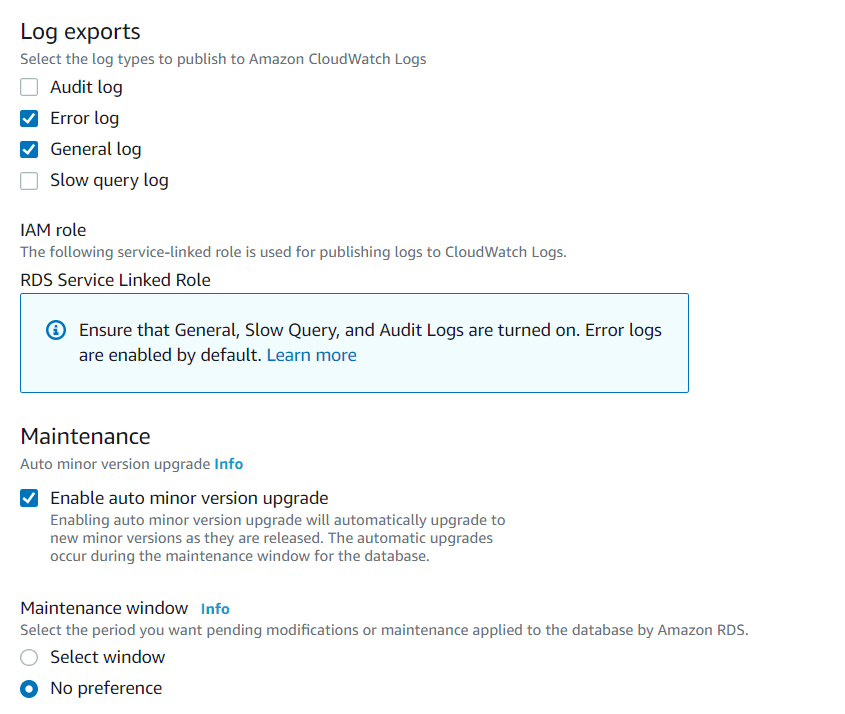
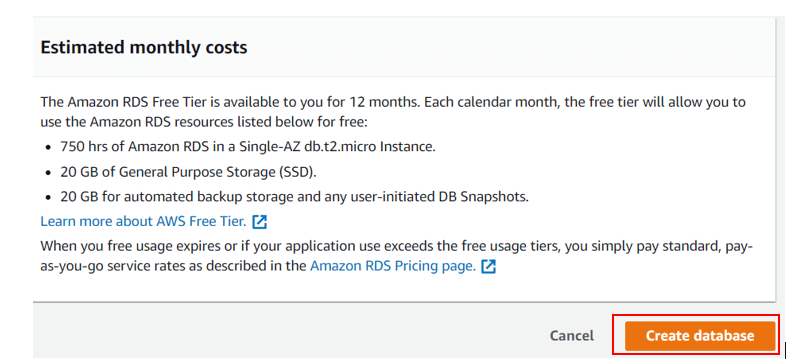
step - 12 (c):
Finally, Click on Create Database.
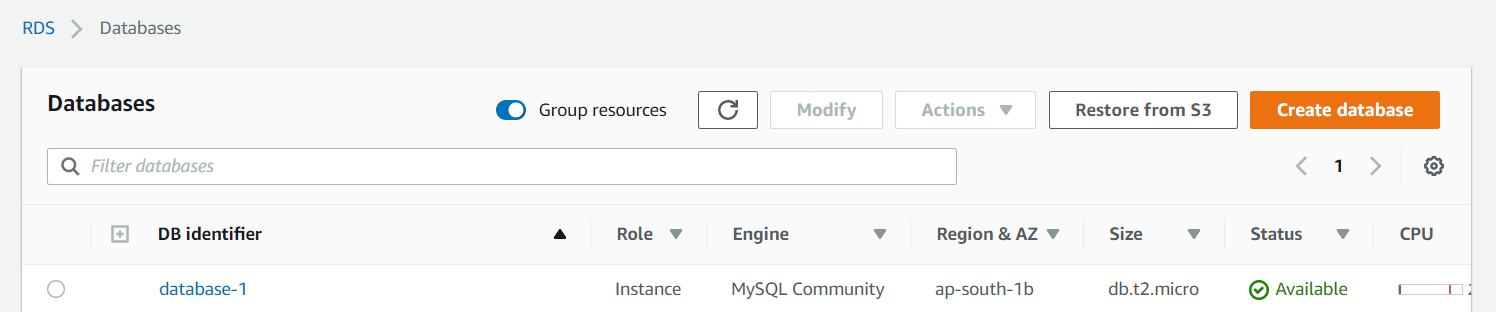
Once you click on create a database it usually takes around 5 minutes in order to create the database. Once it's created, you can see the status as available as shown below
So I hope you people have successfully created the database. Now its time to connect to this databases
Also, check the Role of RDS in AWS Database Connection
In order to create a connection to the database, you need to log in to any one of your instances as root. And must perform the following steps:
step - 1:
Install MySQL in your instance as shown below
![]()
step - 2:
Confirm the installation with 'Y'
![]()
step - 3:
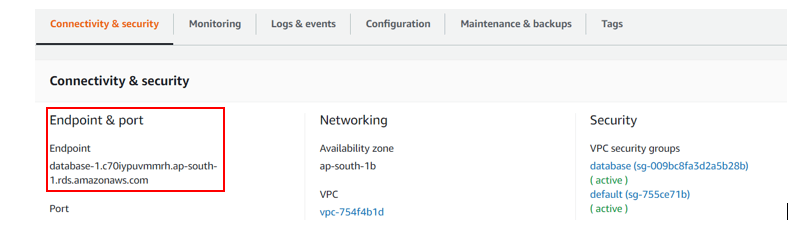
Navigate back to the RDS console and Click on your database and copy the endpoint from the connectivity and security
step - 4:
Now navigate to the putty session and run the following command
![]()
step - 5:
Then it asks you the password. So provide the password that you have assigned at the time of database creation
![]()
step - 6:
Then you can log in to your database as shown below
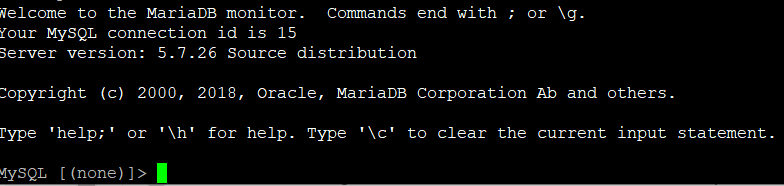
So you have you successfully login to the MySQL database.
step - 7:
Check the database that was available in MYSQL with the following command
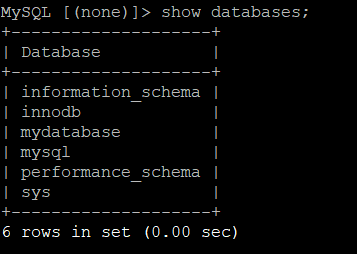
step-8:
Select and log in to any one of the databases with the following command
![]()
step - 9:
Check the tables in the databases with the following command
![]()
Likewise, from here it allows you to operate all the SQL command in the database.
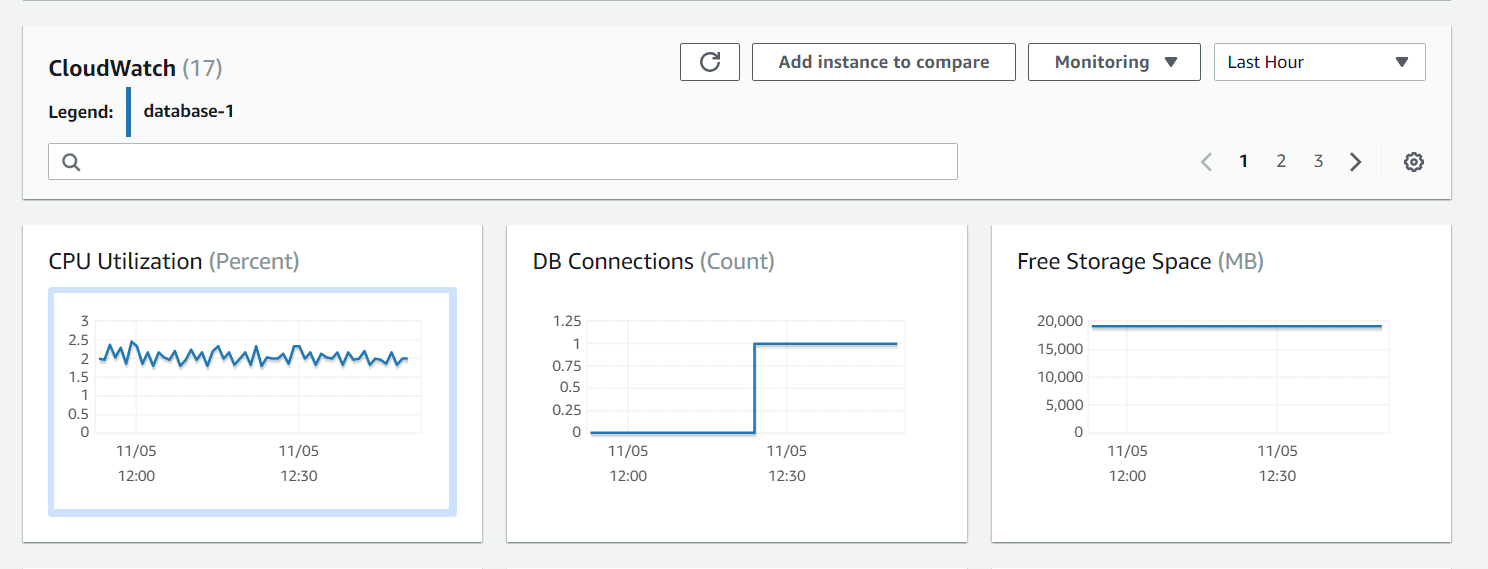
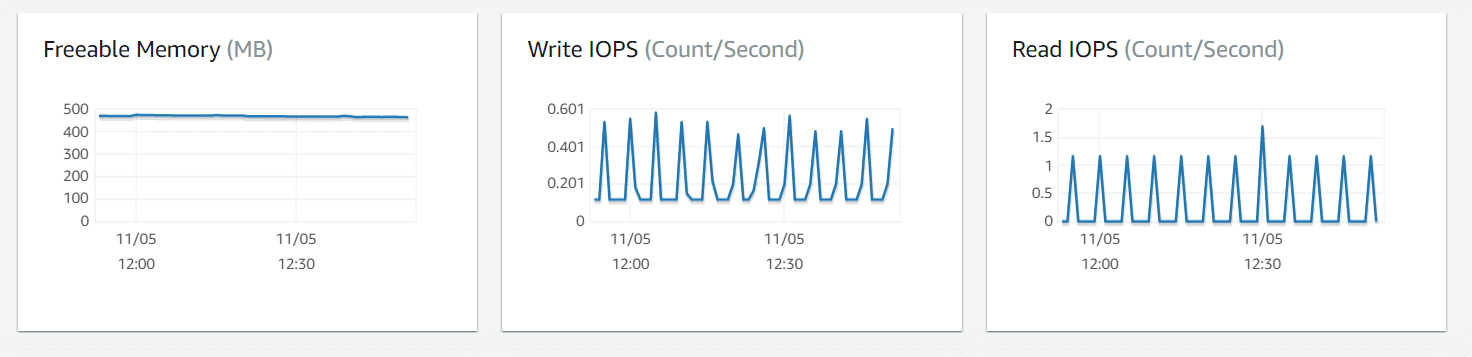
Get the complete knowledge on SQL commands at PLSQL trainingAnd you navigate back to the RDS Console and visit Monitoring, then you can observe the database usage as shown below
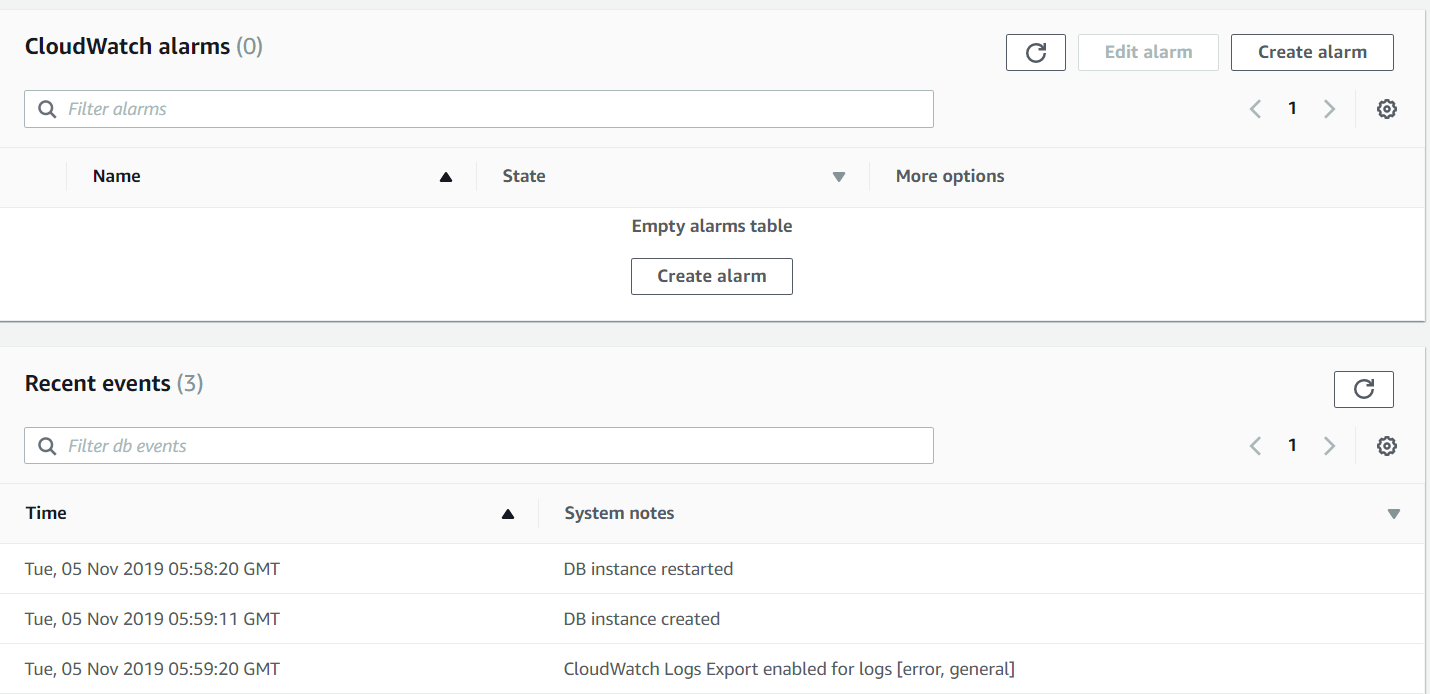
And if you navigate to the Logs and Events tab you can check the various activities happening in the database. Moreover, you can get the complete details of the activity to happen when you click on any one of the logs.
Likewise, if you move to the Configuration tab, you can see various details of the database as shown below.
Likewise, you can see the various options in the database. Moreover, as mentioned above, a database can be available in multiple availability zones. And if you observed the above screenshot it was mentioned as Multi A-z as no. So
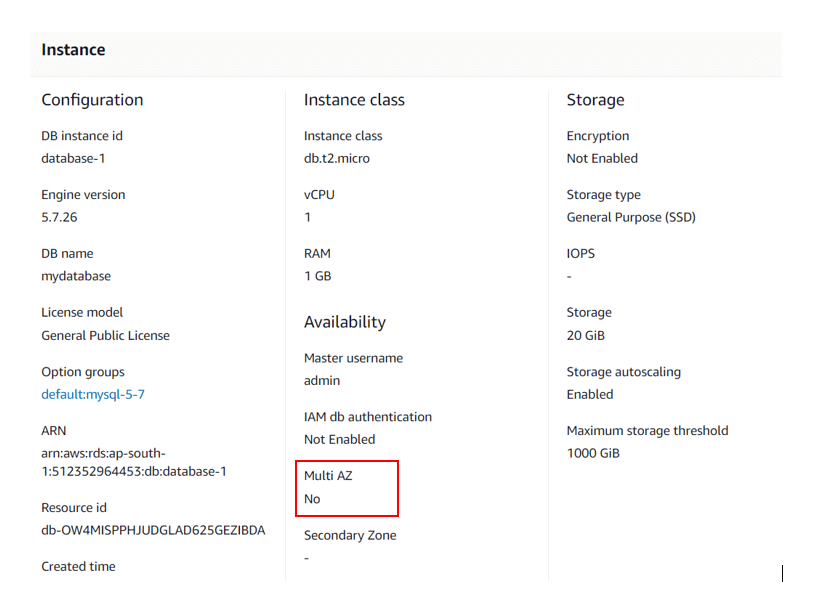
How to make the database available in multiple Zones?
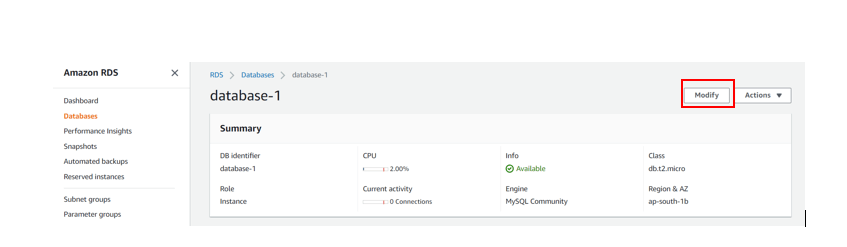
Step - 1:
Navigate to RDS and select the database and click on Modify
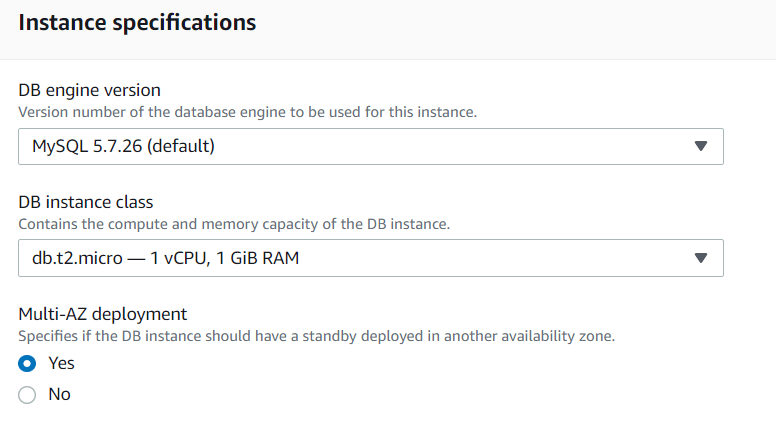
step - 2:
Select Multiple A- Z deployment as yes.
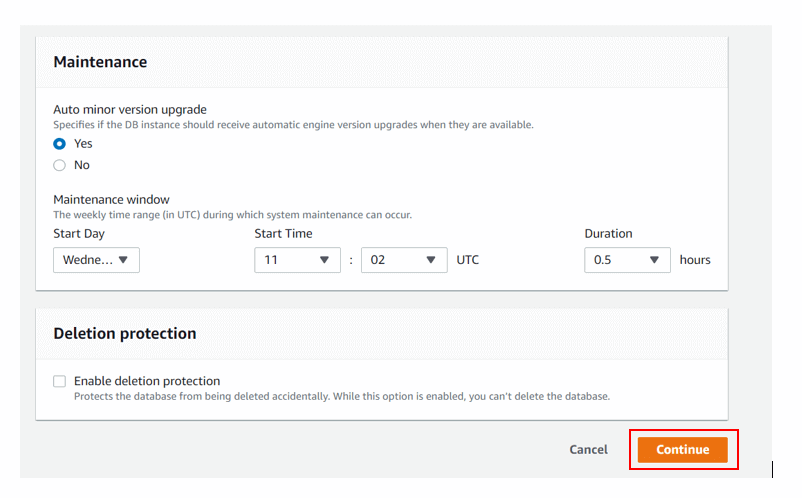
step - 3 :
Scroll down and click on Continue
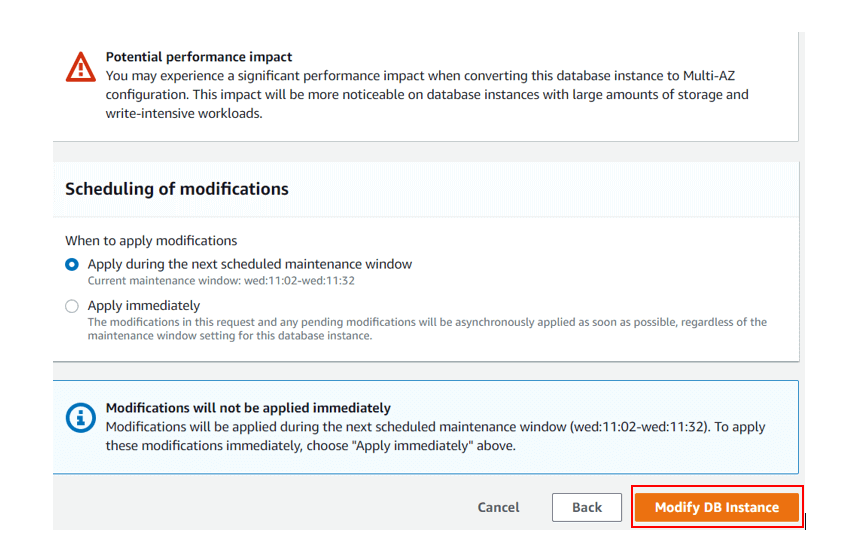
step - 4:
In the scheduling of modifications, select apply immediately and click on Modify DB instance.
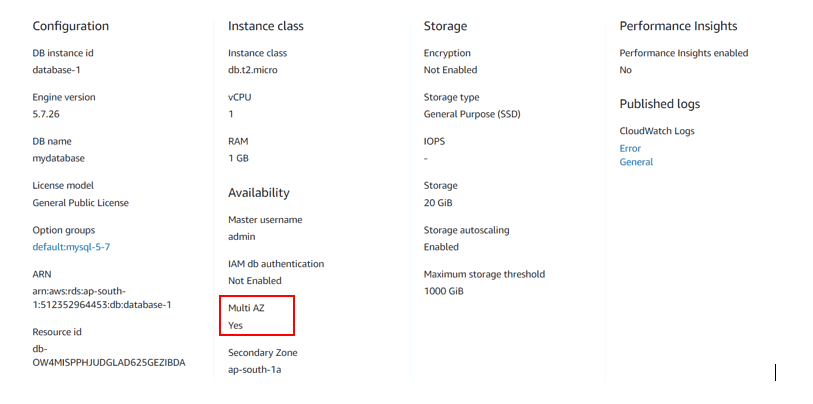
And once you click on Modify DB instance, it takes some time to make the status as available. And once it is available you can see the multi available zones as Yes as shown below
So likewise, we can perform various activities in AWS RDS.
RDS Billing:
AWS bills on RDS on the basis of the following parameters:
- Instance Class: The type of instance that you are choosing.
- Running time: The amount of time that the instance is running. Remember that bills for partial hours will be generated as the full hours.
- Storage: The storage amount that you have allocated for DB instance.
- I/o Request per month: The I/O instance that was made to DB instance per month
- Data transfer: The data transfer in and out of your DB instance.
Besides AWS also provides the RDS service, through the Reserved instances. The advantage of Reserved instances is you can reserve the AWS RDS for a long time basis, which can be from one to three years. And for these reserved instances, you must make a one-time payment in advance for the period that you require.
Free tier:
Besides all these billing methods this platform offers the free tier services to its customers. So lets us discuss those features in detailed.
- Starting from the date of registration, AWS offers 750 hours of Amazon RDS usage for db.t2.micro instance in a single Availability Zone every month.
- Any combination of General Purpose (SSD) (or) the magnetic storage up to 20GB of Database storage.
- 20GB backup storage and 10 million IO's
RDS database features
- It allows the customization of CPU capacity, memory allocation and IOPS ( Input Output per second) for a database instance.
- It is responsible for managing software patching, failure, and recovery of the database without any user intervention
- These databases allow the manual (or) automated back up of the database using snapshots. And it has the capability to restore the database from the snapshots
- These databases provide high availability through the primary and secondary instances.
- It keeps the databases in a Virtual Private Cloud (VPC) and also uses the IAM service to control access to the databases.
- These databases support two purchasing options for RDS service. These were the On-demand the Reserved instances. So for on-demand usage, you need to pay for every hour of usage while you need to pay the upfront payment for the reserved instances.