
I hope you people have successfully launched instances in your AWS Environment. So let's move to the actual DevOps tools. Initially, we will start with GIT. Prior to knowing about GIT, let us consider the following scenario to know the need of GIT
Scenario:
Application development will not happen in a single instance. So prior to the launching of the application, the application undergoes several changes. So while making these changes, there may be a chance for application to be hanged at some point. Hence, if we nullify that recent change, the application may work well. But if we go on updating the same file, we cannot pick at the which point, the application was struck. So it seems for the necessity to have the separate file for each update. Hence, we can easily nullify that recent change for the application to work properly. And the concept of creating the separate file for each update is known as Versioning.
And prior to knowing about the GIT definition, let us initially consider
What is Version Control System?
It is the management of changes to the documents, large programs, large websites and the collection of other information.
This VCS is basically classified into the following types:
- Centralized Version Control System ( CVCS)
- Distributed Version Control System (DVCS)
Centralized Version Control Systems (CVCS):
This system uses the central server, to store all the files and enables the team collaboration. It works on the single repository, where the users can directly access to the central server.
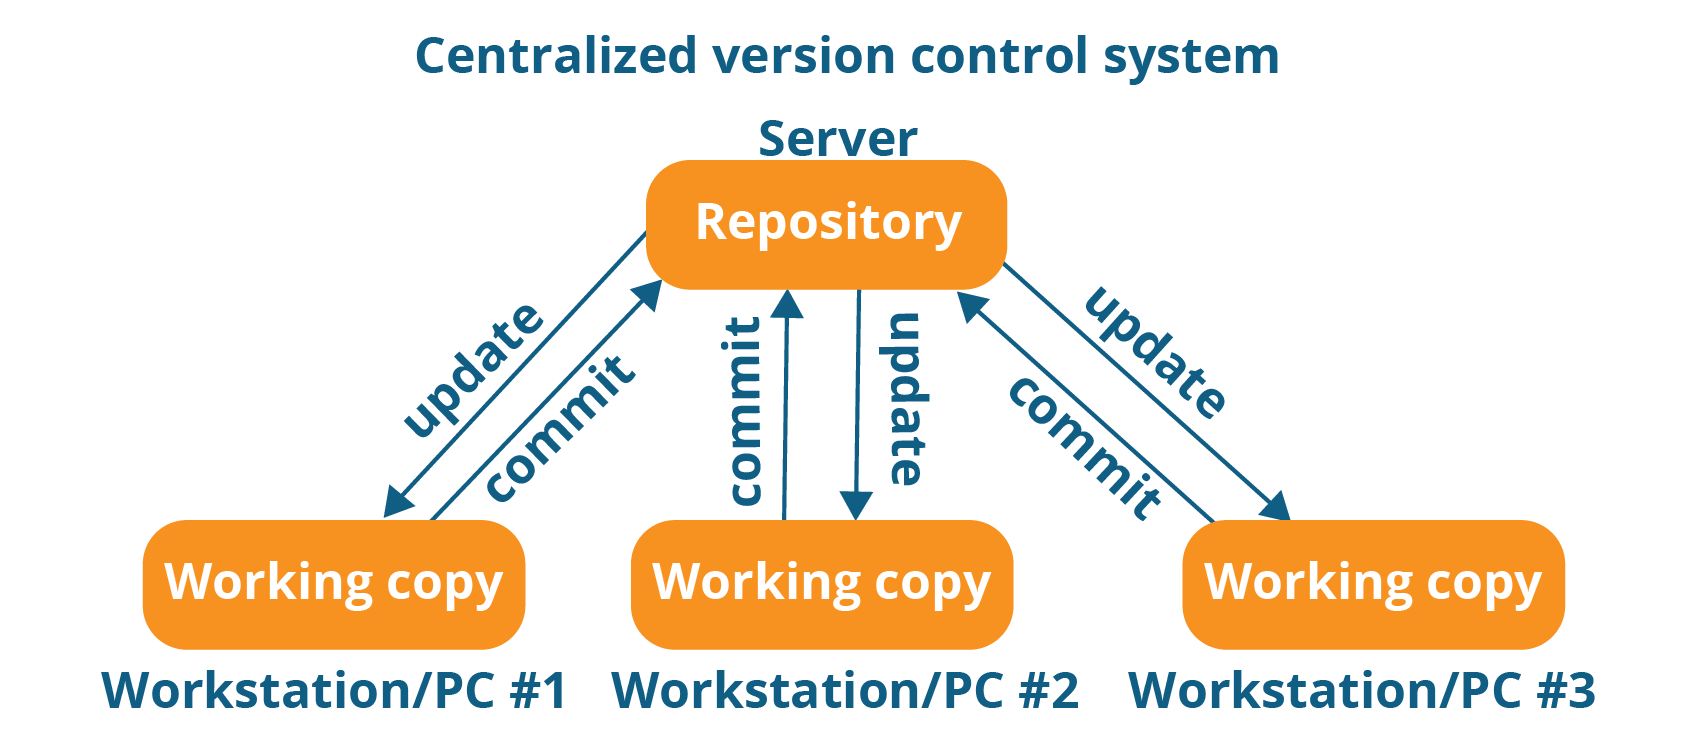
So if you observe the above system carefully, it consists of the central server. And this central server can be local (or) a remote one. And this can be directly connected to each of the programmer's work stations. So it clearly indicates that every action was happening with the central repository. And this can update ( addition/ deletion ) as well as the fetching ( Extracting) of data with the central repository. This interaction of individual repository work seems to be fine if everything goes smoothly. But on the other hand, this system has the following problems:
Centralised Version Control System drawbacks:
- This system is not available, locally. It means, we need to depend on the internet to update (or) fetch the file from the central repository
- Due to any reason, if the central servers are down / crashed, the entire files will be lost.
So to overcome this kind of problems, people prefer other system known as Distributed Version Control Systems (VCS)
Distributed Version Control System:
Unline Centralised Version Control Systems (CVCS) it does not rely on the central server to store all the files. In distributed VCS, each contributor has the local copy of the main repository. It means in this file system, everyone maintains the local copy of their files. And the central repository maintains the metadata of all these files.
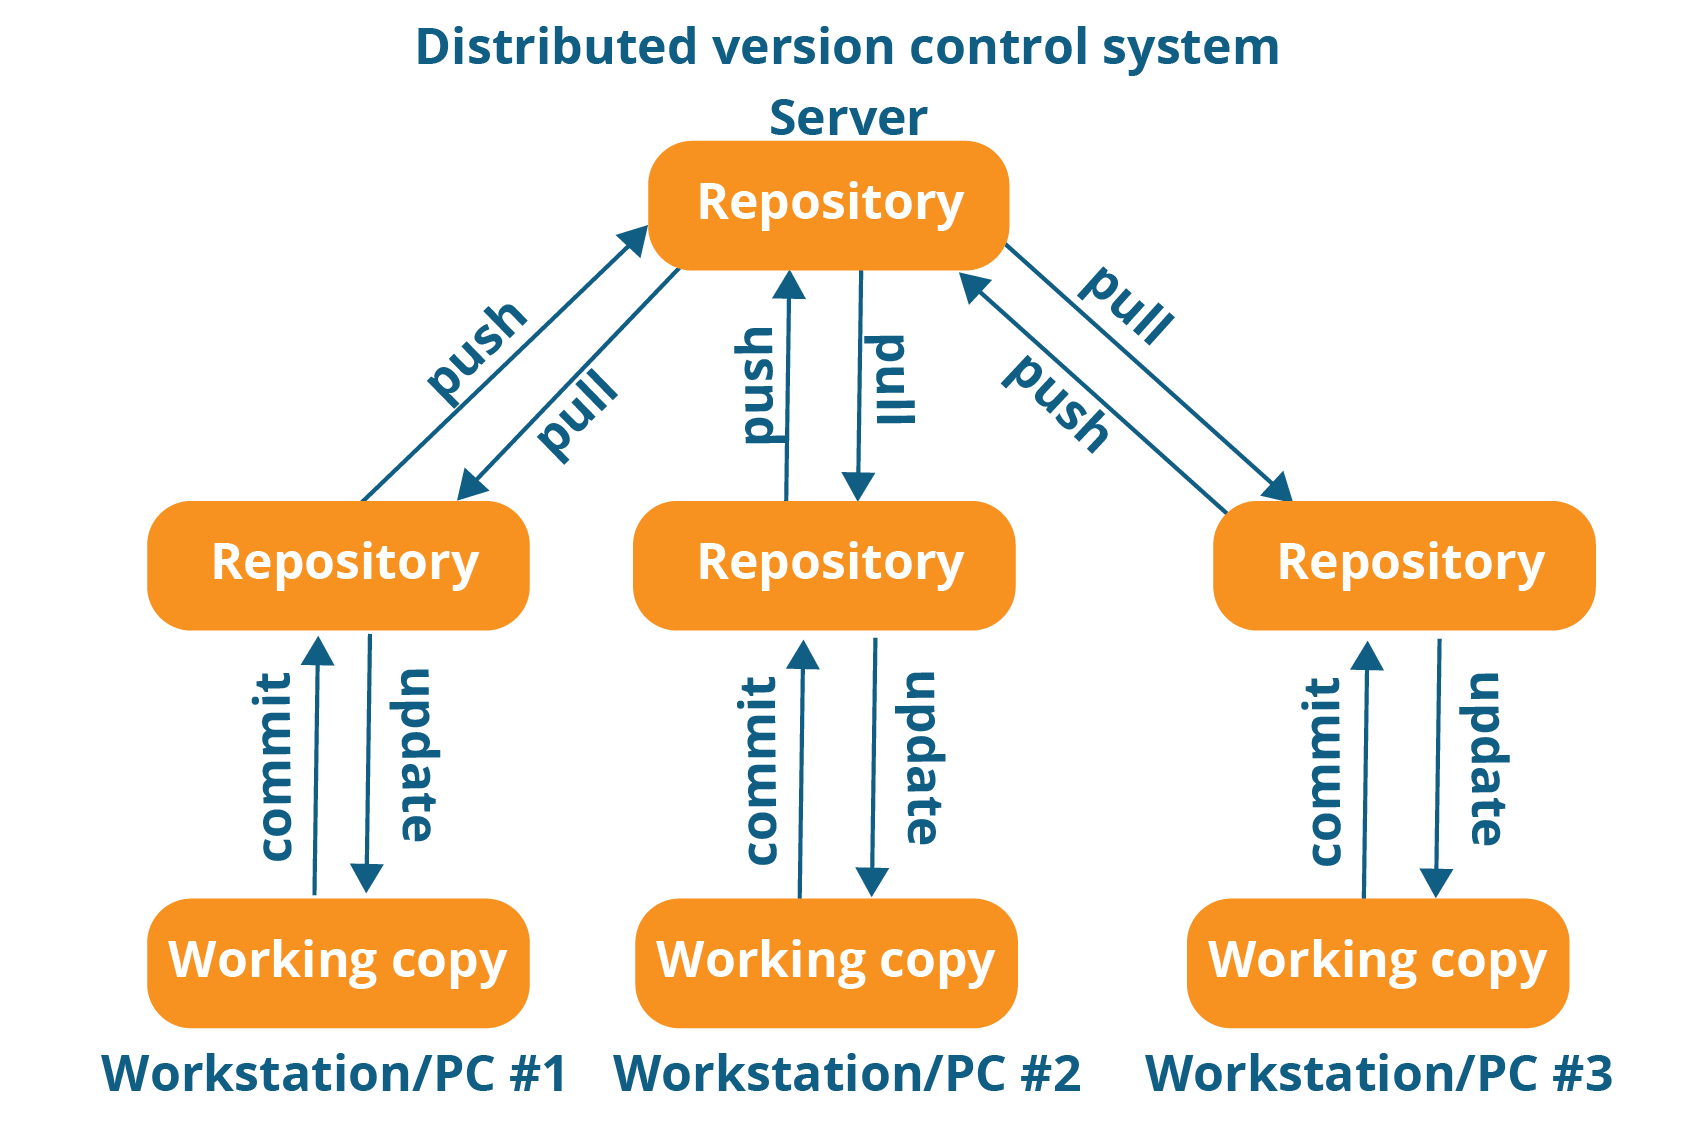
If the observe the above screenshot carefully, we each repository maintains its own local copy in the systems. So the programmer can update (or) pull the data from the local repository. So thereby it bypasses the necessity of central server along with the mandatory internet connection. Moreover, as shown in the above diagram, the programmer can get the data from the central repository using the pull command. Likewise, it sends the data to the central repository using the push command. And as mentioned above this distributed version Control system (DVCS) has the following advantages over the centralized version control system (CVCS)
- Since the programmer needs to access form the local repository, all the operations were very fast Except the pull and push.
- Since we were mostly connecting to the local repository, internet connection is not a mandatory thing
- sharing of data between the programmers is so easy due to local copies in their repositories
- And even though the central repository may be crashed at any instance, they can get the copy from the local repository
So let us move into the actual concept.
What is GIT?
GIT is a Version Control system (VCS) that supports non - linear workflows by providing data assurance for quality software development.
This distributed version control system means, your local copy of code is the complete version of the repository. So this fully functional local repository makes it easy to work offline (or) remotely. Here you can commit the work locally and then sync your copy of the repository with the copy of the server. This system makes the developers work with any team. GIt users community has created many resources to train developers
Every time, you save your work, Git creates a commit. Usually, a commit is a shop shot of all files at any point in time. And if the file has not changed from one commit to the next, GIT uses the previously stored files. And this design differs from the other system that stores the initial version and keeps the deltas over time.
Branches:
Every developer saves changes to the local code repository. So the developer may have different charges based on the same commit. Usually, gits provide the tools for isolating the changes and later merging back together.
Branches were the lightweight process, to work in progress and manage this separation
And once the work is created in the branch, merge it back to your team main branch.
Files and commits:
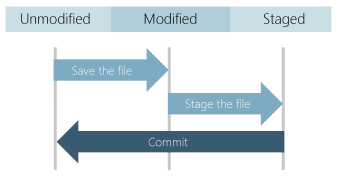
Usually, the files in gits can be anyone the three stages. This may be modified, staged (or) committed. So when you first modify the file, the changes exist only in your working directory. But this is not yet the part of Commit (or) in the development history. And this staging area contains all the changes that you need to include in your next commit. And once, you are satisfied with the staging files, you can commit the message. Besides, this commit is part of the development of history.
What is the role of GIT in DevOps?
Git is usually an integral part of DevOps. And DevOps is a set of practices that brings agility to the process of development and operations. It is responsible for boosting the project life cycles, and in turn, increases the profits. Besides, it promotes the collaboration between the development engineers and operations.
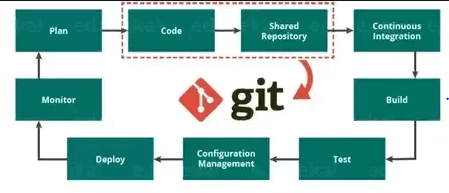
The above diagram shows the entire DevOps life cycle from project planning to deployment and monitoring. And this Git plays a major role in managing the code, that contributes the collaborators to the shared repository. Moreover, this code is extracted for performing the continuous integration to create the build and test it on the server. Usually, GIT is responsible for making the communication between the teams. Today people cannot see the GIT application for smaller projects. But we can see its application in many of the larger projects. Moreover, we people observe this tool application in a large application. And it is essential to establish communication between the development and operations teams. Here commit messages plays a major role in maintaining communication among team members.
We people can use this GIT on a different platform. So let us see them in detail
GIT installation on Windows:
step - 1:
Download the GIT from the following link
https://git-scm.com/download/win/
step - 2:
Download the file as per your system configuration
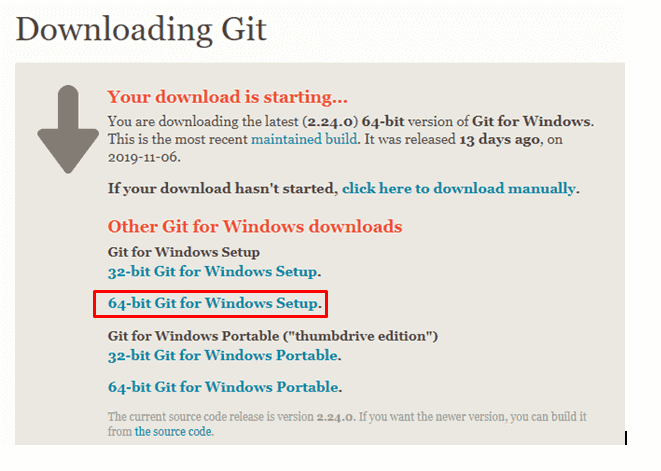
step - 3:
Once the file is downloaded, double click on the file and click on Run.
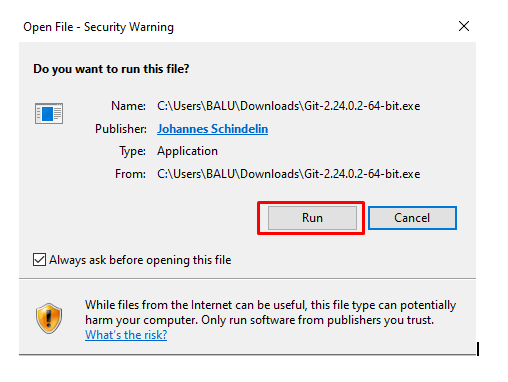
step - 4:
Click on Yes
step - 5:
Click Next
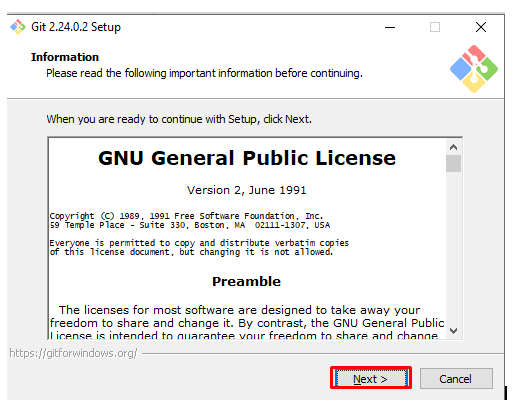
step - 6:
Click on Next
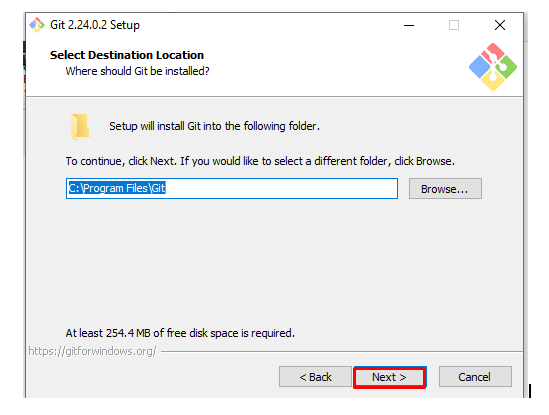
step - 7:
Click on Next
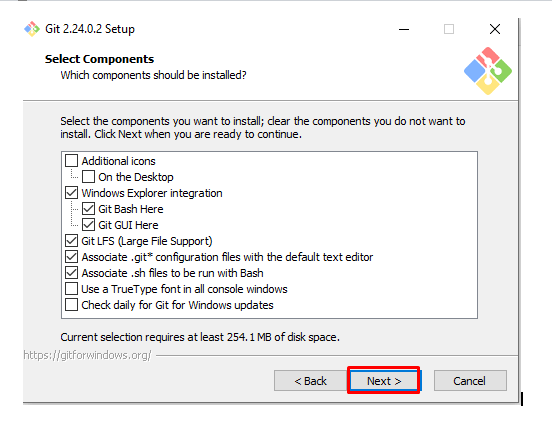
step - 8:
Click on Next
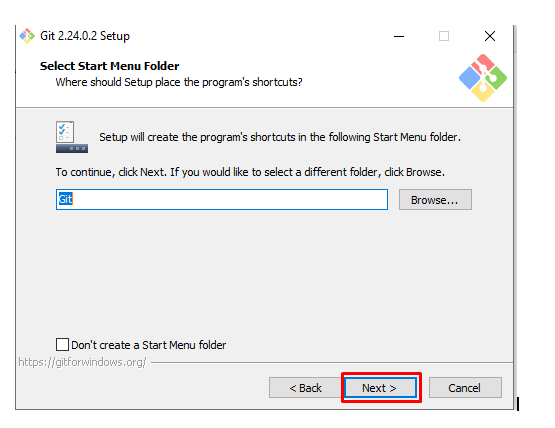
step - 9:
Click on Next
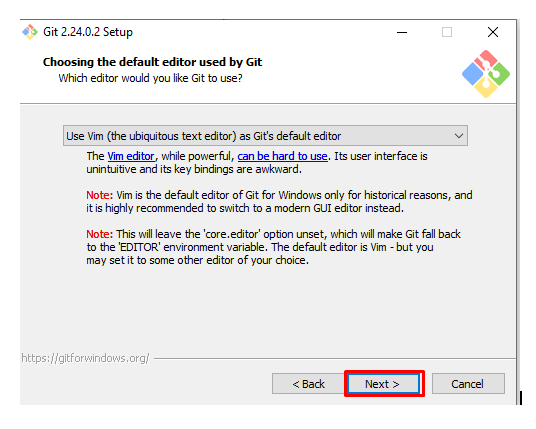
step - 10:
Select the environment path as per your choice and click on NEXT.
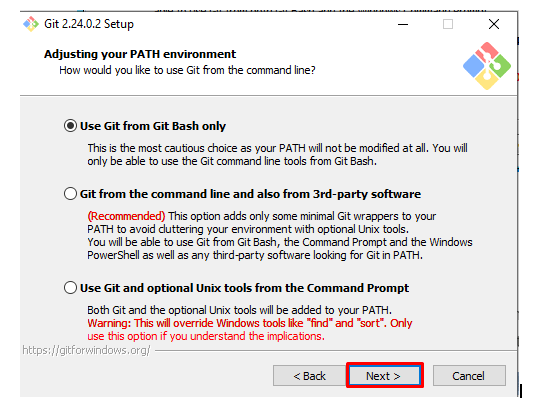
step - 11:
Click on Next
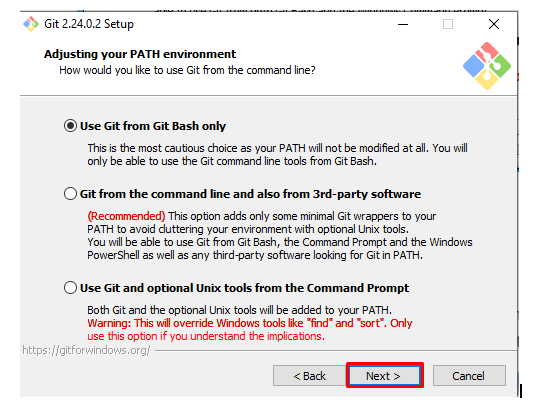
step - 12:
Click on Next
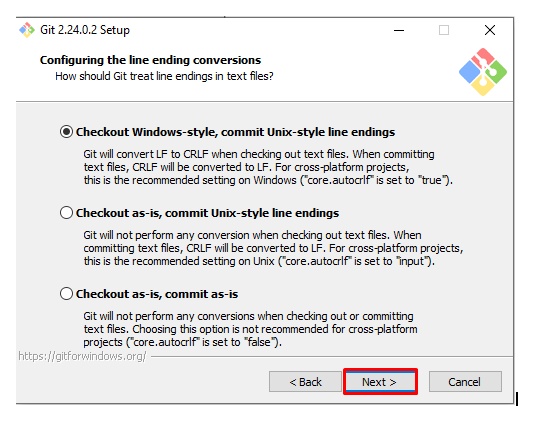
step - 13:
Click on Next
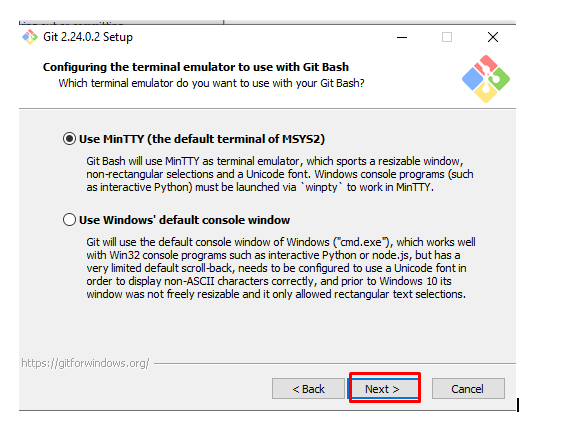
step - 14:
Click on Next
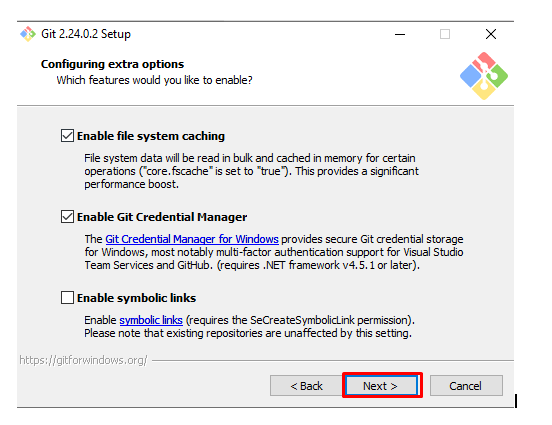
step - 15:
Enable the feature and click on Install
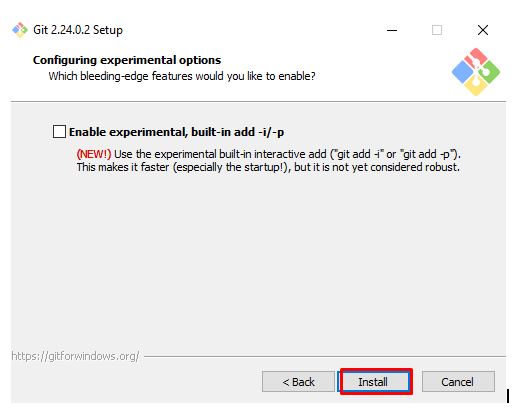
step - 16:
Select Launch Git and click on FINISH.
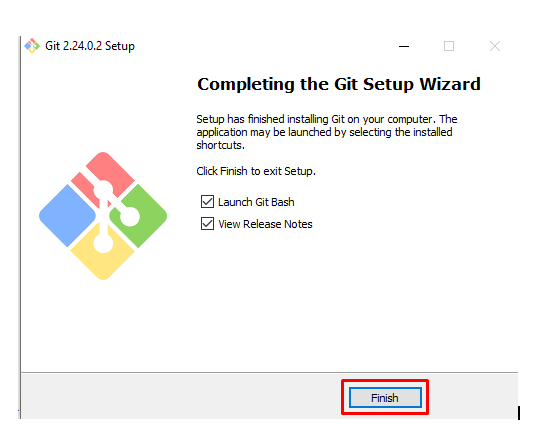
So like this, we can install the GIT in our Windows System. And once, it was installed, we need to created an account in the Git hub. We can create the account in GIT with the following command.
git config - - global user.name "
git config - - global user.email "
And I hope you people have successfully installed in your system and created an account. And if you struck up anywhere.
Visit AWS Online training for more real-time explanationsSo now let's move on to the Linux platform using Ubuntu
GIT installation on Ubuntu:
In order to see the GIT working on Ubuntu, initially, it is required to have two separate instances (Client and server) And if you were new to instance creation, visit AWS Services in our website. Once you create the instances, follow the below steps
step -1:
Login to your Server instance and know your hostname with the following command.

step - 2:
Update the repositories in your system with the following command
step -3:
Install git in your system using the following command
step -4:
Add/create the user in GIT with the following command
step - 5:
Provide the password for the user that you have created.
step - 6:
Reenter the password
Then you can see the password updation confirmation as shown below
step - 7:
Provide the user name with the following command
step -8:
Provide the rest of the detail as asked below( if want to skip as of now, you can press enter)

step - 9:
Provide the confirmation of the user data as shown below
So git installation and the user creations are completed successfully on server. And now let's move to the client machine
Client-side configuration:
step -1:
Login to the client machine and know the hostname of your machine using the following command
step - 2:
Connect the server from the client, using the following command
step - 3:
Remove all the data and add the server IP address and save file

step -4:
Likewise, copy the client address in the server machine also
step -5:
Generate the key pair as shown below
step -6:
By default, it shows some default file location of the keypair. And press enter, if you agree to save in that location
step - 7:
Press enter
step - 8:
Press enter
step - 9:
Then you can see the secret key as shown below
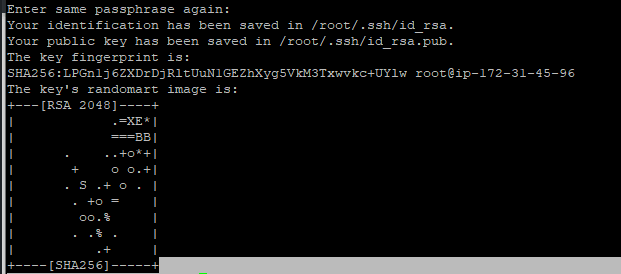
step - 10:
Check the available files using the following command.
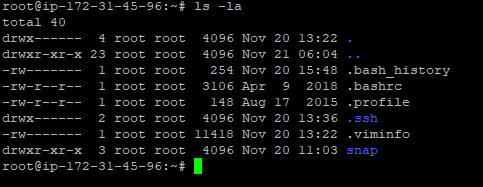
step - 11:
Check the hidden files in your directory using the following command
step - 12:
Copy the secret key of the client using the following command.

step -13:
Like in the client install the git package in the server and create the user and move to that user using the following command.
step - 14:
check the files in the user account with the following command.

step -15:
If you observe the above screenshot, we don't have any .ssh file, create the key pair in the server using the following command.
step - 16:
Now again check the files in the server machine.

step - 17:
Change your current working directory to .ssh and check the files in that directory using the following command

step -18:
Select the file to save the key (or) create the new file using the following command. So, now here I'm creating new file name authorized _keys. Then the paste the secret key in that file and save the file. Perform this action from client to server as well as from server to the client. And once it gets done, you can able to connect to the machines. So you can connect to the remote machine using the following command.
ssh git @hostname
Then it will ask you for some confirmation. Once you confirmed, you will be able to connect to the remote machines
Besides this, there is also another to interact with the Git hub. i.e. Generating and pasting the key in Github account. And if you did so, you people can download and upload from git hub to the Ubuntu instance as shown below
Git hub operations:
step -1 :
Generate and copy the public key to your clipboard
step - 2:
Navigate to github.com and sign in to your account ( if you are a new user, then sign up and sign in to the account). And navigate to setting and click on SSH and GPG Keys.
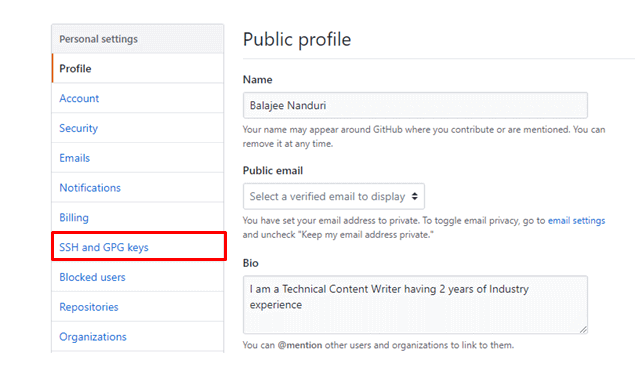
step - 3 :
Click on New SSH Key.

step - 4:
Provide some title and paste the key that you have copied to your clipboard in step - 1 and click on add SSH key.
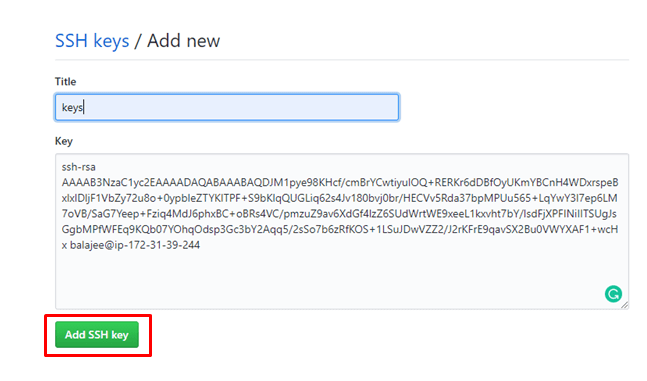
step -5:
Navigate to github.com and click on your Repositories.
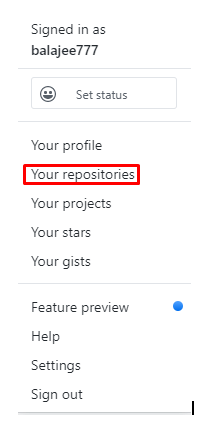
step - 6:
Click on New

step - 7:
Provide and description and click on Create repository
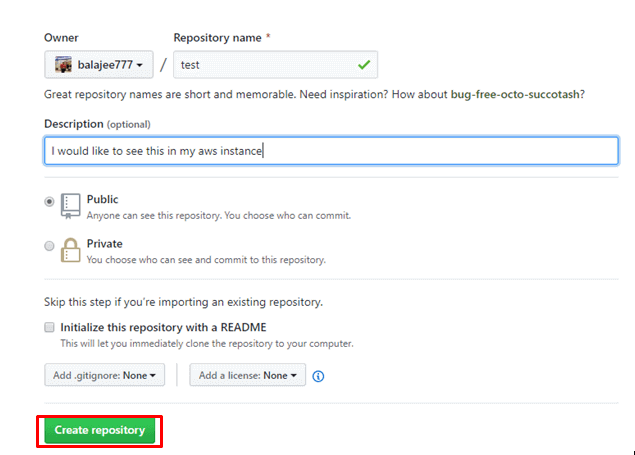
Once you click on create repository you can see the repositories as shown below( i have one additional repository named DevOps).
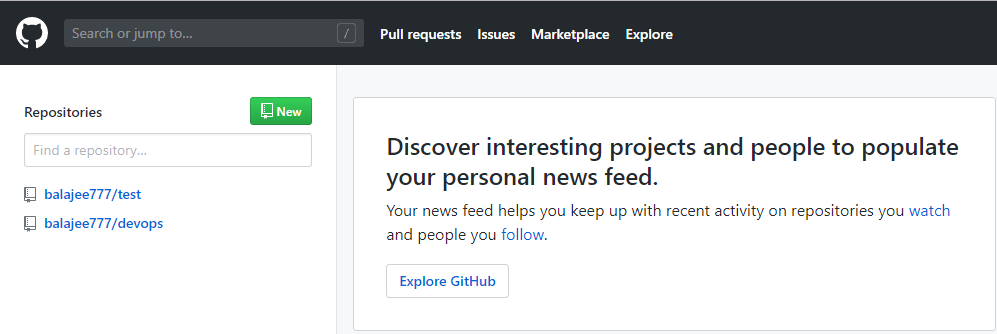
And now we need to connect to this account from aws account
step - 1:
In the aws instance, Connect to Git hub account user as shown below
step - 2:
Also, provide the email address that is linked to the Git hub as shown below
So like this, we have successfully connected our AWS instance to the Github
step - 3:
So we can see the github repositories through the following command
git clone "repository URL"
step - 4:
check the file and folders in your repository using ls -la
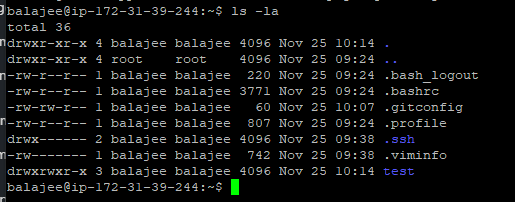
So like this, we can see the complete repository through Linux. And I hope, you people have successfully downloaded your files.
Uploading a file to Github:
step - 1:
As above create a repository ( make sure, you have ticked initialize README.md) during the repository creation. (in this case, I have created the repository DEMO)
step - 2:
Check the available file in your repository

since we have initialized README.md we can able to see this tile
step-4:
Open this file and add some data and then save this file.
step -5:
Add the updated file(README.md) to the git using the following command
step - 6:
Commit the file that you have added
In the above command, you can write anything in between " "
step -7:
Push the updated file to the git using the following command
So you have successfully updated the file pushed to Github. And if you reload to git hub, you can see the updated file as shown below

And if you click on the file, you can see the updated text. So likewise, we can perform GitHub file operations from AWS instance. And now let us discuss a few of them
Branching:
The term branching can be understood clearly with the following scenario.
Let us consider, where there some file named Test. And now, you have some changes to the original file. But you were not sure of the changes that you were made and not committed to the main server. And we people can able to see all the file versions using branching. This concept usually allows you to move back and forth in a project. Besides, once you are ok with a different version of the file you can merge these files and update that file to the server.
We can create the branch using the following commands from the terminal
step - 1:
Create the branch using the following command
step -2:
Move to the branch using the following command.
So with this command, we will be moving to a branch named branch1. And now add some date to the file and save then push to the master. And the for the updated files in the git hub
Don't reload the GitHub page twice and thrice, because you cannot observe any kind of changes there until you move and merge this fill with the master
Merge:
This command is used in places, where there is availability for multiple version of the file and interested to merge these file and update this file to the main repository.
So navigate back to the master branch with the following command
Merge the branch with the master using the following command.
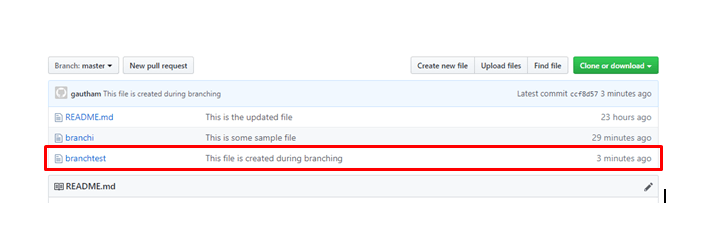
Now create a file and add some data and then save and finally commit this file to the git server. Once you committed, you can observe the changes in the git server.
Cloning:
It is nothing but the Downloading option that we use in our daily life. This option lets you get the complete file from the git server to your local machines. once you clone the main repository, you can get all the subfolders as well as the files placed in that repository.
Forking:
A fork is a copy of the repository.
In a real-time scenario, every project is an experiment. So while performing, these kinds of experiments, we may fail in some cases. Moreover, due to this failure, we may also lose the actual option that was available in this project. So it leads to the failure of some data. And at this point, there comes a need to use the concept Forking. This concept usually overcomes these kinds of problems. Moreover, it is essential and I strongly recommend to make a safe copy prior to project experiment.
GIT Features:
Free and open-source:
Git is released under General purpose License ( GPL) open-source license. It is absolutely free and you need to purchase it. And since it is open-source, you can modify the code as per your requirement.
Speed:
Since GIT does not require any network to perform all the operation, it completes all the task really fast. And Mozilla performance test shows that the magnitude order was very fast when compared to other version control systems. Moreover, the fetching history from the local server is 100 times faster than fetching the data from the remote server. And the core part of Git is written in C language.
Scalable:
Git is very scalable. So in future, if the number of collaborators increases GIT can easily handle this change. Even though GIT represents the entire repository, the data stored on the client-side is very small. Usually, GIT compresses huge data using the lossless compression technique.
Reliable:
Since every contributor has its own local repository, on the events of the system crash, the lost data can be recovered with any of the local repositories. So even though the central system was crashed, you can recover those files from the local repository.
Secure:
Git uses SHAH1 to name and identify the objects to name and identify the objects within its repository. Here every file and commit is checksummed. and retrieved by its checksum at the time of retrieving. Moreover, once it was published, it is not possible to change to older versions.
Economical:
In the case of CVCS, the central server needs to the powerful to serve the request of the entire team. And there will be no issue for the smaller teams. But if the team size grows, the hardware limitation of the server will be the bottleneck. And in case of Distributed Version Control system, the developers don't interact with the server, until they need to push (or) pull the changes. Since in this case, everything is happening on the client-side, there will be a little burden on the server-side.