
Python is the most popular general-purpose high-level programming language with interpretation and dynamic semantics. Other than useful in web development, it is also helpful in different types of coding and software development. Moreover, the Python language offers different types of libraries to parse or separate data written in other programming languages. In this regard, the Python XML parser helps in offering the easiest way to read the XML files and data extraction. Hence, we will try to understand the Python XML parsing in this blog with some examples.
The term “Parsing” refers to the general programming task that separates the given series of text (Character-values) into small pieces. In this regard, it uses a particular law to execute the parsing process via many functions. Moreover, this type of execution is useful in a variety of apps ranging from simple doc parsing to large files. These larger files use natural language processing (NLP).
Here, XML refers to eXtensible Markup Language designed/developed to store and transmit data of small to medium range. Further, this is much useful in sharing structured info/data. This is a coding interface that tends XML as a tree structure. And it’s easy to interpret and also supports the structure.
The Python XML module Minidom or Minimal DOM application is useful.
Moreover, Python allows XML parsing and altering XML doc where a user needs to have the whole XML doc in memory.
Let us go deeper in this section to get more insights into Python XML and parsing it.
Python XML parsing
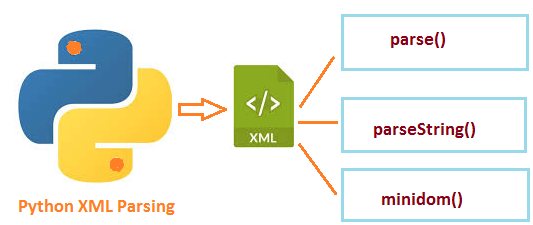
In Python XML parsing, the Python standard library offers two different modules to parse these XML docs. Such as the Minidom module (i.e. Minimal DOM implementation), and Element tree. In this regard, the term parsing refers to reading information from a file and separates it into different parts. It also locates the various portions of the XML file in this process.
We will further check how we can parse the XML docs using both modules.
ElementTree XML API
The type “Element” is a flexible object container developed to store data structures inside the memory. Moreover, the module Element Tree helps users to format XML data in a tree-like structure. This is the most natural presentation of structural data of hierarchy. The properties that “ElementTree” in Python XML parser include the following, - tag, attributes, text string, child elements, and tail string.
Get more insights on Python XML from the experts of the industry through Python Online Course at OnlineITGuru.
The property “Tag” includes a string presenting the type of stored data. Attributes property includes several attributes stored as dictionaries. The string “text string” including info that requires to be shown. Tail string property includes tail strings in case of necessity. Last but not least, the Child elements property includes numerous child elements stored like sequences.
The XML API “ElementTree” is a type of class that folds the element structure. Moreover, it allows conversions to and through XML format.
Furthermore, in the ‘‘ElementTree’’ module there are two different ways to parse/split the file. The first way here is the use of the parse () function and the second function is fromstring (). Moreover, the parse () function separates XML doc given in the form of a file. On the other hand, the fromstring function splits XML doc when provided as a string that is under triple quotes.
Let us look at an example of the ElementTree module in Python XML parsing.
Here, we will try to create an XML file.
Syntax
The syntax for this file creation is as follows.-
import xml.etree.ElementTree xml format |
After running the above script, we will get a new file built with the new file name text.xml having the below contents. :-
< users >< user /> - Syntax
||{"title":"Master in Python", "subTitle":"Python Certification Training by ITGURU's", "btnTitle":"View Details","url":"https://onlineitguru.com/python-online-course","boxType":"demo","videoId":"Qtdzdhw6JOk"}||
Add values to the XML elements
Here, we will add some value to the XML elements. The syntax for these XML elements is as follows;-
Import a file xml.etree.ElementTree in xml format |
Upon running the above script we will get the elements added with latest values. The file includes the below changes.
|
And this makes the sense of a valid Python XML format and here all tags are closed perfectly. Next, we will check how to modify the XML data using similar data and syntax. This will explain to us the alteration of data within an XML file or document.
Modifying XML data
Let us modify the XML data in this section and we use here the same data as taken above.
|
Later on, we can try to update the data and check out the results. And also we can remove the XML file easily with this syntax. This will help us in understanding the XML data changing.
Minidom (DOM) Module:
The minidom module is generally used by people having proficiency with DOM (Document Object module). Besides, DOM apps typically begin by splitting XML into DOM objects. Within xml.dom.minidom module, this is achieved in the following different ways:
Parse () function:
This is the first method using this function by contributing the XML file for parsing in this module.
import minidom from xml.dom module

d1 = minidom.parse("example.xml");
Moreover, after executing this code users can separate their XML file, and also they can fetch the data that need. Furthermore, users can split any open file using the above function.
ParseString() function
This type of method or function is useful while a user wants to contribute the XML to parse as a string.
Python XML parsing with SAX
In Python XML parsing, SAX (Simple API for XML) is a standard User Interface that helps users with event-driven XML parsing. Besides, users need subclassing of xml.sax.ContentHandler to build a “Content Handler” to accomplish this work. In this regard, the user will also need tags and attributes. This will help to manage user’s tags and attributes and also serves different methods to manage parsing events. Moreover, the Python XML parser also calls these methods while we parse the XML file.
We have a few methods in this section to check. When the process starts parsing the file, it calls the function “startDocument()”. Then while ending the parsing at the end of the file it calls the function “endDocument()”. Furthermore, it also passes the data character of the XML file as a framework to the characters (text) method.
At the beginning and end of each element, Python XML calls the ContentHandler function. In case the Python XML parser is within the mode “namespace”, it calls both methods startElementNS() & endElementNS(). Otherwise, the parser method calls startElement (tag, attributes) and endElement (tag). In this place, a tag is the element tag, and attributes acts like an Attributes object.
Let us discuss the process of this SAX method in Python XML parsing.
In this section, we will use a sample XML file produced that we are going to parse in Python. Here, I am trying to explain the steps involved in the coding to parse the file.
Stage 1)
In the first stage of this coding, we can see the following fields like first name, last name, home, and area of expertise within the file.
Stage 2)
Here, after parsing the document, we will print the “node name” of the document’s root and also the “first-child tagname”. Moreover, the “tag name” and the node name are XML file’s standard properties.
Let us elaborate on the process of parsing using these fields.
We have to import the “xml.dom.minidom” Dom module and mention a file name to be parsed.
This file includes some basic data of any employee that is a first name, last name, address, skills, qualification, etc.
Here, we use the-“XML-Minidom” parse function to load the Python XML file and parse it properly.
Later, we have the variable doc and the same get the parse function as a result.
Next, we want to print out the files- “node name and child tag name’’ within the XML file. Hence, we can specify the same in the print function of the file.
Run the code: While running this code, this will print the “nodename” file of the XML file document. And also it prints the first “child tag” of the XML file.
Here the point to be noted that:
The standard XML DOM names/properties are the “node name and child tag name” fields. In case, if you are not well known with these types of naming conventions, we can move further with other names.
Stage 3)
We have another option also to call and print out the XML tag list from the XML doc. There are several skills that are printed out here are SQL, Python, Testing, Business, etc.
Specify the variable expertise from which we can capture the employee’s entire expertise name.
Furthermore, here we use a DOM-basic function or feature called "getElementsByTagName".
This tag will get all the elements under one roof called “skill”.
Now, we will declare a loop via each of the skill tags.
Finally, while running the code, we will get a list of four different skills as a given result.
||{"title":"Master in Python", "subTitle":"Python Certification Training by ITGURU's", "btnTitle":"View Details","url":"https://onlineitguru.com/python-online-course","boxType":"reg"}||
How to build an XML Node within Python?
Using the “createElement” function, we can build a new attribute. Next, we add this new attribute/tag to current XML tags. For instance, here we add a new tag -“BigData”- to the XML file format. Let us discuss the points of developing an XML node under Python.
Here, you need to write code to append a new attribute (i.e. Big Data) to the current XML tag name.
In the next step, you need to print the XML tag using the latest attributes added to the main XML tag.
Then, you have to use the code "doc.create elements" to append the new XML tag and add it to the doc
Later, this code builds a new Tag based on skill for the latest "Big-data" attribute.
Next, append this skill/ability Tag into the “First-Child” Doc.
Now by running the code the latest "Big Data" tag appears with the other list of abilities.
Hence, in this way, we can build the Python XML note under this coding language with various attributes and tags. Using these tags and methods in the Python XML file, and the user interface,
Final words
Thus, you reached the conclusion on the topic of Python XML parsing and its modification using various examples. In this post, you have gone through the various methods and functions using to perform Python XML parsing. We have seen the use of different functions and methods in this XML parsing. Tree elements and DOM elements and various tags are used in this regard. Get more insights on Python XML and the parsing methods through Python Online Training with industry experts. This learning will help you to get practical experience of programming in real-time through experts.